
Introduction
Thank you for purchasing the IMUSA GAU-18200 Electric Espresso & Cappuccino Maker. This manual provides important information for the safe operation, maintenance, and troubleshooting of your appliance. Please read it thoroughly before first use and keep it for future reference.
Important Safety Instructions
When using electrical appliances, basic safety precautions should always be followed to reduce the risk of fire, electric shock, and/or injury to persons, including the following:
- Read all instructions.
- Do not touch hot surfaces. Use handles or knobs.
- To protect against fire, electric shock, and injury to persons, do not immerse cord, plugs, or appliance in water or other liquid.
- Close supervision is necessary when any appliance is used by or near children.
- Unplug from outlet when not in use and before cleaning. Allow to cool before putting on or taking off parts, and before cleaning the appliance.
- Do not operate any appliance with a damaged cord or plug, or after the appliance malfunctions or has been damaged in any manner. Return appliance to the nearest authorized service facility for examination, repair, or adjustment.
- The use of accessory attachments not recommended by the appliance manufacturer may result in fire, electric shock, or injury to persons.
- Do not use outdoors.
- Do not let cord hang over edge of table or counter, or touch hot surfaces.
- Do not place on or near a hot gas or electric burner, or in a heated oven.
- Always attach plug to appliance first, then plug cord into the wall outlet. To disconnect, turn any control to 'off', then remove plug from wall outlet.
- Do not use appliance for other than intended use.
- Scalding may occur if the filter holder is removed during the brewing cycle.
- This appliance has a polarized plug (one blade is wider than the other). To reduce the risk of electric shock, this plug is intended to fit into a polarized outlet only one way. If the plug does not fit fully into the outlet, reverse the plug. If it still does not fit, contact a qualified electrician. Do not attempt to modify the plug in any way.
Product Components
Familiarize yourself with the parts of your IMUSA Electric Espresso & Cappuccino Maker:
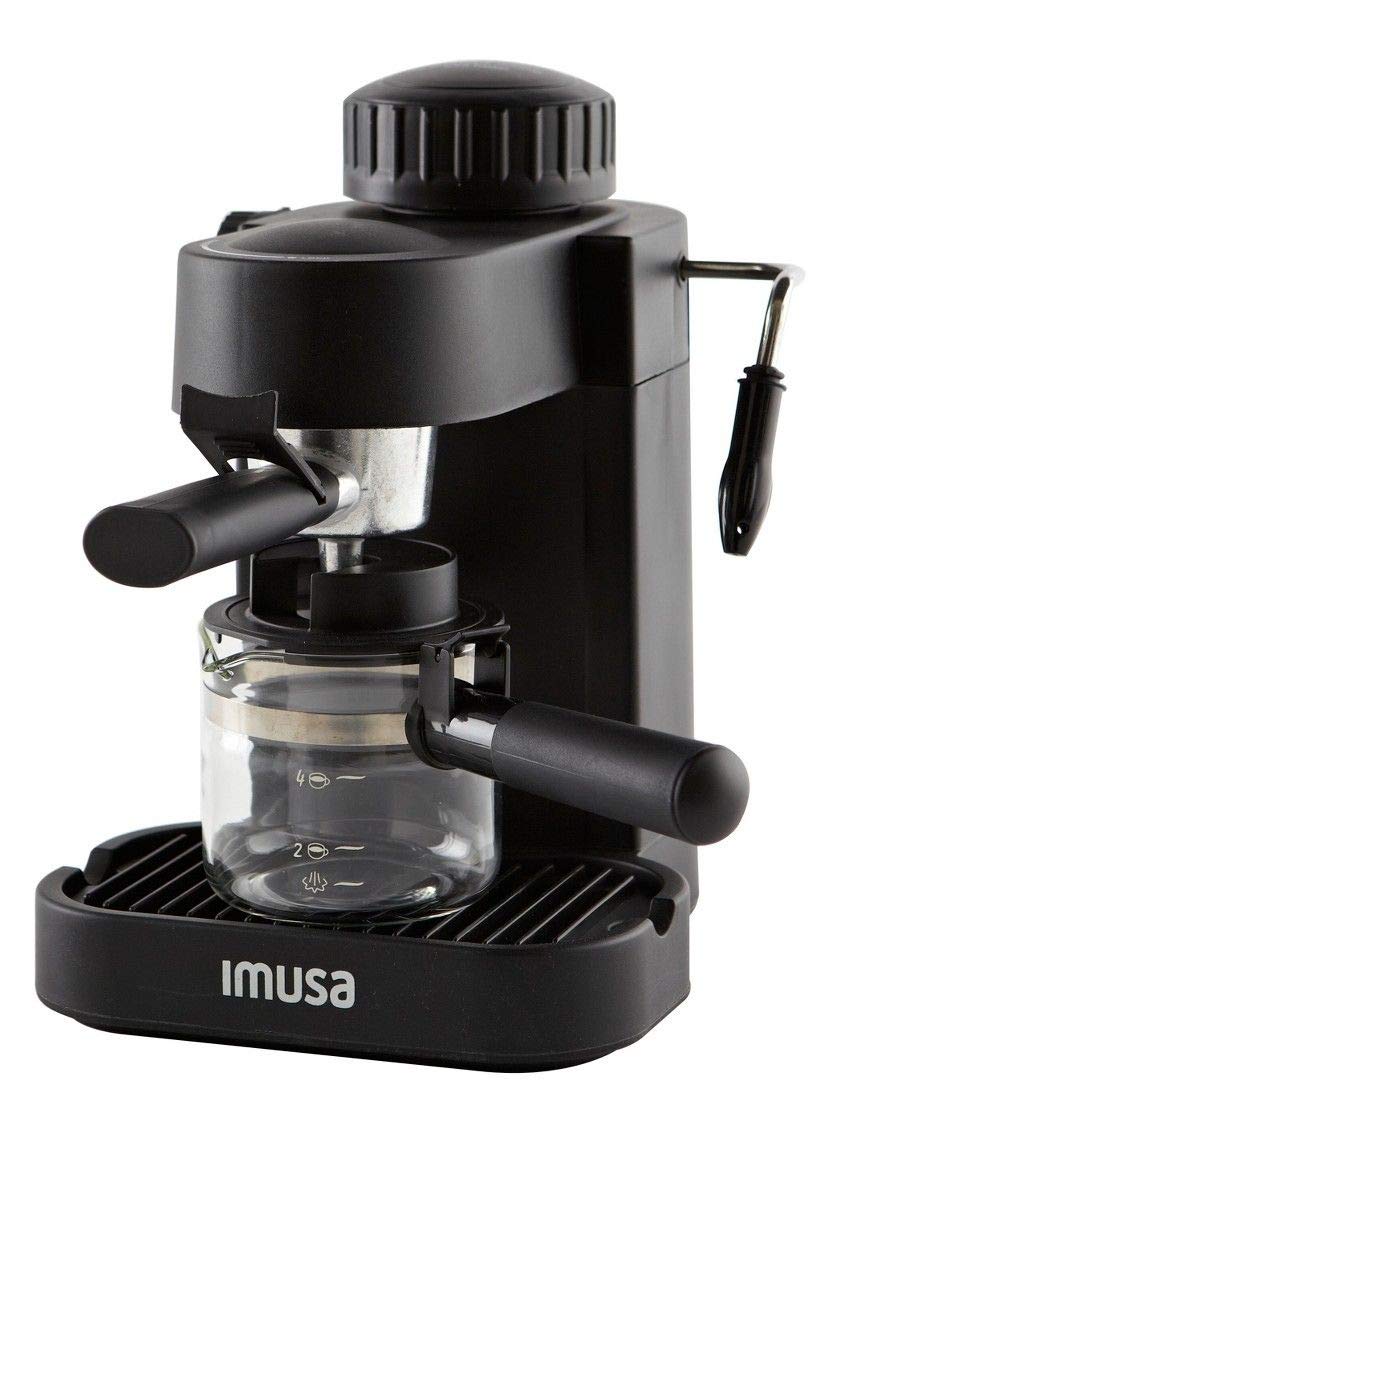
Image Description: The image displays the black IMUSA GAU-18200 Electric Espresso & Cappuccino Maker on a light wooden surface. The machine features a main unit with a control knob on top, a portafilter attached to the brewing head, and a glass carafe positioned below to collect brewed espresso. To the right of the machine, a stainless steel milk frothing pitcher is visible, and further right, a glass with cinnamon sticks. In the foreground, a white mug filled with frothed cappuccino, topped with a sprinkle of cinnamon, rests on a green and white striped napkin, alongside two loose cinnamon sticks. The 'IMUSA' logo is visible on the machine's drip tray.
- Main Unit: Houses the heating element and pump.
- Water Tank Cap: Located on top, for filling water.
- Control Knob: For selecting brewing or steaming functions.
- Portafilter: Holds ground coffee for brewing.
- Glass Carafe with Lid: Collects brewed espresso.
- Steam Wand/Frother: For frothing milk.
- Drip Tray: Collects excess liquid and is removable for cleaning.
Setup
- Unpack: Carefully remove all packaging materials and ensure all components are present.
- Initial Cleaning: Before first use, wash the glass carafe, portafilter, and drip tray in warm, soapy water. Rinse thoroughly and dry. Wipe the exterior of the main unit with a damp cloth.
- First Cycle (without coffee): Fill the water tank with fresh, cold water up to the '4-cup' mark. Place the empty portafilter into the brewing head and lock it. Place the carafe under the portafilter. Plug in the machine and turn the control knob to the 'brew' position. Allow the water to run through completely. Discard this water. This primes the system and cleans any manufacturing residue.
- Placement: Place the espresso maker on a stable, flat, heat-resistant surface, away from the edge of the counter and out of reach of children.
Operating Instructions
Making Espresso
- Fill Water Tank: Open the water tank cap and fill the tank with fresh, cold water up to the desired level (e.g., '4-cup' mark for 4 servings). Close the cap securely.
- Add Ground Coffee: Fill the portafilter with finely ground espresso coffee. Do not overfill. Tamp the coffee lightly and evenly. Wipe any excess coffee from the rim of the portafilter.
- Attach Portafilter: Insert the portafilter into the brewing head and turn it firmly to the right until it is securely locked in place.
- Position Carafe: Place the glass carafe with its lid under the portafilter's spout.
- Brew Espresso: Plug the machine into a standard electrical outlet. Turn the control knob to the 'brew' position. The machine will begin to heat water and force it through the coffee grounds. Espresso will start to drip into the carafe.
- Stop Brewing: Once the desired amount of espresso has been brewed (or the water tank is empty), turn the control knob to the 'off' position.
- Serve: Carefully remove the carafe and pour the fresh espresso.
Frothing Milk for Cappuccino/Latte
After brewing espresso, you can froth milk using the steam wand.
- Prepare Milk: Fill a small pitcher (preferably stainless steel) with cold milk. Do not fill more than one-third full, as milk expands when frothed.
- Activate Steam: Turn the control knob to the 'steam' position. The machine will begin to heat up to produce steam. Wait for the indicator light to show it's ready (if applicable, or for a few moments until steam is consistently produced).
- Purge Steam Wand: Briefly open the steam valve to release any condensed water from the wand into an empty cup. Close the valve.
- Froth Milk: Immerse the tip of the steam wand just below the surface of the milk. Slowly open the steam valve. Move the pitcher up and down gently to incorporate air and create foam. Continue until the milk is frothed to your desired consistency and temperature.
- Stop Steaming: Close the steam valve and turn the control knob to the 'off' position.
- Clean Steam Wand: Immediately wipe the steam wand with a damp cloth to prevent milk residue from drying. Briefly open the steam valve again to clear any milk from inside the wand.
- Combine: Pour the frothed milk over your freshly brewed espresso to create a cappuccino or latte.
Cleaning and Maintenance
Regular cleaning ensures optimal performance and extends the life of your espresso maker.
- Daily Cleaning:
- After each use, remove the portafilter, discard used coffee grounds, and rinse the portafilter and filter basket under running water.
- Wash the glass carafe and lid with warm, soapy water and rinse thoroughly.
- Empty and clean the drip tray.
- Wipe the exterior of the machine with a damp cloth. Do not use abrasive cleaners or scourers.
- Steam Wand Cleaning: Always wipe the steam wand immediately after frothing milk. If the wand becomes clogged, use a small pin or needle to clear the opening.
- Descaling: Mineral deposits from water can build up over time, affecting performance. Descale your machine every 2-3 months, or more frequently if you have hard water. Use a commercial descaling solution designed for coffee makers, following the product's instructions. Alternatively, a solution of white vinegar and water (1:1 ratio) can be used. Run the descaling solution through the machine as if brewing coffee, then rinse by running several cycles with fresh water.
- Storage: Ensure the machine is clean and dry before storing. Store in a cool, dry place.
Troubleshooting
| Problem | Possible Cause | Solution |
|---|---|---|
| No coffee brews | No water in tank; Clogged filter; Machine not plugged in. | Fill water tank; Clean filter and portafilter; Ensure power cord is securely plugged in. |
| Coffee brews too slowly or not at all | Coffee grounds too fine or over-tamped; Clogged filter; Machine needs descaling. | Use coarser grind or less pressure when tamping; Clean filter; Descale the machine. |
| Weak espresso | Not enough coffee; Coffee grounds too coarse. | Add more coffee; Use finer grind. |
| No steam from wand | Steam wand clogged; Not enough water; Machine not heated to steam temperature. | Clear steam wand with a pin; Ensure water tank is filled; Wait for machine to reach steam temperature. |
| Water leaks from machine | Portafilter not properly secured; Water tank cap loose; Drip tray full. | Ensure portafilter is locked tightly; Secure water tank cap; Empty and replace drip tray. |
Specifications
| Feature | Detail |
|---|---|
| Brand | Imusa |
| Model Number | GAU-18200 |
| Color | Black |
| Capacity | 4 Cups |
| Special Feature | Milk Frother |
| Coffee Maker Type | Espresso Machine |
| Operation Mode | Fully Automatic |
| Voltage | 120 Volts (AC) |
| Product Dimensions | 11.3 x 9.8 x 9.6 inches |
| Item Weight | 4.5 pounds |
Warranty and Support
For warranty information or technical support, please refer to the warranty card included with your product or contact IMUSA customer service. Keep your purchase receipt as proof of purchase.