
Introduction
Thank you for purchasing the STAR WARS X-Wing Four Waffle Maker. This appliance is designed to create four 4.25-inch square waffles simultaneously, each imprinted with iconic Star Wars designs including an X-Wing, the Star Wars logo, the Millennium Falcon, and the Rebel Alliance starbird symbol. Featuring nonstick plates, adjustable browning control, and power/ready indicator lights, this waffle maker provides a convenient and enjoyable experience for preparing waffles.

Image: The STAR WARS X-Wing Four Waffle Maker with its lid open, revealing the four nonstick cooking plates, each featuring a unique Star Wars emblem.
Important Safeguards
When using electrical appliances, basic safety precautions should always be followed, including the following:
- Read all instructions before operating the appliance.
- Do not touch hot surfaces. Use handles or knobs.
- To protect against electrical shock, do not immerse cord, plugs, or the appliance in water or other liquid.
- Close supervision is necessary when any appliance is used by or near children.
- Unplug from outlet when not in use and before cleaning. Allow to cool before putting on or taking off parts, and before cleaning the appliance.
- Do not operate any appliance with a damaged cord or plug, or after the appliance malfunctions or has been damaged in any manner. Contact customer support for examination, repair, or adjustment.
- The use of accessory attachments not recommended by the appliance manufacturer may cause injuries.
- Do not use outdoors.
- Do not let the cord hang over the edge of a table or counter, or touch hot surfaces.
- Do not place on or near a hot gas or electric burner, or in a heated oven.
- Extreme caution must be used when moving an appliance containing hot oil or other hot liquids.
- To disconnect, turn any control to "off," then remove plug from wall outlet.
- Do not use the appliance for other than intended use.
Setup
- Unpacking: Carefully remove the waffle maker from its packaging. Retain packaging for future storage or disposal.
- Initial Cleaning: Before first use, wipe the nonstick cooking plates with a damp cloth or sponge. Dry thoroughly. The exterior can be wiped with a soft, damp cloth. Do not immerse the appliance in water.
- Placement: Place the waffle maker on a stable, heat-resistant, and dry surface. Ensure there is adequate ventilation around the appliance. The non-skid feet will help keep it stable during use.
- Power Connection: Unwind the power cord from the convenient cord wrap located at the base of the unit and plug it into a standard 120V AC electrical outlet.
- First Use Odor: It is normal for a slight odor to be present during the first few uses as manufacturing residues burn off. This is temporary and will dissipate.
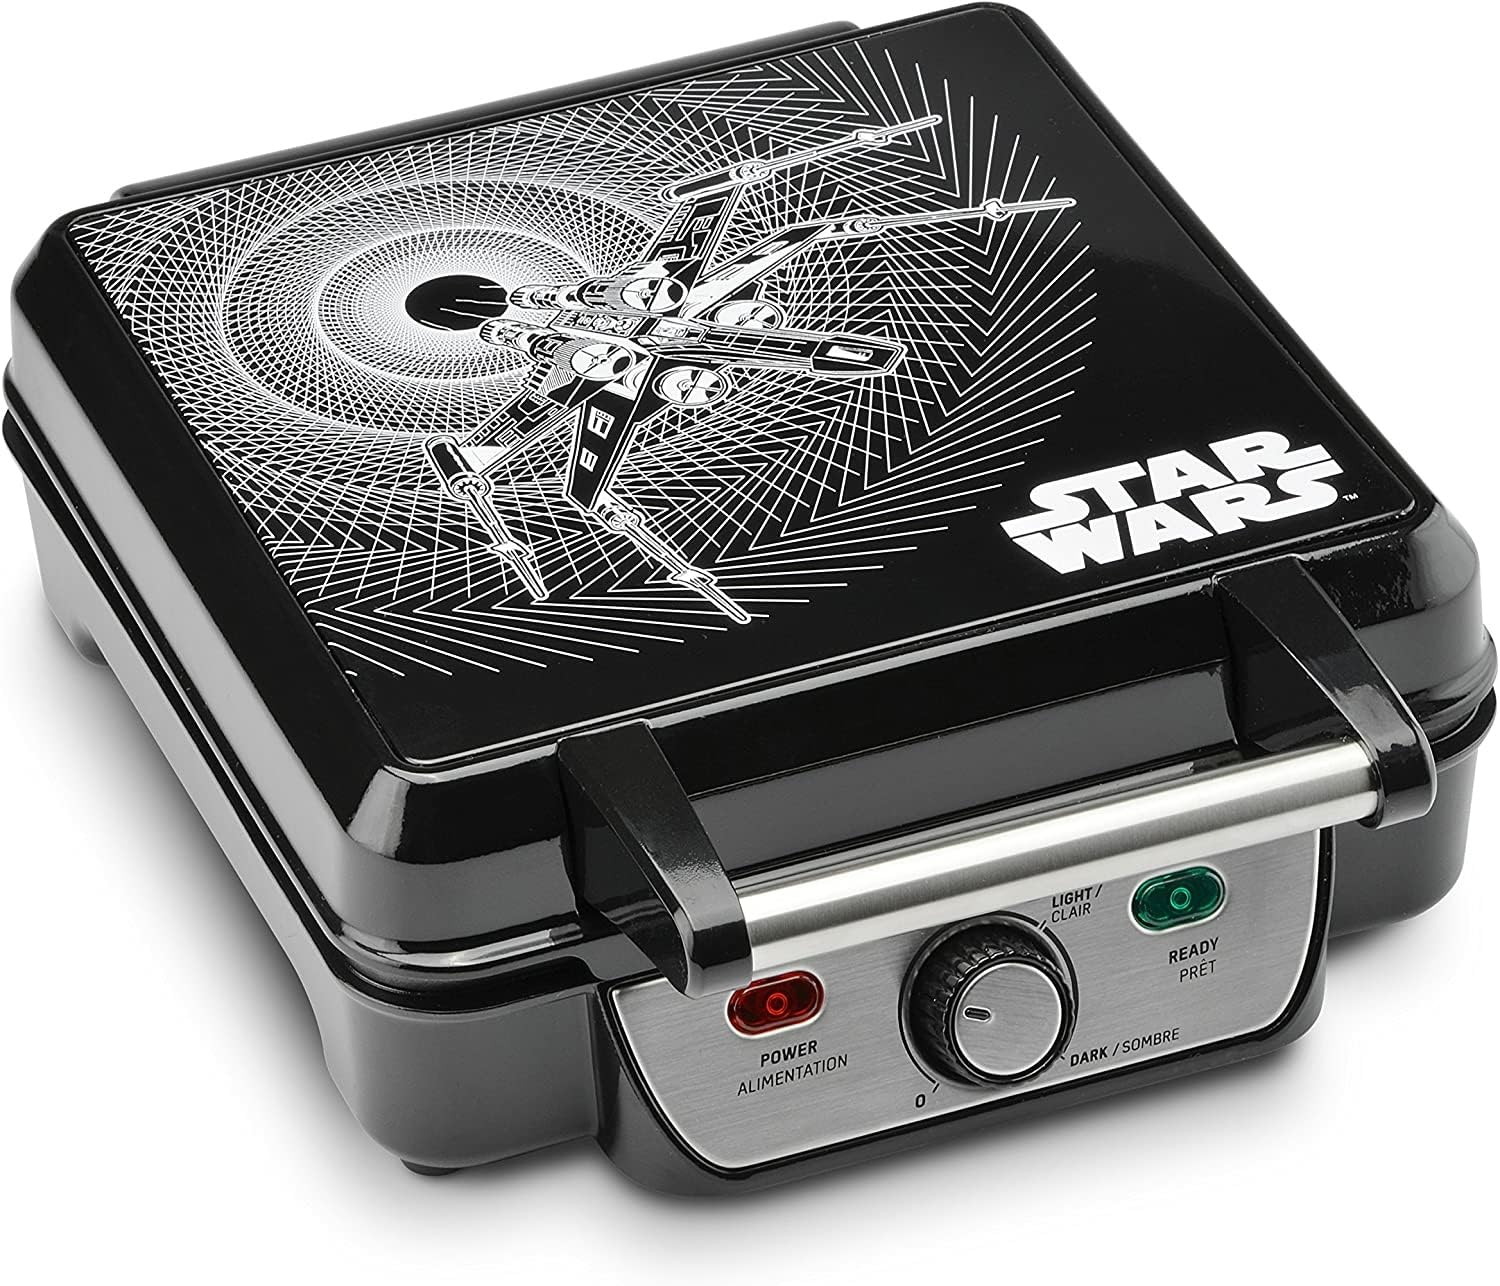
Image: The STAR WARS X-Wing Four Waffle Maker in its closed position, displaying the X-Wing graphic on the lid and the control panel.
Operating Instructions
- Preheating: Close the lid of the waffle maker and plug it into a 120V AC outlet. The red 'POWER' light will illuminate, indicating the unit is on. Allow the waffle maker to preheat until the green 'READY' light illuminates. This typically takes a few minutes.
- Adjust Browning: Use the adjustable browning control dial on the front of the unit to select your desired waffle crispness, from 'LIGHT' to 'DARK'.
- Prepare Batter: While the waffle maker preheats, prepare your favorite waffle batter.
- Pour Batter: Once the green 'READY' light is on, open the lid. Carefully pour approximately 1/2 to 3/4 cup of batter onto the lower cooking plate, distributing it evenly across the four sections. Do not overfill.
- Close Lid: Gently close the lid. Do not force it shut. The green 'READY' light may turn off as the cooking process begins.
- Cooking Time: Cook for approximately 3-5 minutes, or until the green 'READY' light illuminates again, indicating the waffles are done. Cooking time may vary based on batter type and desired browning.
- Remove Waffles: Once cooked, open the lid and carefully remove the waffles using a heat-resistant plastic or wooden utensil. Do not use metal utensils, as they can damage the nonstick coating.
- Repeat: Close the lid and allow the waffle maker to reheat until the green 'READY' light illuminates again before cooking additional waffles.
- Finish: When finished cooking, unplug the waffle maker from the outlet.

Image: Four golden-brown waffles, each featuring a different Star Wars emblem, ready for serving.
Official Product Video: Operation Overview
Video: This official video demonstrates the basic operation of the Star Wars 4-Waffle Maker, including pouring batter and the adjustable browning control feature.
Cleaning and Maintenance
- Cool Down: Always unplug the waffle maker and allow it to cool completely before cleaning.
- Clean Plates: The nonstick cooking plates are designed for easy cleaning. Wipe them with a soft, damp cloth or sponge. For stubborn batter residue, a small amount of cooking oil can be applied to soften it before wiping away. Do not use abrasive cleaners, scouring pads, or metal utensils, as these can damage the nonstick surface.
- Exterior Cleaning: Wipe the exterior of the waffle maker with a soft, damp cloth. Do not immerse the appliance in water or any other liquid.
- Storage: Once clean and dry, wrap the power cord around the integrated cord wrap at the base of the unit. Store the waffle maker in a cool, dry place. Its compact size allows for easy storage.
Troubleshooting
- Waffles sticking to plates:
Ensure the plates are clean and free of residue. For best results, lightly brush the plates with cooking oil or spray before each use, especially for the first batch. Ensure the waffle maker is fully preheated (green 'READY' light is on) before adding batter. - Waffles are not cooking evenly:
Ensure the waffle maker is placed on a flat, level surface. Verify that the batter is evenly distributed across all four sections. Adjust the browning control dial to a higher setting if waffles are consistently too light. - Waffle maker not heating:
Check that the power cord is securely plugged into a functioning 120V AC outlet. Ensure the red 'POWER' light is illuminated. If the issue persists, contact customer support. - Breaker trips when using:
This appliance draws 1200 watts. Avoid using other high-wattage appliances on the same electrical circuit simultaneously to prevent overloading the circuit breaker.
Specifications
| Model Number | LSW-281CN |
| Brand | STAR WARS |
| Wattage | 1200 watts |
| Voltage | 120V |
| Product Dimensions (D x W x H) | 9.69" x 13.07" x 4.06" |
| Item Weight | 4.8 Pounds |
| Material | Plastic (PFAS Free, PFOA Free) |
| Special Feature | Manual operation, Adjustable Browning Control, Nonstick Plates, Cord Wrap, Non-Skid Feet |

Image: A diagram illustrating the physical dimensions of the waffle maker.
Warranty
This STAR WARS X-Wing Four Waffle Maker is covered by a 1-year limited manufacturer warranty. This warranty covers defects in materials and workmanship under normal use. Please refer to the warranty documentation included with your purchase for full terms and conditions, or contact customer support for details.
Customer Support
For technical assistance, warranty claims, or general inquiries regarding your STAR WARS X-Wing Four Waffle Maker, please contact the manufacturer, Select Brands, Inc. Refer to the contact information provided in your product packaging or visit the official brand website for support options.


