
1. Introduction
This manual provides comprehensive instructions for the installation, operation, and maintenance of your BST AP707-BT Bluetooth Amplified Ceiling Speaker Pack. This system includes one active and one passive ceiling speaker, designed for simplified installation and high-quality audio reproduction via Bluetooth or line input.
Please read this manual thoroughly before installation and use to ensure proper function and to prevent damage.
2. Safety Instructions
Always observe the following safety precautions to avoid electric shock, fire, or injury:
- Ensure the power supply voltage matches the requirements specified on the unit.
- Do not expose the speakers to water, moisture, or extreme temperatures.
- Do not open the speaker enclosures. There are no user-serviceable parts inside. Refer all servicing to qualified personnel.
- Disconnect the power supply before cleaning or performing any maintenance.
- Ensure proper ventilation around the speakers.
- Use only accessories and attachments specified by the manufacturer.
- Keep out of reach of children.
3. Package Contents
Verify that all items are present in the package:
- 1x Active Ceiling Speaker (with integrated amplifier and Bluetooth)
- 1x Passive Ceiling Speaker
- 1x Mini-Jack Connection Cable
- 1x Linking Cable for Passive Speaker
- 1x 12VDC Power Supply
- 1x User Manual (this document)
4. Product Features
- Complete amplified speaker pack with active and passive units.
- Integrated Bluetooth system for wireless audio streaming.
- Class D integrated amplifier.
- 2-way speaker design for balanced audio.
- Magnetic grille for easy installation and removal.
- Simplified installation process.
- Stereo Line input on Euroblock terminal block for wired connections.
- Power Output: Amplifier 2x 20W RMS, 2x 30W Max.
- Woofer: 5.25" / 15cm, 8 ohms.
- Dome Tweeter: 1".
- Sensitivity: (1W/1m) 90dB.
5. Setup and Installation
Follow these steps for proper installation of your ceiling speakers:
5.1 Speaker Placement
Choose appropriate locations in your ceiling for optimal sound distribution. Ensure there is sufficient space behind the ceiling panel for the speaker depth and wiring.
5.2 Cutting the Mounting Hole
Using the provided template (if included, otherwise measure the speaker's cutout diameter), carefully cut a circular hole in the ceiling. Ensure the hole is clean and free of debris.

Figure 1: Front view of the speaker without its magnetic grille, revealing the 2-way design with a central tweeter and surrounding woofer.
5.3 Wiring Connections
Important: Disconnect power before making any connections.
- Connect Passive Speaker: Connect the linking cable from the "Passive Speaker Output" terminals on the active speaker to the input terminals on the passive speaker. Ensure correct polarity (+ to + and - to -).
- Line Input (Optional): If using a wired audio source, connect it to the stereo Line input on the Euroblock terminal block of the active speaker. Use the provided Mini-Jack cable or a suitable audio cable.
- Power Connection: Connect the 12VDC power supply to the active speaker's power input. Do not plug into a wall outlet yet.
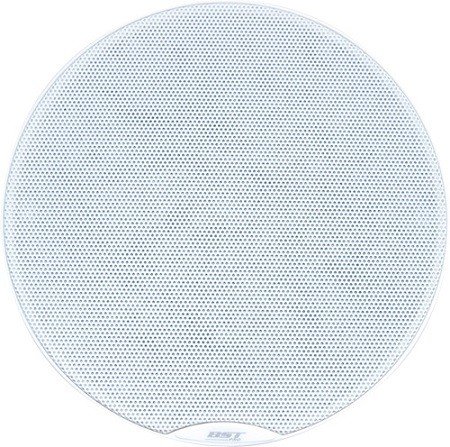
Figure 2: Rear view of the active (right) and passive (left) speakers. Note the amplifier board and various connection terminals on the active unit.

Figure 3: Detailed view of the active speaker's circuit board, highlighting the Bluetooth module, power input, and Euroblock terminal for line input.
5.4 Mounting the Speakers
Once all connections are made, carefully insert the speakers into the ceiling holes. The mounting clamps will secure the speakers in place. Ensure they are firmly seated.
Finally, attach the magnetic grilles to the front of the speakers.
6. Operating Instructions
6.1 Powering On/Off
Plug the 12VDC power supply into a wall outlet. The active speaker will power on automatically. There is a cutoff switch integrated into the system for power management.
6.2 Bluetooth Pairing
- Ensure the speakers are powered on.
- On your Bluetooth-enabled device (smartphone, tablet, etc.), go to the Bluetooth settings.
- Scan for available devices. You should see "BST AP707-BT" or a similar name appear in the list.
- Select "BST AP707-BT" to pair. A confirmation sound may be heard from the speakers once paired successfully.
- You can now stream audio wirelessly from your device to the speakers.
Note: The Bluetooth system has an integrated cutoff switch. If you experience issues, ensure the switch is in the correct position.
6.3 Using Line Input
If you prefer a wired connection or your device does not have Bluetooth, connect your audio source to the Euroblock Line input terminals on the active speaker. The system will automatically detect and play audio from the line input when a signal is present.
7. Maintenance
- Cleaning: Use a soft, dry cloth to clean the speaker grilles and surfaces. Do not use abrasive cleaners or solvents.
- Grille Removal: The magnetic grilles can be easily removed for cleaning or access to the speaker components if needed. Handle with care to avoid bending.
- Storage: If storing the speakers for an extended period, disconnect them from power and store them in a dry, dust-free environment.
8. Troubleshooting
| Problem | Possible Cause | Solution |
|---|---|---|
| No sound from speakers. |
|
|
| Bluetooth device cannot find speakers. |
|
|
| Distorted sound. |
|
|
9. Specifications
- Model: AP707-BT (95-1631)
- Brand: BST
- Power Output: Amplifier 2x 20W RMS, 2x 30W Max
- Woofer: 5.25" / 15cm, 8 ohms
- Tweeter: 1" Dome
- Sensitivity (1W/1m): 90dB
- Connectivity: Bluetooth, Stereo Line Input (Euroblock)
- Power Supply: 12VDC (included)
- Mounting Type: Ceiling Mount
- Features: Integrated Class D amplifier, 2-way speakers, magnetic grille, cutoff switch.
10. Warranty and Support
This product is covered by the standard warranty provided by the manufacturer. For specific warranty terms and conditions, please refer to the documentation included with your purchase or contact your retailer.
For technical support or service inquiries, please contact the seller or manufacturer directly. Please have your model number (AP707-BT / 95-1631) and purchase information ready.