
1. Introduction
This manual provides essential information for the proper installation, operation, and maintenance of the Viega 32123 PureFlow Zero Lead ViegaPEX Tubing. Adhering to these instructions will ensure optimal performance and longevity of the product. Please read this manual thoroughly before beginning any installation.
2. Product Overview
The Viega PureFlow Zero Lead ViegaPEX Tubing is a high-quality, flexible cross-linked polyethylene (PEX) pipe designed for potable water distribution systems. This specific product is a 1/2-inch diameter, 300-foot red coil, engineered for durability and compliance with lead-free standards.
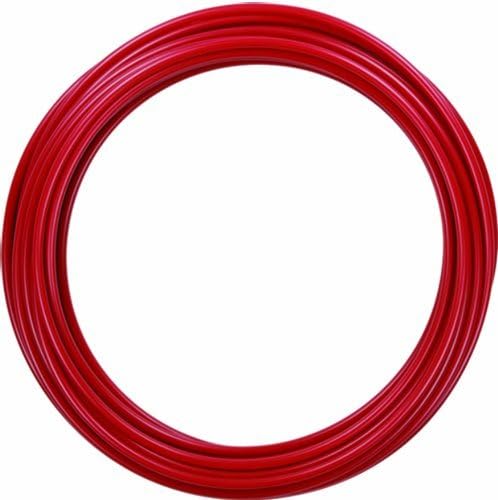
Figure 1: A 300-foot coil of Viega PureFlow Zero Lead ViegaPEX Tubing in red, coiled for easy handling and storage. This PEX tubing is designed for potable water applications.
Key Features:
- Material: Cross-linked polyethylene (PEX-B)
- Lead-Free: Complies with all lead-free requirements for potable water.
- Flexibility: Allows for easier installation and fewer fittings compared to rigid piping.
- Corrosion Resistance: Does not corrode, pit, or scale.
- Temperature and Pressure Rating: Suitable for hot and cold water applications.
3. Setup and Installation
Proper installation is crucial for the performance of ViegaPEX tubing. Always consult local plumbing codes and regulations before installation.
3.1 Required Tools and Materials:
- ViegaPEX Tubing (1/2-inch, 300-foot red coil)
- Viega PureFlow fittings (crimp or press)
- PEX cutting tool
- Crimp tool or press tool (specific to fitting type)
- Measuring tape
- Marker
3.2 Installation Steps:
- Planning: Design your plumbing system layout, considering pipe runs, fixture locations, and manifold placement. Minimize the number of fittings by utilizing the flexibility of PEX.
- Cutting: Use a specialized PEX cutting tool to make clean, square cuts. Avoid using utility knives or saws, which can deform the tubing and compromise connections.
- Connecting Fittings:
- Crimp Connections: Slide a crimp ring over the tubing. Insert the fitting fully into the tubing. Position the crimp ring over the fitting's barb. Use a crimp tool to compress the ring until the gauge indicates a proper crimp.
- Press Connections: Slide a stainless steel sleeve over the tubing. Insert the fitting fully into the tubing. Position the sleeve over the fitting's barb. Use a press tool to compress the sleeve until the tool indicates a complete press.
- Securing Tubing: Secure the tubing using appropriate hangers or clips at recommended intervals to prevent sagging and protect against damage. Maintain proper spacing for thermal expansion and contraction.
- Bending: PEX tubing can be bent. Observe the minimum bending radius specified by Viega to avoid kinking. For tighter bends, use bend supports.
- Pressure Testing: After installation, pressure test the system according to local codes and manufacturer recommendations to check for leaks before concealing the piping.
4. Operating Instructions
ViegaPEX tubing operates as a conduit for water distribution. Once installed and pressure tested, the system is ready for use. No specific "operating" steps are required beyond ensuring the water supply is turned on and the system is free of leaks.
Important Considerations:
- Water Temperature and Pressure: Ensure that the operating water temperature and pressure remain within the specified limits for ViegaPEX tubing.
- Freezing Conditions: While PEX is more freeze-resistant than rigid pipes, it is not freeze-proof. Take precautions to prevent freezing in unheated areas.
- UV Exposure: Prolonged exposure to ultraviolet (UV) light can degrade PEX tubing. Protect exposed tubing from direct sunlight.
5. Maintenance
ViegaPEX tubing systems require minimal maintenance once properly installed. Regular inspection can help identify potential issues early.
Maintenance Guidelines:
- Periodic Inspection: Periodically inspect visible sections of the tubing and fittings for any signs of damage, leaks, or stress.
- Leak Detection: If a leak is suspected, isolate the section and inspect all connections. Repair or replace any faulty components.
- System Flushing: If the system has been dormant for an extended period, flush it thoroughly before use.
6. Troubleshooting
This section addresses common issues that may arise with PEX plumbing systems.
Common Issues and Solutions:
- Leaks at Fittings:
- Cause: Improperly crimped/pressed fitting, damaged O-ring, or incorrect fitting size.
- Solution: Re-crimp/re-press the fitting if possible, or replace the fitting and crimp ring/sleeve. Ensure the tubing is cut squarely and fully inserted into the fitting.
- Kinked Tubing:
- Cause: Bending the tubing beyond its minimum bending radius.
- Solution: Kinked PEX tubing cannot be fully restored to its original integrity. It is recommended to cut out the kinked section and replace it with a new piece of tubing and appropriate fittings.
- Reduced Water Flow:
- Cause: Debris in the line, partially closed valve, or severe kinking.
- Solution: Flush the system, check all valves, and inspect tubing for kinks.
7. Specifications
| Attribute | Detail |
|---|---|
| Brand | Viega |
| Model Number | 32123 |
| Part Number | 3073154 |
| Material | Cross-linked polyethylene (PEX-B) |
| Color | Red |
| Dimension | 1/2-Inch (Nominal Diameter) |
| Length | 300-Feet (3600 inches) |
| Lead Content | Zero Lead (compliant) |
| Item Package Quantity | 1 Coil |
| UPC | 767654330944 |
8. Safety Information
- Always wear appropriate personal protective equipment (PPE) during installation, including safety glasses and gloves.
- Ensure all connections are secure and leak-free before pressurizing the system.
- Do not expose PEX tubing to open flames or excessive heat.
- Avoid contact with petroleum-based products, as they can degrade PEX material.
- Consult local plumbing codes and regulations for specific installation requirements and safety standards.
9. Support
For technical assistance, product inquiries, or warranty information, please contact Viega customer support directly. Refer to the official Viega website for the most current contact details and resources.
Note: This manual is intended as a guide. Viega reserves the right to make changes to product specifications and instructions without prior notice.


