
1. Introduction
This manual provides essential information for the installation, operation, and maintenance of your AKKON LED DRL Light Tube Projector Chrome Headlights for the 2009-2020 Dodge Journey. Please read these instructions carefully before proceeding with installation or use to ensure proper function and safety.
These headlights are designed as a direct bolt-on replacement for your original headlights, requiring no additional wiring or modifications. They are DOT (Department of Transportation) and SAE (Society of Automotive Engineers) approved, ensuring compliance with safety standards.
2. Safety Information
- Professional Installation Recommended: While designed for direct replacement, professional installation is highly recommended to ensure correct wiring, alignment, and functionality. Improper installation can lead to damage to the product or vehicle electrical system.
- Disconnect Battery: Always disconnect the vehicle's battery before beginning any electrical work to prevent electrical shock or short circuits.
- Handle with Care: Headlight assemblies contain delicate components. Handle them carefully to avoid damage to the lens or internal parts.
- Secure Connections: Ensure all electrical connections are secure and properly insulated to prevent moisture intrusion and electrical issues.
- Test Functionality: After installation, thoroughly test all lighting functions (low beam, high beam, DRL, turn signals) before driving.
3. Package Contents
Your AKKON LED DRL Projector Headlights package includes:
- One (1) Left Side (Driver Side) Headlight Assembly
- One (1) Right Side (Passenger Side) Headlight Assembly
Note: Additional bulbs or wiring harnesses are typically integrated into the assembly or utilize existing vehicle components.
4. Setup and Installation
The following steps outline a general installation process. Specific vehicle disassembly and reassembly procedures may vary. Refer to your vehicle's service manual for detailed instructions on removing and installing headlight assemblies.
- Prepare Vehicle: Park the vehicle on a level surface, engage the parking brake, and turn off the engine. Disconnect the negative terminal of the vehicle's battery.
- Access Headlight Assembly: Depending on your Dodge Journey model year, you may need to remove the front bumper, grille, or fender liners to access the headlight mounting bolts and electrical connectors.
- Remove Old Headlight: Disconnect all electrical connectors from the existing headlight assembly. Unbolt and carefully remove the old headlight unit from the vehicle.
- Inspect New Headlight: Before installation, visually inspect the new AKKON headlight assembly for any shipping damage.
- Connect Wiring: Connect the electrical harnesses from the vehicle to the corresponding connectors on the new AKKON headlight assembly. Ensure connections are secure.
- Install New Headlight: Carefully position the new headlight assembly into the vehicle's headlight opening. Secure it with the mounting bolts removed earlier. Do not overtighten.
- Reassemble Vehicle: Reinstall any removed bumper, grille, or fender liner components.
- Reconnect Battery: Reconnect the negative terminal of the vehicle's battery.
- Test and Adjust: Turn on the vehicle and test all headlight functions: low beam, high beam, daytime running lights (DRL), and turn signals. Adjust headlight aim if necessary according to local regulations.

Image 4.1: Rear view of the AKKON headlight assembly, illustrating the various wiring connections for power, DRL, and turn signals. Ensure all connections are secure.
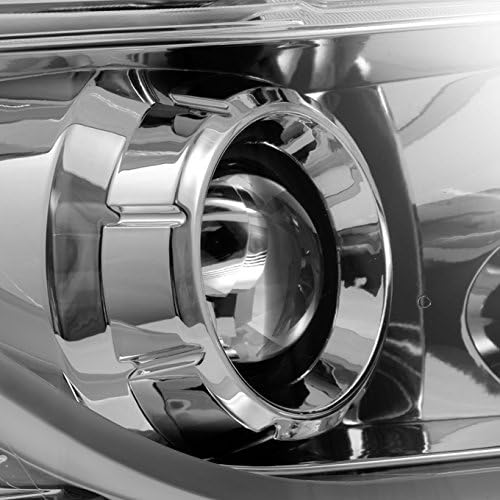
Image 4.2: A detailed view of the projector lens, highlighting the chrome housing and clear lens material. This component focuses the light beam for optimal visibility.
5. Operating Instructions
Once installed, your AKKON LED DRL Projector Headlights will operate in conjunction with your vehicle's existing lighting controls.
- Daytime Running Lights (DRL): The integrated LED light tube DRLs are designed to illuminate automatically when the vehicle is running, enhancing daytime visibility.
- Low Beam Headlights: Activate your low beam headlights using your vehicle's standard headlight switch. The projector lens will provide a focused beam pattern for general night driving.
- High Beam Headlights: Engage your high beam headlights via your vehicle's control stalk for increased illumination when needed.
- Turn Signals: The amber LED turn signals will flash when activated, indicating your intended direction.
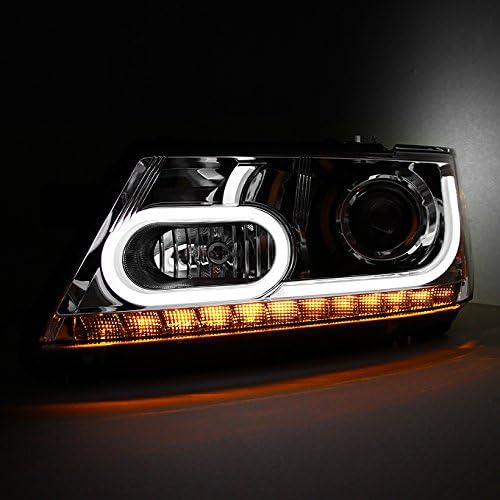
Image 5.1: The AKKON headlight assembly fully illuminated, showcasing the bright LED DRL tube and the projector lens. This demonstrates the operational appearance.

Image 5.2: A close-up view of the LED DRL light tube, illustrating its continuous illumination for daytime visibility.

Image 5.3: A detailed shot of the amber LED turn signal, showing its distinct illumination pattern when activated.
6. Maintenance
Proper maintenance will help prolong the life and performance of your headlights.
- Cleaning: Clean the headlight lenses regularly with a soft cloth and mild automotive soap or glass cleaner. Avoid abrasive cleaners or harsh chemicals that can damage the lens material.
- Inspection: Periodically inspect the headlight assemblies for any signs of moisture intrusion, cracks, or loose connections. Address any issues promptly.
- Bulb Replacement: While LED components have a long lifespan, if any conventional bulbs (if applicable) require replacement, ensure you use the correct type and wattage as specified by the manufacturer.
7. Troubleshooting
If you encounter issues with your headlights, consider the following common troubleshooting steps:
| Problem | Possible Cause | Solution |
|---|---|---|
| Headlights not turning on | Loose electrical connection, blown fuse, faulty switch | Check all wiring connections. Inspect vehicle's fuse box for blown headlight fuses and replace if necessary. Test headlight switch functionality. |
| DRL not illuminating | Vehicle not running, DRL circuit issue, faulty DRL module | Ensure vehicle engine is running. Check DRL specific wiring and connections. Consult a professional if the issue persists. |
| Moisture inside headlight | Improper seal, condensation | Small amounts of condensation are normal and should dissipate. If excessive moisture or water pooling occurs, check for proper sealing and installation. Re-seal or replace if necessary. |
| Uneven light beam | Improper aiming, incorrect installation | Adjust headlight aim according to vehicle specifications and local regulations. Ensure the headlight assembly is securely mounted and not loose. |
If these troubleshooting steps do not resolve the issue, it is recommended to seek assistance from a qualified automotive technician.
8. Specifications
| Feature | Detail |
|---|---|
| Brand | AKKON |
| Model Number | 9-P1DJO09C |
| Compatible Vehicle | 2009-2020 Dodge Journey |
| Light Source Type | LED (Daytime Running Lights), Projector (Headlights) |
| Housing Color | Chrome |
| Lens Material | Polycarbonate |
| Lens Color | Clear |
| Voltage | 12 Volts |
| Wattage | 220 watts (total, estimated) |
| Special Feature | Waterproof |
| Certifications | DOT & SAE Approved |
| OEM Equivalent Part Numbers | 5116288AA, 5116289AA, 5116289AB |
| UPC | 840960170432 |
9. Warranty Information
Specific warranty details for this product are not provided in the available information. Please refer to the product packaging or contact AKKON directly for comprehensive warranty terms and conditions. Typically, automotive lighting products come with a limited manufacturer's warranty covering defects in materials and workmanship.
10. Support
For technical assistance, installation inquiries, or warranty claims, please contact AKKON customer support through their official website or the retailer from whom the product was purchased. When contacting support, please have your product model number (9-P1DJO09C) and purchase information readily available.