
OLYMPIA A 2250
Olympia A 2250 Laminator Instruction Manual
Model: A 2250 | Brand: OLYMPIA
1. Introduction
Thank you for choosing the Olympia A 2250 Laminator. This manual provides essential information for the safe and efficient operation of your device. Please read it thoroughly before first use and keep it for future reference.
The Olympia A 2250 is designed for both hot and cold laminating, accommodating formats up to DIN A4. Its compact design and high-quality heating system ensure reliable performance, preventing common issues like blistering. The device features automatic shutdown for overheating protection and a jam release key for easy troubleshooting.
2. Safety Instructions
- Always connect the laminator to a grounded power outlet.
- Do not operate the device with wet hands or near water.
- Keep children and pets away from the laminator during operation.
- Ensure adequate ventilation around the device to prevent overheating.
- Never attempt to open or repair the laminator yourself. Refer to qualified service personnel.
- Unplug the device when not in use or before cleaning.
- Use only laminating pouches specified for the device (75-250 micron).
- Avoid laminating heat-sensitive materials in hot laminating mode.
3. Package Contents
Verify that all items are present in the package:
- Olympia A 2250 Laminator
- Instruction Manual
- Starter set of laminating pouches (e.g., 3x A4, 4x A5, 4x A6, 4x business card size) - Note: Actual starter set contents may vary.
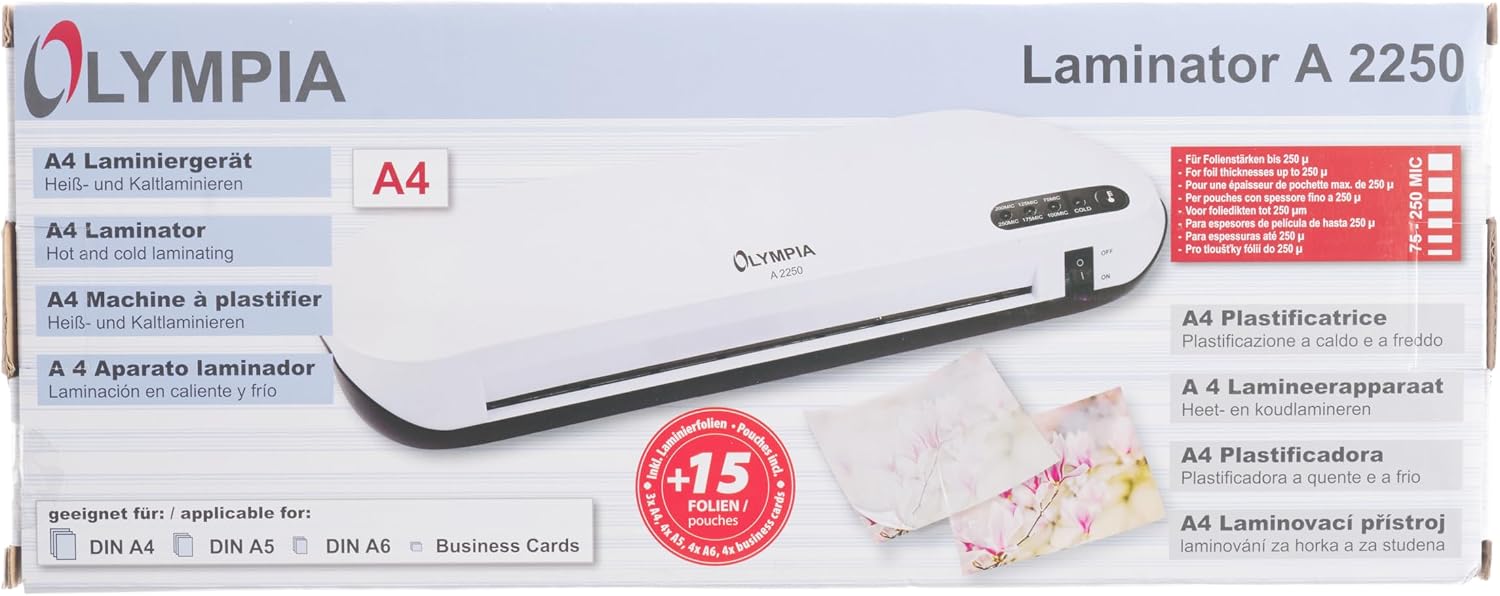
Image: Retail packaging of the Olympia A 2250 Laminator, illustrating the device and included starter pouches.
4. Device Overview
Familiarize yourself with the components of your Olympia A 2250 Laminator.

Image: Front view of the Olympia A 2250 Laminator, highlighting the power switch and film thickness selection LEDs.
- Power Switch (ON/OFF): Activates or deactivates the laminator.
- Film Thickness Selection LEDs: Indicators for 75MIC, 100MIC, 125MIC, 175MIC, 200MIC, 250MIC, and COLD laminating modes.
- Ready LED: Illuminates when the laminator has reached the selected operating temperature.
- Jam Release Key: Used to release a jammed laminating pouch.
- Document Entry Slot: Where the laminating pouch is inserted.
- Laminated Document Exit: Where the finished laminated document emerges.
- Power Cord Connection: Located at the rear of the device.

Image: Rear view of the Olympia A 2250 Laminator, showing the power cord connection point.
5. Setup
- Unpacking: Carefully remove the laminator from its packaging. Retain the packaging for storage or future transport.
- Placement: Place the laminator on a stable, flat, and heat-resistant surface. Ensure there is sufficient space around the device for proper ventilation and for documents to pass through freely.
- Power Connection: Plug the power cord into the laminator's power input, then connect it to a suitable 220-240V, 50Hz grounded electrical outlet.
6. Operating Instructions
6.1 Hot Laminating
- Power On: Switch the laminator ON using the power switch. The power LED will illuminate.
- Select Film Thickness: Choose the appropriate film thickness (e.g., 75MIC, 100MIC, 125MIC, 175MIC, 200MIC, 250MIC) using the selection button. The corresponding LED will light up.
- Warm-up: Allow the laminator to warm up. The Ready LED will illuminate when the device has reached the optimal temperature for the selected film thickness.
- 75 - 100 mic films: approx. 1.5 minutes
- 125 - 175 mic films: approx. 3.5 minutes
- 200 - 250 mic films: approx. 4.5 minutes
- Prepare Document: Place the document centrally into a laminating pouch, ensuring it is aligned and there are no wrinkles. Leave a small margin around the document.
- Insert Pouch: Insert the sealed edge of the laminating pouch straight and evenly into the document entry slot. The laminator will automatically feed the pouch through.
- Retrieve Document: Once the laminated document exits the rear slot, place it on a flat surface to cool down and harden.

Image: The Olympia A 2250 Laminator actively processing a document, demonstrating the insertion and exit of laminating pouches.
6.2 Cold Laminating
- Power On: Switch the laminator ON.
- Select Cold Mode: Press the film thickness selection button until the "COLD" LED illuminates. No warm-up time is required for cold laminating.
- Prepare Document: Use self-adhesive cold laminating pouches. Place the document carefully into the pouch, ensuring no air bubbles.
- Insert Pouch: Insert the sealed edge of the cold laminating pouch straight and evenly into the document entry slot.
- Retrieve Document: Collect the laminated document from the exit slot.
6.3 Jam Release
If a laminating pouch jams or is inserted incorrectly:
- Immediately press and hold the Jam Release Key.
- Gently pull the laminating pouch out of the entry slot. Do not force it.
- Once the pouch is removed, release the Jam Release Key.
- Inspect the pouch and document for damage. If reusable, re-insert carefully.
7. Maintenance
- Cleaning: Ensure the laminator is unplugged and completely cool before cleaning. Wipe the exterior with a soft, dry cloth. Do not use abrasive cleaners or solvents.
- Roller Cleaning: Periodically run a cleaning sheet (available separately) through the laminator to remove adhesive residue from the rollers. This helps maintain optimal performance and prevents future jams.
- Storage: When not in use, store the laminator in a dry, dust-free environment.
8. Troubleshooting
| Problem | Possible Cause | Solution |
|---|---|---|
| Laminator does not turn on. | No power supply. | Check power cord connection and wall outlet. Ensure the power switch is ON. |
| Pouch jams in the laminator. | Incorrect insertion; pouch too thick; foreign object. | Press the Jam Release Key and gently pull out the pouch. Ensure correct insertion and appropriate pouch thickness. |
| Laminated document has bubbles or is cloudy. | Insufficient heat; incorrect pouch thickness; air trapped. | Ensure the correct temperature setting for the pouch thickness. Allow full warm-up. Smooth out document in pouch before laminating. |
| Laminator overheats and shuts down. | Prolonged use; blocked ventilation. | Unplug the device and allow it to cool down for at least 30 minutes. Ensure proper ventilation. |
9. Technical Specifications
- Model: Olympia A 2250
- Laminating Type: Hot and Cold
- Max. Laminating Width: 230 mm (DIN A4)
- Film Thickness: 75 - 250 micron
- Lamination Speed: 350 mm/min
- Max. Lamination Thickness: 0.5 mm
- Warm-up Time (approx.):
- 75 - 100 mic films: 1.5 min
- 125 - 175 mic films: 3.5 min
- 200 - 250 mic films: 4.5 min
- Power Supply: 220-240V, 50Hz
- Power Consumption: 305W
- Current: 1.3A
- Dimensions (L x W x H): 366 x 146 x 66 mm
- Weight: 1.15 kg
- Safety Features: Automatic shutdown when overheated, Jam Release Key
- Certificates: CE, RoHS, GS
- Color: White/Black
10. Warranty Information
OLYMPIA products are manufactured with high-quality materials and undergo strict quality control. This product is covered by a manufacturer's warranty against defects in materials and workmanship from the date of purchase. The specific duration and terms of the warranty may vary by region. Please retain your proof of purchase for warranty claims.
The warranty does not cover damage resulting from:
- Improper use or operation not in accordance with this manual.
- Unauthorized repairs or modifications.
- Accidents, neglect, or external causes.
- Normal wear and tear.
For detailed warranty terms and conditions, please refer to the warranty card included with your product or contact OLYMPIA customer support.
11. Customer Support
Should you encounter any issues or have questions regarding your Olympia A 2250 Laminator, please contact OLYMPIA customer support.
Manufacturer: Olympia Group
Website: www.go-europe.com
Please have your model number (A 2250) and proof of purchase ready when contacting support.
12. Disposal Information
This symbol on the product or its packaging indicates that this product shall not be treated as household waste. Instead, it shall be handed over to the applicable collection point for the recycling of electrical and electronic equipment. By ensuring this product is disposed of correctly, you will help prevent potential negative consequences for the environment and human health, which could otherwise be caused by inappropriate waste handling of this product. The recycling of materials will help to conserve natural resources. For more detailed information about recycling of this product, please contact your local city office, your household waste disposal service or the shop where you purchased the product.

Image: Product packaging displaying recycling symbols and manufacturer contact details, indicating proper disposal methods.
Related documentsA 2250


Ask a question about this manual
Ask about setup, troubleshooting, compatibility, parts, safety, or missing instructions. Manuals+ will review the question and use this page’s manual context to help answer it.