
1. Introduction
This instruction manual provides detailed guidance for the installation, operation, and maintenance of your Hipa Carburetor Kit. This kit is designed to replace original carburetor components in compatible Stihl backpack blowers, restoring optimal engine performance. Please read this manual thoroughly before attempting any installation or maintenance to ensure safe and correct procedures.
2. Compatible Models
The Hipa Carburetor Kit is compatible with the following Stihl backpack blower models:
- BR320
- BR340
- BR340L
- BR380
- BR400
- BR420
- BR420C
- SR320
- SR340
- SR380
- SR400
- SR420
This kit replaces manufacturer part numbers: # 4203 120 0601, 4203 120 0603, 4203 120 0605, 4203 120 0607; Walbro # HD-4A, HD-4B, HD-13B.
3. Package Contents
Your Hipa Carburetor Kit includes the following components:
- 1 x Hipa 4203 120 0601 Carburetor
- 1 x Air Filter
- 1 x Fuel Tank Grommet
- 1 x Fuel Filter
- 1 x 2-foot Fuel Line
- 1 x Spark Plug (L7TC)
- 2 x Gaskets
- Carburetor cleaning tools
- Allen wrench

Figure 1: All components included in the Hipa Carburetor Kit.
4. Setup and Installation
Follow these steps to install the Hipa Carburetor Kit on your compatible Stihl backpack blower. Ensure the blower is turned off and cool before beginning.
4.1 Safety Precautions
- Always ensure the engine is off and cool before performing any maintenance.
- Disconnect the spark plug wire to prevent accidental starting.
- Work in a well-ventilated area.
- Wear appropriate personal protective equipment, such as gloves and eye protection.
- Drain all fuel from the tank into an approved container before starting. Loosen the fuel cap to release pressure.
4.2 Installation Steps
- Access the Carburetor:
- Remove the air filter cover and the old air filter.
- Locate and remove the screws holding the air filter housing and backing plate in place. There are typically four screws for the pull rope assembly and two for the carburetor backing plate.
- Carefully detach the spark plug wire.

Figure 2: Stihl blower with carburetor kit, illustrating the general setup.
- Remove the Old Carburetor:
- Disconnect the throttle linkage from the old carburetor.
- Carefully remove the fuel lines connected to the carburetor. Be prepared for residual fuel.
- Remove any remaining screws or nuts securing the old carburetor to the engine.
- Remove the old carburetor and any old gaskets.
- Install the New Carburetor:
- Place the new gaskets provided in the kit, ensuring they are correctly aligned with the mounting holes. The gasket on the back of the carburetor should have holes for fuel passages.
- Mount the new Hipa carburetor, ensuring the throttle cable is properly attached to the carburetor's linkage.
- Secure the carburetor with the appropriate screws/bolts.
- Reconnect the fuel lines to the new carburetor. Ensure a snug fit to prevent leaks.
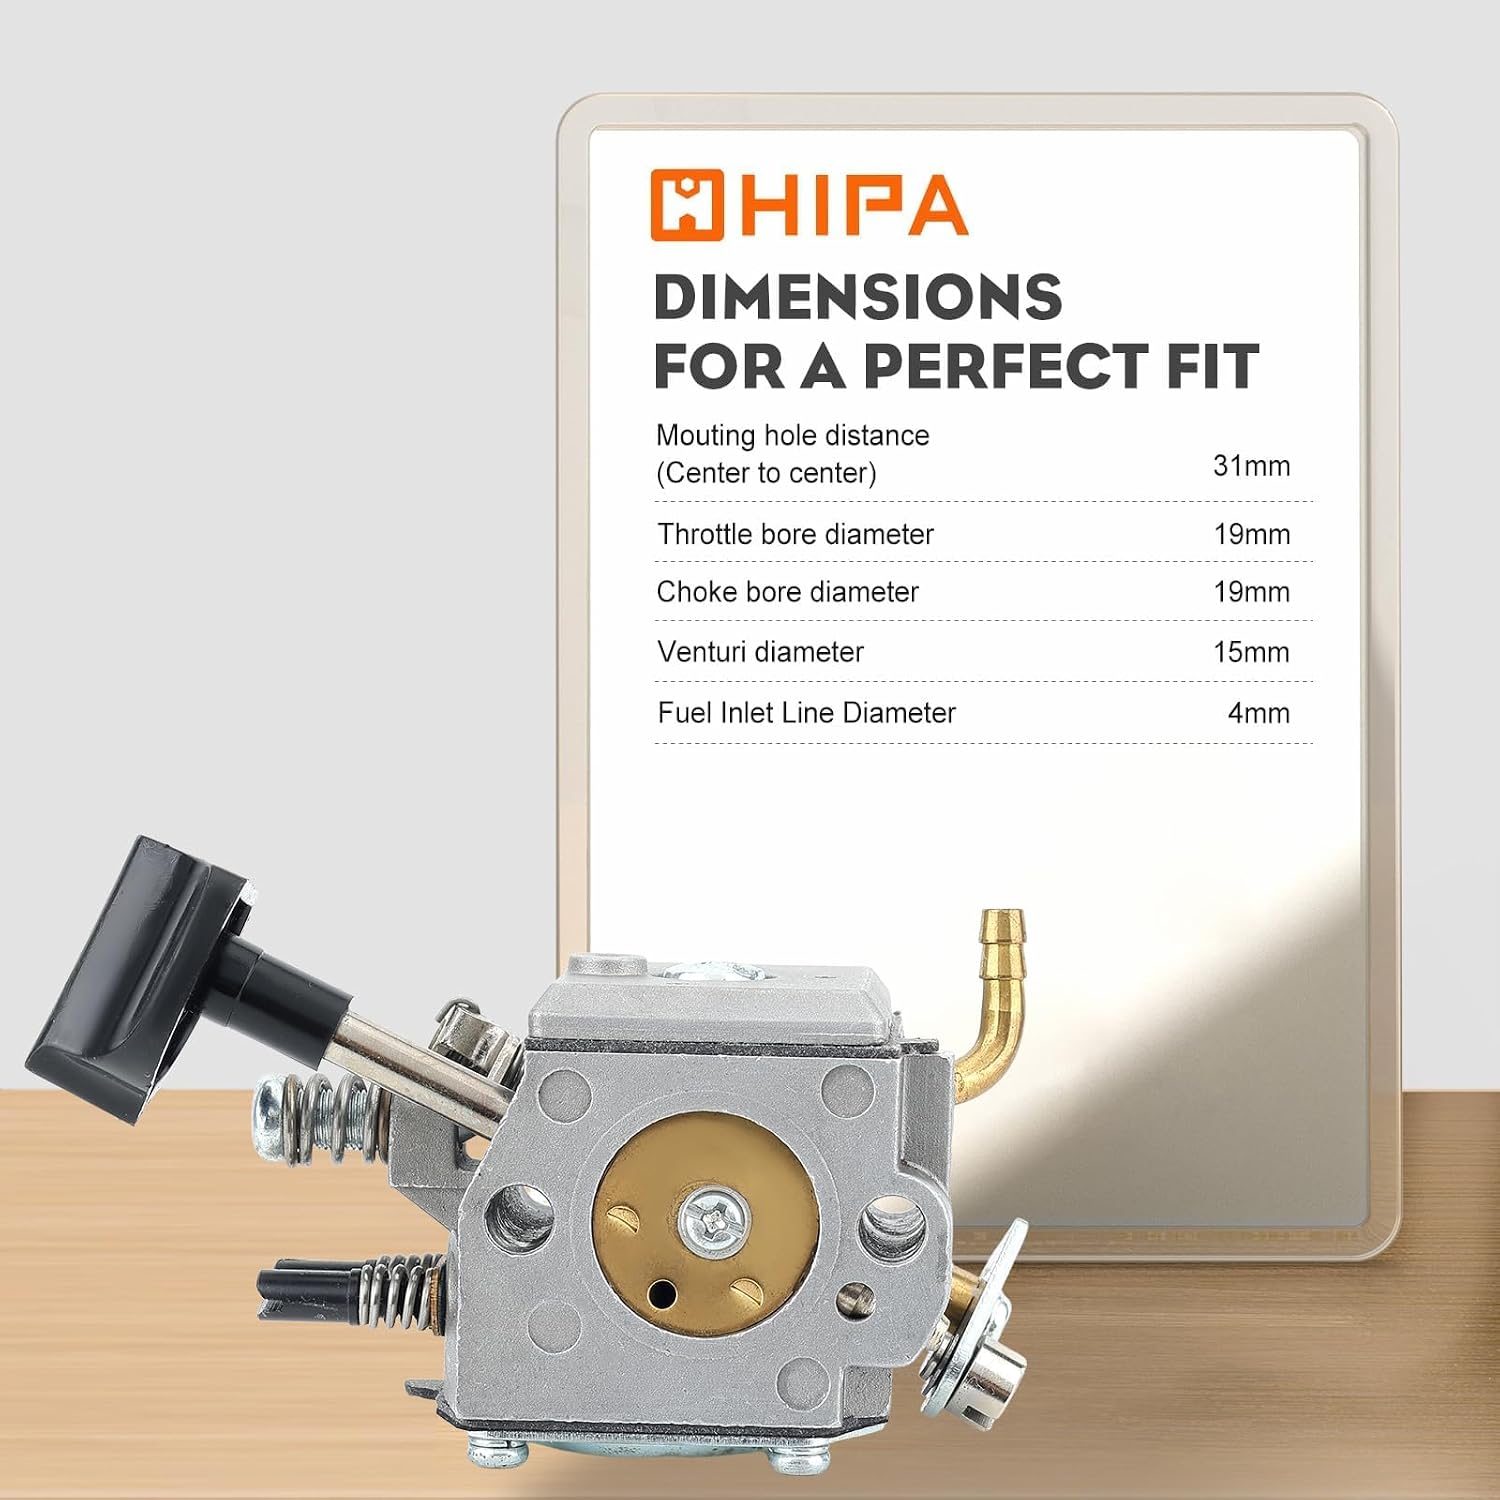
Figure 3: Carburetor dimensions for proper fit.
- Replace Filters and Spark Plug:
- Replace the old fuel filter inside the fuel tank with the new one provided.
- Install the new air filter into the air filter housing.
- Replace the old spark plug with the new L7TC spark plug. Reconnect the spark plug wire.
- Reassemble and Test:
- Reattach the air filter housing and any other covers removed during disassembly.
- Refill the fuel tank with the correct fuel mixture for your Stihl blower.
- Start the blower. The carburetor is factory-tuned and typically requires no further adjustment.

Figure 4: The Hipa carburetor is factory-tuned and ready for use.
5. Operating Principles
The carburetor is a crucial component that mixes air and fuel in the correct ratio for combustion in the engine. This Hipa carburetor is designed to provide a precise air-fuel ratio, ensuring efficient and stable engine performance. It features an idle speed screw, low speed screw, and high speed screw for fine-tuning if necessary, though it comes pre-tuned for most applications.

Figure 5: Tunable air-fuel ratio components for efficient operation.
6. Maintenance
Regular maintenance ensures the longevity and optimal performance of your carburetor and blower. The Hipa carburetor is constructed from quality materials, including brass components, composite rubber diaphragms, and an anodized aluminum body, making it resistant to heat, corrosion, and wear.
- Air Filter: Regularly inspect and clean the air filter. Replace it with a new one (like the included Hipa air filter) when it becomes excessively dirty or damaged to ensure proper airflow and prevent debris from entering the carburetor.
- Fuel Filter: The fuel filter prevents contaminants from reaching the carburetor. Replace it periodically (a new one is included in the kit) to maintain clean fuel flow.
- Spark Plug: Check the spark plug for wear and proper gap. Replace it with the new spark plug provided if it's fouled or worn.
- Fuel Lines: Inspect fuel lines for cracks, hardening, or leaks. Replace them if any damage is observed. The kit includes a new fuel line.
- Storage: When storing the blower for extended periods, drain the fuel tank and run the engine until it runs out of fuel to prevent fuel degradation and carburetor clogging.
7. Troubleshooting Common Issues
While the Hipa Carburetor Kit is designed for reliable performance, here are some common engine problems and potential solutions:
- Won't Start:
- Check fuel level and ensure fresh, properly mixed fuel.
- Verify spark plug is clean and firing. Replace if necessary.
- Ensure the choke is set correctly for starting.
- Inspect fuel lines and fuel filter for blockages.
- Starts then Stalls:
- Could indicate a lean fuel mixture. Check for air leaks around the carburetor or intake.
- Ensure the fuel filter is not clogged.
- Check idle speed adjustment on the carburetor.
- Leaks Gas:
- Inspect all fuel line connections for tightness.
- Check carburetor gaskets for proper sealing. Ensure they are not pinched or damaged.
- A faulty needle valve or float in the carburetor can cause overflow.
- Runs Rough:
- Check the air filter for cleanliness.
- Inspect the spark plug for fouling or incorrect gap.
- Ensure the fuel is fresh and correctly mixed.
- If necessary, adjust the high and low speed screws on the carburetor for optimal performance.

Figure 6: Visual representation of common engine issues.
8. Specifications
| Feature | Detail |
|---|---|
| Brand | HIPA |
| Item Model Number | 4316517910 |
| Item Weight | 9.9 ounces |
| Package Dimensions | 5.91 x 4.06 x 3.03 inches |
| Mounting Hole Distance (Center to Center) | 31mm |
| Throttle Bore Diameter | 19mm |
| Choke Bore Diameter | 19mm |
| Venturi Diameter | 15mm |
| Fuel Inlet Line Diameter | 4mm |
| Air Filter Dimensions | Length: 5-3/16", Width: 3-7/16", Height: 1-3/8" |
9. Warranty and Support
Hipa is committed to providing quality products. For any questions, concerns, or support regarding your carburetor kit, please contact Hipa customer service. We provide 100% perfect service and are ready to assist you.
Please refer to the product packaging or the official Hipa website for the most current warranty information and contact details.