
Product Overview
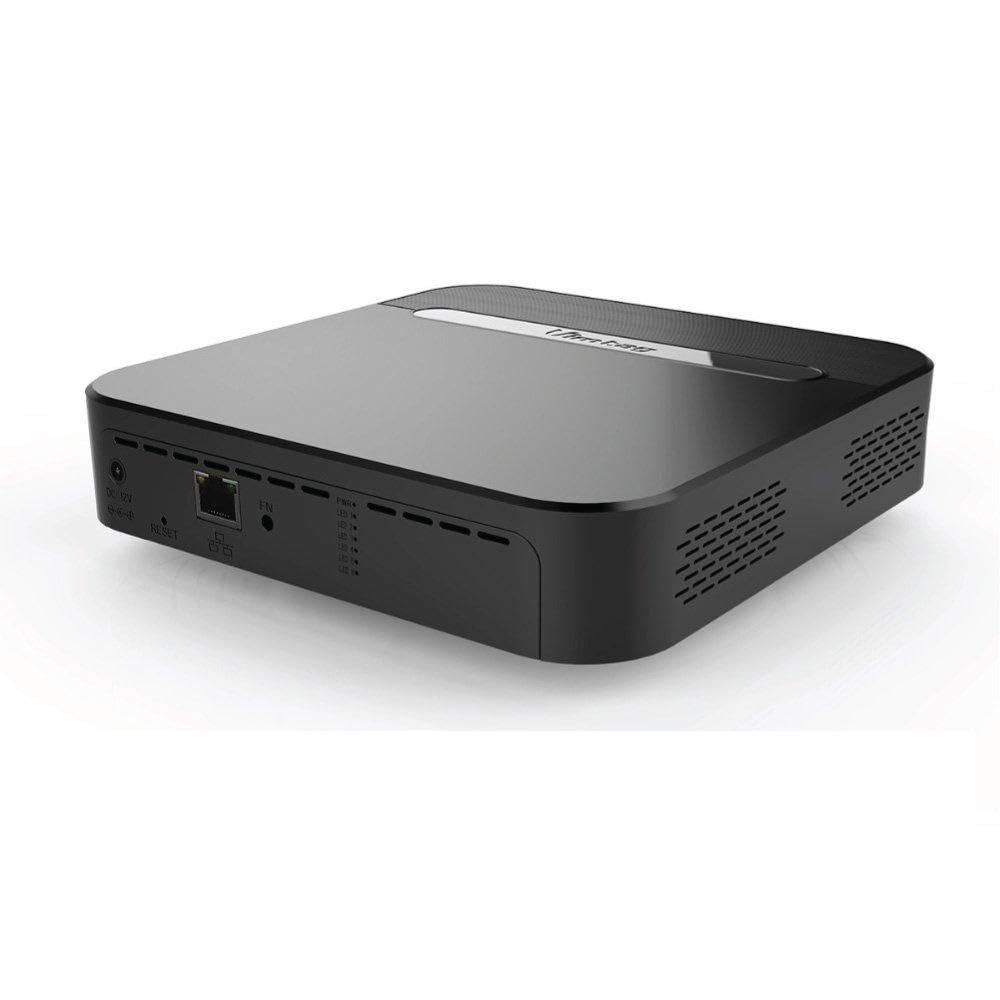
This image displays the Vimtag B2 (S1-2T.EU) 2TB Network Video Recorder unit, typically a compact black box with indicator lights and various ports for connectivity.
The Vimtag B2 (S1-2T.EU) is a 2TB Network Video Recorder (NVR) designed for managing and storing surveillance footage from compatible IP cameras. It supports up to 16 channels, offering a centralized solution for security monitoring. This device integrates into your existing network to provide reliable video recording and playback capabilities.
Setup Guide
1. Package Contents
Verify that all items are present in the package:
- Vimtag B2 (S1-2T.EU) NVR Unit
- Power Adapter
- Ethernet Cable
- Quick Start Guide
2. Physical Installation
- Place the NVR unit on a stable, flat surface in a well-ventilated area, away from direct sunlight or heat sources.
- Connect the power adapter to the NVR's power input port and then plug it into a power outlet.
- Connect one end of the Ethernet cable to the NVR's LAN port and the other end to an available port on your network router or switch.
3. Initial Configuration
- Download the official Vimtag mobile application from your device's app store (iOS or Android).
- Open the app and register a new account if you do not already have one.
- Follow the in-app instructions to add your NVR device. This typically involves scanning a QR code located on the NVR or manually entering its device ID.
- Set a strong password for your NVR to secure access.
Operating Instructions
1. Accessing the NVR
You can access and manage your NVR through the Vimtag mobile application or via a web browser by entering the NVR's IP address into the address bar.
2. Adding Cameras
The Vimtag B2 NVR is compatible with Vimtag cameras and other MIPC-compatible cameras. Ensure all cameras are powered on and connected to the same local network as the NVR.
- In the Vimtag app or web interface, navigate to the camera management section.
- Use the 'Add Camera' or 'Search Device' function. The NVR will scan for compatible cameras on the network.
- Select the cameras you wish to add and follow the prompts to complete the pairing process. You may need to enter camera-specific passwords.
3. Recording Management
Configure recording settings for each camera:
- Recording Modes: Choose between continuous recording, motion-detection recording, or scheduled recording based on specific timeframes.
- Recording Quality: Adjust video quality settings (e.g., normal, medium, long duration) to optimize storage usage. Higher quality consumes more space.
4. Playback and Export
To review recorded footage:
- Access the 'Playback' section in the Vimtag app or web interface.
- Select the desired camera, date, and time range.
- Use the timeline to navigate through recorded events.
- To export footage, select the desired clip and follow the export options provided by the interface.
Maintenance
1. Firmware Updates
Regularly check for and install firmware updates for your NVR. Firmware updates often include performance improvements, new features, and security patches. You can typically find update options within the NVR's settings in the Vimtag app or web interface.
2. Hard Drive Management
The 2TB hard drive is pre-installed. Monitor its status periodically through the NVR's system settings. If the hard drive encounters errors or requires a fresh start, you may have the option to format it. Note: Formatting the hard drive will erase all recorded data.
3. Cleaning
Use a soft, dry cloth to clean the exterior of the NVR unit. Do not use liquid cleaners, aerosols, or abrasive solvents, as these can damage the device.
Troubleshooting
| Problem | Possible Cause | Solution |
|---|---|---|
| NVR has no power | Power adapter disconnected; power outlet faulty. | Check power adapter connection; try a different power outlet. |
| Cannot connect to network | Ethernet cable loose or faulty; router issue; incorrect network settings. | Ensure Ethernet cable is securely connected; restart router; verify NVR network settings. |
| Cameras not detected | Cameras not powered; cameras on a different network segment; not MIPC compatible. | Ensure cameras are powered and on the same network as the NVR. Check camera compatibility. |
| No recording | Hard drive full or faulty; incorrect recording schedule; motion detection not triggered. | Check HDD status and capacity; review recording schedule and motion detection settings. |
| Poor video quality | Low camera resolution settings; insufficient network bandwidth. | Adjust camera resolution settings; ensure stable network connection with adequate bandwidth. |
Specifications
| Feature | Detail |
|---|---|
| Brand | Vimtag |
| Model Number | S1-2T.EU |
| Connectivity Technology | Wireless (and Wired Ethernet for NVR connection) |
| Number of Channels | 16 |
| Storage Capacity | 2TB (Terabytes) |
| Manufacturer | Vimtag |
| ASIN | B01LVXMEBZ |
Warranty Information
The Vimtag B2 (S1-2T.EU) NVR comes with a standard limited warranty. Please refer to the warranty card included with your product or the official Vimtag website for specific terms, conditions, and duration of the warranty period. Keep your proof of purchase for warranty claims.
Customer Support
For technical assistance, troubleshooting, or any product-related inquiries, please contact Vimtag customer support:
- Official Website: Visit the Vimtag Store on Amazon or the main Vimtag website for FAQs, support resources, and contact information.
- Email Support: Refer to your Quick Start Guide or the official website for the dedicated customer support email address.
Note: No official product videos were provided in the product data for embedding in this manual.