1. Introduction
This manual provides detailed instructions for the safe and efficient operation of your VERTEX HP-100ZM Electrically Powered Height Presetter. Please read this manual thoroughly before use and keep it for future reference. This device is designed for precise measurement of tool lengths in machining applications.
2. Safety Information
WARNING: Failure to follow these safety instructions may result in injury or damage to the equipment.
- Always wear appropriate personal protective equipment (PPE), such as safety glasses, when operating machinery or handling tools.
- Ensure the device is connected to a properly grounded power source to prevent electrical shock.
- Do not operate the presetter in wet or damp conditions.
- Disconnect power before performing any cleaning, maintenance, or when the unit is not in use.
- Keep hands and loose clothing clear of moving parts and the contact surface during operation.
- Use only the power cable supplied with the unit.
3. Package Contents
Upon unpacking, please verify that all the following items are present:
- VERTEX HP-100ZM Height Presetter Unit
- Power Cable
- Instruction Manual (this document)
If any items are missing or damaged, please contact your supplier immediately.
4. Product Overview
The VERTEX HP-100ZM is an electrically powered height presetter designed for precise tool length measurement in various machining environments. It features a stable base, a sensitive contact sensor, and a clear digital display for accurate and repeatable readings.
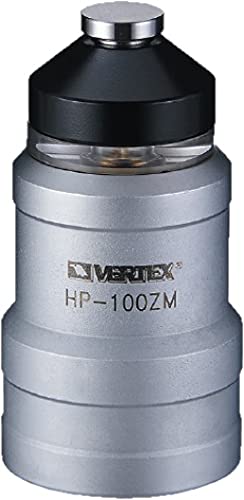
The image displays the VERTEX HP-100ZM Height Presetter. It features a robust base, a central column, and a top-mounted digital display unit with a contact sensor surface. The device is designed for precise measurement of tool lengths.
5. Setup
- Unpacking: Carefully remove the presetter from its packaging. Inspect the unit for any signs of shipping damage.
- Placement: Place the unit on a stable, level, and clean workbench. Ensure the location is free from excessive vibrations, direct sunlight, and extreme temperature fluctuations.
- Power Connection: Connect the provided power cable to the presetter's power input port. Then, plug the other end of the power cable into a standard grounded electrical outlet (AC 100-240V, 50/60Hz).
- Initial Power On: Flip the main power switch, usually located on the side or rear of the unit, to the 'ON' position. The digital display should illuminate, indicating the unit is powered.
6. Operating Instructions
Follow these steps for accurate tool length measurement:
- Zeroing the Presetter: Before each use, ensure the presetter's contact sensor surface is clean and free of debris. Gently lower the machine spindle or tool holder until the tool tip makes contact with the presetter's sensor surface. The digital display will show a reading. Press the 'ZERO' button (if available) to set the current position as the reference zero point. If no 'ZERO' button, the initial contact point serves as the reference.
- Measuring Tool Length: Mount the tool to be measured securely into the machine spindle or tool holder. Carefully lower the tool until its tip makes contact with the presetter's sensor surface. Ensure stable contact without excessive force.
- Reading the Display: The digital display will show the precise tool length from the reference zero point. Ensure the correct unit of measurement (millimeters (mm) or inches (in)) is selected for your application. Some models may have a unit conversion button.
- Power Off: After completing your measurements, turn off the main power switch. For extended storage, it is recommended to disconnect the power cable from the outlet.
7. Maintenance
Proper maintenance ensures the longevity and accuracy of your presetter.
- Cleaning: Regularly clean the presetter's contact surface and body with a soft, dry, lint-free cloth. Avoid using abrasive cleaners, solvents, or harsh chemicals, as these can damage the surface or electronic components. Ensure no metal chips or dust interfere with the sensor mechanism.
- Calibration: Periodic calibration is recommended to maintain the highest level of accuracy. The frequency of calibration depends on usage and environmental conditions. For calibration procedures or to arrange professional calibration, please refer to a qualified service technician or contact VERTEX support.
- Storage: When not in use, store the presetter in a clean, dry environment, protected from dust, moisture, and extreme temperatures. Use the original packaging or a protective cover if available.
8. Troubleshooting
This section addresses common issues you might encounter with your HP-100ZM presetter.
- No Power / Display Off:
- Check that the power cable is securely connected to both the presetter and the electrical outlet.
- Verify that the power outlet is functional by testing it with another device.
- Ensure the main power switch on the presetter is in the 'ON' position.
- Inaccurate or Inconsistent Readings:
- Clean the sensor contact surface thoroughly to remove any debris or contaminants.
- Ensure the tool tip being measured is clean and free of burrs or damage.
- Verify that the presetter is placed on a stable and level surface, free from vibrations.
- If issues persist, the unit may require recalibration by a qualified technician.
- Display Not Responding / Frozen:
- Turn the unit off, wait for 10 seconds, and then turn it back on.
- If the problem continues, contact customer support for assistance.
9. Specifications
| Model | HP-100ZM |
| Brand | VERTEX |
| Measurement Range | 0-100 mm |
| Accuracy | ±0.005 mm |
| Repeatability | 0.001 mm |
| Power Supply | AC 100-240V, 50/60Hz |
| Output Signal | Contact signal (electrically powered) |
| Base Dimensions (Approx.) | 150 x 150 mm |
| Weight (Approx.) | 3 kg |
Note: Specifications are subject to change without notice for product improvement.
10. Warranty and Support
This VERTEX HP-100ZM Height Presetter comes with a standard manufacturer's warranty against defects in materials and workmanship. The specific terms and duration of the warranty may vary by region and retailer.
For detailed warranty information, technical support, service inquiries, or to purchase replacement parts, please contact your authorized VERTEX dealer or visit the official VERTEX website. Please have your model number (HP-100ZM) and purchase date available when contacting support.