
Spectra Precision 1445-2092
Spectra Precision Charger User Manual
Model: 1445-2092
For GL710, GL720, GL722, GL742, GL762 Grade Slope Laser Levels
1. Introduction
This user manual provides essential information for the safe and effective operation and maintenance of your Spectra Precision Charger, Model 1445-2092. This charger is specifically designed for use with Spectra Precision GL710, GL720, GL722, GL742, and GL762 grade slope laser levels. Please read this manual thoroughly before using the product.
2. Product Overview
The Spectra Precision Charger (Model 1445-2092) is a dedicated power supply and charging unit for compatible Spectra Precision laser levels. It ensures proper power delivery and efficient battery charging.

Figure 1: Spectra Precision Charger (Model 1445-2092) with included power adapters and original packaging.
2.1 Components
- Charger Unit: The main power and charging device.
- Power Cable: Connects the charger unit to the laser level.
- AC Power Cord: Connects the charger unit to a wall outlet.
- Interchangeable Power Adapters: Various regional plug types for AC power.

Figure 2: Close-up of the charger unit, highlighting the indicator lights and branding.
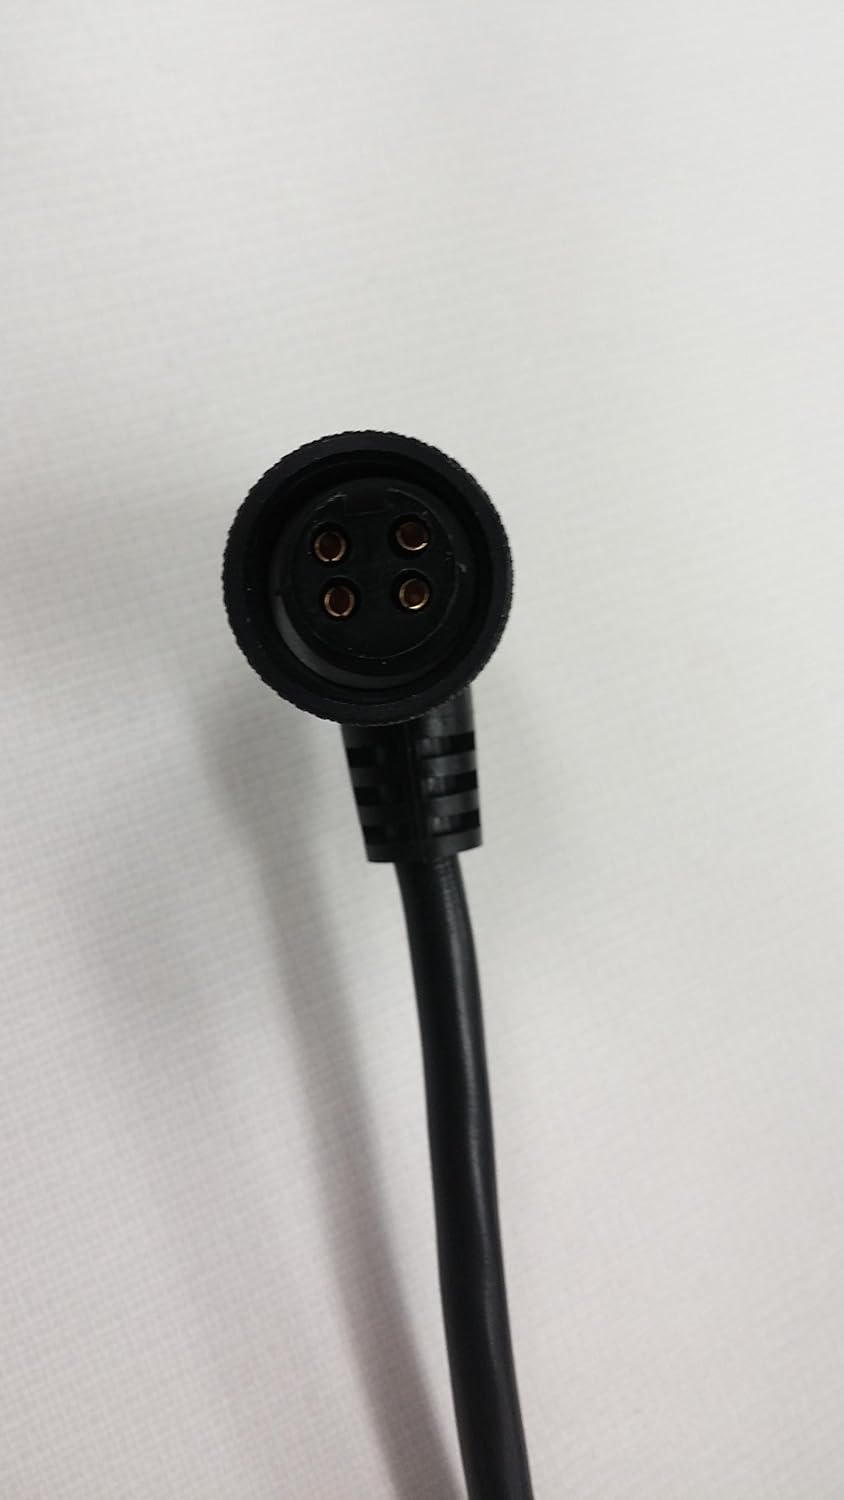
Figure 3: Detail of the 4-pin circular connector that plugs into the laser level.
3. Setup Instructions
- Select Power Adapter: Choose the appropriate interchangeable power adapter for your region and attach it to the AC power cord.
- Connect AC Power: Plug the AC power cord into the charger unit, then plug the other end into a suitable wall outlet (Input Voltage: 240 Volts).
- Connect to Laser Level: Carefully align the 4-pin circular connector of the charger's power cable with the charging port on your Spectra Precision GL710, GL720, GL722, GL742, or GL762 laser level. Insert and secure the connector.
- Verify Connection: Ensure all connections are firm and secure before proceeding.
Important: Use only the charger provided by Spectra Precision (Model 1445-2092) with compatible laser levels to prevent damage and ensure safe operation.
4. Operating Instructions
Once the charger is connected to both the power source and the laser level, it will begin charging the internal battery. The charger features indicator lights to communicate its status:
| Indicator Light | Status | Description |
|---|---|---|
| Charge | On | Battery is currently charging. |
| Charge | Complete | Battery charging is finished. The laser level is ready for use. |
| Temperature | Flash On | Charging has paused due to the battery temperature being outside the optimal range. Charging will resume automatically when the temperature stabilizes. |
| No Battery | Off | No battery detected or battery is not properly connected. |
| Error | Flash Flash | An error has occurred. Refer to the Troubleshooting section. |
Allow the battery to fully charge for optimal performance and battery life. Disconnect the charger from the laser level and the power outlet once charging is complete or when the laser level is not in use.
5. Maintenance
- Cleaning: Use a soft, dry cloth to clean the charger unit. Do not use liquid cleaners or solvents.
- Storage: Store the charger in a dry, cool place away from direct sunlight and extreme temperatures.
- Cable Inspection: Regularly inspect the power cables and connectors for any signs of damage, fraying, or bending. Do not use if damaged.
- Avoid Moisture: Keep the charger away from water and high humidity.
6. Troubleshooting
| Problem | Possible Cause | Solution |
|---|---|---|
| Charger indicator lights are off. | No power to the charger. |
|
| "No Battery" indicator is off (or charging does not start). | Battery not detected or improperly connected. |
|
| "Temperature" indicator is flashing. | Battery temperature is too high or too low. |
|
| "Error" indicator is flashing. | Internal fault or severe battery issue. |
|
7. Specifications
- Model Number: 1445-2092
- Brand: Spectra Precision
- Manufacturer: Spectra Precision
- Input Voltage: 240 Volts
- Output Voltage: 120 Volts
- Color: Black
- Safety Standard: UL Compliant
- Compatibility: Spectra Precision GL710, GL720, GL722, GL742, GL762 Grade Slope Laser Levels
8. Warranty and Support
For warranty information, technical support, or service inquiries, please refer to the official Spectra Precision website or contact your authorized dealer. Keep your purchase receipt as proof of purchase.
Spectra Precision Website: www.spectraprecision.com
Ask a question about this manual
Ask about setup, troubleshooting, compatibility, parts, safety, or missing instructions. Manuals+ will review the question and use this page’s manual context to help answer it.