1. Introduction and Overview
Thank you for choosing the Winix 50BT 50 Pint Dehumidifier. This appliance is designed to efficiently remove excess moisture from the air, creating a more comfortable and healthy indoor environment. It features auto operation control, casters for easy mobility, a child lock, a timer function, and a clear water level display. This manual provides essential information for the safe and effective use of your dehumidifier.

Figure 1: Front view of the Winix 50BT Dehumidifier, showing the control panel and water bucket window.
2. Safety Information
Please read all safety instructions carefully before operating the dehumidifier to prevent injury or damage. Keep this manual for future reference.
- Always plug the unit into a grounded electrical outlet. Do not use extension cords.
- Do not operate the dehumidifier with a damaged power cord or plug.
- Ensure the unit is placed on a level, stable surface to prevent tipping.
- Maintain at least 20 cm (8 inches) clearance around the unit for proper airflow.
- Do not insert fingers or objects into the air inlet or outlet.
- Unplug the unit before cleaning or performing any maintenance.
- Do not use the dehumidifier in areas where flammable gases or liquids are stored.
- This appliance is not intended for use by persons (including children) with reduced physical, sensory or mental capabilities, or lack of experience and knowledge, unless they have been given supervision or instruction concerning use of the appliance by a person responsible for their safety.
3. Package Contents
Carefully unpack your Winix 50BT Dehumidifier and check that all items are present:
- Winix 50BT Dehumidifier Unit
- 4 Casters (wheels)
- Water Collection Bucket
- Drain Hose / Drain Connector
- User Manual (this document)
4. Setup and Installation
4.1 Installing the Casters
The dehumidifier comes with casters for easy movement. Gently tilt the unit and insert each caster into the designated slots at the bottom of the unit until they click into place. Ensure all four casters are securely attached before placing the unit upright.
4.2 Unit Placement
Place the dehumidifier on a firm, level surface in an area where the humidity is highest. For optimal performance, ensure there is at least 20 cm (8 inches) of space around the unit to allow for proper air circulation. Avoid placing the unit near heat sources or in direct sunlight.
4.3 Continuous Drainage Setup (Optional)
For continuous operation without needing to empty the water bucket, you can connect a drain hose. Locate the drain outlet at the back of the unit. Attach the provided drain hose or a standard garden hose (not included) to the drain connector, ensuring a tight seal. Route the hose downwards to a suitable drain or floor drain, ensuring there are no kinks or blockages.
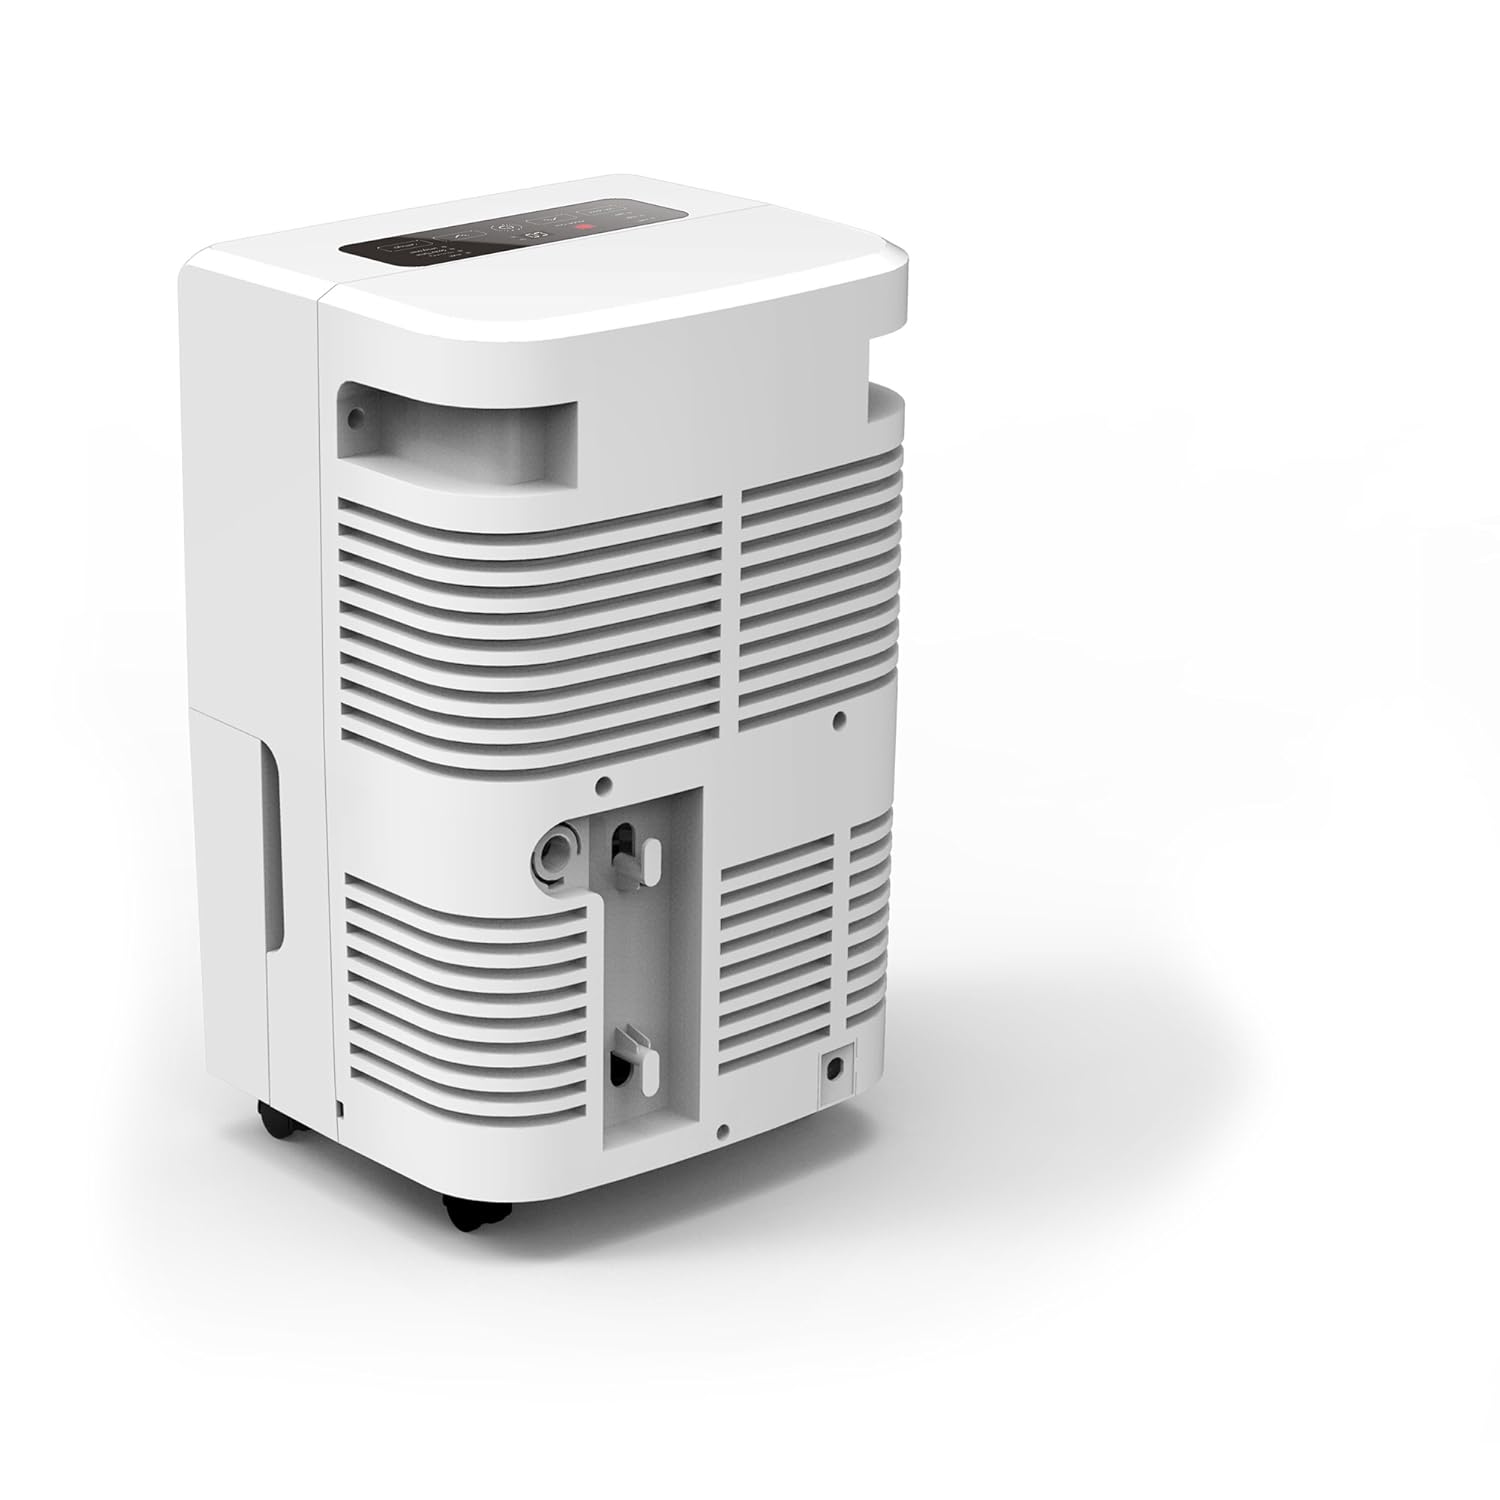
Figure 2: Rear view of the Winix 50BT Dehumidifier, highlighting the continuous drain connection point.
5. Operating Instructions
5.1 Control Panel Overview
The control panel is located on the top of the unit. It includes buttons for power, mode selection, humidity setting, fan speed, timer, and child lock. Refer to the diagram below for button identification (Note: Diagram not available, refer to unit's physical control panel).
5.2 Power On/Off
Press the Power button to turn the unit on or off. The unit will start in its last used setting.
5.3 Setting Desired Humidity Level
Press the Humidity button (often indicated by '+' and '-' symbols or a dedicated button) to adjust the desired humidity level. The recommended humidity level for comfort is between 40% and 60% relative humidity. The unit will automatically turn on and off to maintain this level.
5.4 Fan Speed
Press the Fan Speed button to cycle through available fan speeds (e.g., Low, Medium, High). Higher fan speeds will dehumidify faster but may produce more noise.
5.5 Timer Function
Press the Timer button to set a delay for the unit to turn on or off. Use the humidity adjustment buttons to set the desired hours (1-24). The timer indicator will illuminate when active.
5.6 Child Lock
To activate the child lock, press and hold the Child Lock button (or a combination of buttons as indicated on the unit) for a few seconds. This will disable the control panel to prevent accidental changes. Repeat the action to unlock.
5.7 Auto Features
- Auto Operation Control: The unit automatically adjusts its operation based on the set humidity level.
- Auto Defrost: If frost builds up on the evaporator coils, the unit will automatically enter defrost mode to melt the frost, ensuring efficient operation.
- Auto Shutoff: The unit will automatically turn off when the water bucket is full or when the set humidity level is reached.
5.8 Water Level Display
The transparent window on the front of the unit allows you to monitor the water level in the collection bucket. When the bucket is full, the unit will stop operating and an indicator light will illuminate.
6. Maintenance
Regular maintenance ensures optimal performance and extends the lifespan of your dehumidifier.
6.1 Emptying the Water Bucket
- When the bucket is full, the unit will stop and an indicator light will turn on.
- Gently pull out the water bucket from the front of the unit.
- Carefully carry the bucket to a sink or drain and empty the collected water.
- Slide the empty bucket back into the unit until it clicks into place. The unit will resume operation if the humidity is above the set level.
6.2 Cleaning the Air Filter
The air filter should be cleaned every two weeks or more frequently depending on usage and air quality.
- Turn off and unplug the dehumidifier.
- Remove the air filter from its slot (usually located at the back or side of the unit).
- Wash the filter with warm, soapy water. Rinse thoroughly and allow it to air dry completely before reinstalling. Do not use a dishwasher.
- Reinsert the dry filter into its slot.
6.3 Cleaning the Unit Exterior
Wipe the exterior of the unit with a soft, damp cloth. Do not use harsh chemicals, abrasives, or solvents, as these can damage the surface. The unit features an anti-microbial Cleancel coating to help fight bacterial growth.
6.4 Storage
If storing the unit for an extended period, ensure the water bucket is empty and clean, and the air filter is clean and dry. Coil the power cord neatly and store the unit in a cool, dry place, covered to protect it from dust.
7. Troubleshooting
Before contacting customer support, please refer to the following troubleshooting guide for common issues:
| Problem | Possible Cause | Solution |
|---|---|---|
| Unit does not turn on. | No power; power cord not plugged in; circuit breaker tripped. | Ensure unit is plugged into a live, grounded outlet. Check circuit breaker. |
| Unit runs but no water collects. | Ambient humidity is too low; temperature is too low; air filter is clogged; continuous drain hose is connected and working. | Check room humidity and temperature (dehumidifiers work best above 5°C/41°F). Clean air filter. If continuous drain is active, water will not collect in the bucket. |
| Unit is noisy. | Unit not on a level surface; air filter clogged; fan speed set too high. | Place unit on a level surface. Clean air filter. Reduce fan speed. |
| "Bucket Full" indicator is on, but bucket is not full. | Bucket not properly seated; float switch malfunction. | Ensure the bucket is fully inserted and correctly aligned. Check the float switch for obstructions. |
| Unit is leaking water. | Continuous drain hose not properly connected or kinked; bucket not seated correctly. | Check drain hose connection and ensure it's not kinked. Re-seat the water bucket. |
8. Specifications
| Feature | Detail |
|---|---|
| Model Name | Winix 50 Pint Dehumidifier |
| Model Number | 50BT |
| Dehumidification Capacity | 50 Pints per day (at 80°F/60% RH) |
| Water Tank Capacity | 14.4 Pints |
| Item Weight | 17.1 kg (approximately 37.7 lbs) |
| Item Dimensions (LxWxH) | 30.5 x 36.6 x 57.2 cm (approximately 12 x 14.4 x 22.5 inches) |
| Special Features | Automatic Defrost, Sleep Mode, Child Lock, Timer Function, Water Level Display, Anti-microbial Cleancel coating |
| Operation Mode | Automatic |
| Included Components | Dehumidifier, 4 Casters, Bucket, Hose/Drain Connector |
9. Warranty and Support
For warranty information and customer support, please refer to the warranty card included with your product or visit the official Winix website. Do not attempt to repair the unit yourself, as this may void the warranty and pose safety risks. For technical assistance or service, contact Winix customer service.


