1. Introduction
This manual provides essential information for the installation, operation, and maintenance of your Tesa Assa Abloy M6503030L Safety Cylinder Lock. Please read these instructions carefully before proceeding with installation or use to ensure proper function and security.
2. Product Overview
The Tesa Assa Abloy M6503030L is a high-quality safety cylinder lock designed for enhanced door security. It features a robust brass construction and advanced protection mechanisms. This model is a 30x30mm cylinder with a short cam and a brass finish, supplied with five nickel brass keys.

Figure 1: Tesa Assa Abloy M6503030L Safety Cylinder Lock with five brass keys.
3. Key Features
- Advanced Security: Equipped with anti-drill, anti-bump, and anti-pick protection.
- Durable Construction: Made from high-quality brass for long-lasting performance.
- 6-Pin Tumbler Mechanism: Provides enhanced security against manipulation.
- High Resistance: Tested for 100,000 operational cycles.
- Master Key System Compatibility: Suitable for master key systems with moderate complexity (e.g., up to 100 key features).
- Key Quantity: Each cylinder is supplied with 5 nickel brass keys.

Figure 2: Internal cutaway view showing the 6-pin tumbler mechanism and security features.
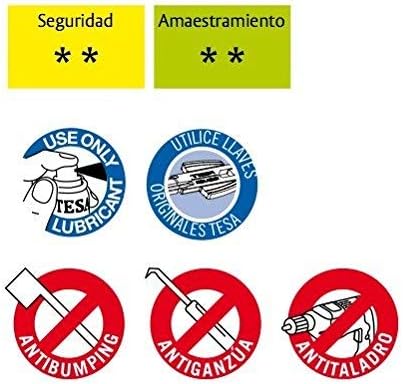
Figure 3: Security and maintenance icons: Tesa lubricant, original Tesa keys, anti-bumping, anti-picking, anti-drilling.
4. Specifications
| Attribute | Detail |
|---|---|
| Brand | Tesa Assa Abloy |
| Model | M6503030L |
| Lock Type | Key Lock |
| Material | Brass |
| Dimensions (L x W x H) | 2.36 x 1.18 x 1.18 inches (60 x 30 x 30 mm) |
| Cam Type | Short Cam |
| Keys Supplied | 5 Nickel Brass Keys |

Figure 4: Cylinder dimensions (L, A, B) for various sizes. This model is 30x30mm (L=60).

Figure 5: Comparison of long cam (LEVA LARGA) and short cam (LEVA CORTA) cylinders. This model features a short cam.
5. Installation Guide (Setup)
Proper installation is crucial for the security and functionality of your cylinder lock. If you are unsure about any step, consult a professional locksmith.
5.1. Tools Required
- Screwdriver (Phillips or flathead, depending on your door hardware)
- Measuring tape or ruler
5.2. Measuring Your Existing Cylinder
Before replacing a cylinder, accurately measure its dimensions. The M6503030L is a 30x30mm cylinder (total length 60mm). Ensure this matches your door's requirements.
- Open the door and locate the fixing screw on the door edge, usually below the latch bolt.
- Unscrew and remove this screw.
- Insert your key into the cylinder and turn it slightly (about 15-20 degrees) in either direction.
- While turning the key, gently pull the cylinder towards you. It should slide out once the cam is aligned with the cylinder body.
- Measure the cylinder from the center of the fixing screw hole to each end (dimensions A and B as shown in Figure 4). The total length (L) is A + B.
5.3. Replacing the Cylinder
- Ensure the new Tesa Assa Abloy M6503030L cylinder matches the required dimensions (30x30mm, short cam).
- Insert one of the supplied keys into the new cylinder.
- Turn the key slightly to align the cam with the cylinder body, allowing it to slide smoothly into the door's mortise lock.
- Push the cylinder fully into the door, ensuring it is flush with both sides of the door.
- Re-insert the fixing screw into the door edge and tighten it securely. Do not overtighten.
- Test the lock from both sides with the key to ensure smooth operation before closing the door.
6. Operation
To operate your Tesa Assa Abloy M6503030L Safety Cylinder Lock:
- Insert the key fully into the keyway.
- Turn the key clockwise to lock the door or counter-clockwise to unlock it.
- Remove the key once the door is locked or unlocked.
Always use original Tesa Assa Abloy keys for optimal performance and security. Using non-original or damaged keys may impair the lock's function and security features.
7. Maintenance
Regular maintenance helps ensure the longevity and smooth operation of your cylinder lock.
- Lubrication: Apply a specialized lock lubricant (e.g., Tesa lubricant as shown in Figure 3) into the keyway approximately once a year, or if the lock feels stiff. Do not use oil-based lubricants or graphite, as these can attract dirt and clog the mechanism.
- Cleaning: Keep the keyway free from dust and debris. You can use compressed air to clear any obstructions.
- Key Care: Store keys properly to prevent bending or damage. Avoid using keys for purposes other than operating the lock.
8. Troubleshooting
If you encounter issues with your Tesa Assa Abloy M6503030L cylinder lock, consider the following common problems and solutions:
- Key is difficult to insert or turn:
- Ensure you are using an original, undamaged key.
- Check for debris in the keyway. Use compressed air to clear.
- Apply a suitable lock lubricant.
- Lock feels stiff or gritty:
- The lock may require lubrication.
- Internal components might be dirty. Professional cleaning may be needed.
- Cylinder cannot be removed:
- Ensure the fixing screw is completely removed.
- The key must be turned slightly (about 15-20 degrees) to align the cam with the cylinder body. Try turning the key in both directions while gently pulling.
If problems persist after attempting these solutions, contact a qualified locksmith or Tesa Assa Abloy customer support.
9. Warranty and Support
Tesa Assa Abloy products are manufactured to high standards and are backed by a manufacturer's warranty. For specific warranty terms and conditions, please refer to the documentation provided with your purchase or visit the official Tesa Assa Abloy website.
For technical support, spare parts, or further assistance, please contact Tesa Assa Abloy customer service through their official channels. Always provide your product model (M6503030L) and purchase details when seeking support.
Contact Information:
- Website: www.assaabloy.com (or relevant regional site)
- Refer to your product packaging for specific regional contact details.


