1. Product Overview
The Everbilt 3/4 HP Convertible Jet Pump with Ejecter, Model DP370C, is designed for reliable water supply in both shallow and deep well applications. Constructed from rugged cast iron, this pump is built for durability and long-lasting performance. It comes supplied with a shallow well ejector installed, and includes components for deep well conversion, making it versatile for various water source depths.
Key features include a heavy-duty dual-voltage 115/230-Volt motor, pre-set at 230-Volt for immediate use in higher voltage systems. It is capable of handling shallow well water levels up to 25 feet and deep well water levels up to 70 feet.

Figure 1.1: Main view of the Everbilt 3/4 HP Convertible Jet Pump (DP370C). This image shows the robust cast iron body, the motor housing, and the integrated pressure gauge, highlighting its compact and durable design.
2. Safety Information
WARNING: Read and understand all safety warnings and instructions before installing or operating this pump. Failure to follow these instructions may result in electric shock, fire, serious injury, or death.
- Always disconnect power to the pump before performing any maintenance or service.
- Ensure proper grounding to prevent electrical shock. All wiring must comply with local electrical codes.
- Do not operate the pump in an explosive atmosphere, such as in the presence of flammable liquids, gases, or dust.
- Protect the pump from freezing temperatures. Freezing can cause severe damage and void the warranty.
- This pump is designed for pumping clean water only. Do not use it for pumping corrosive, abrasive, or flammable liquids.
- The motor is pre-set at 230-Volt. Verify your power supply matches the pump's voltage setting before connection.
3. Components and Features
The DP370C pump includes several key components for its operation and versatility:
- Cast Iron Body: Provides robust and durable housing for the pump's internal components.
- 3/4 HP Motor: A powerful, heavy-duty motor capable of operating on dual voltage (115V/230V), factory pre-set to 230V.
- Shallow Well Ejector: Pre-installed for immediate use in shallow well applications.
- Deep Well Components: Included for converting the pump to deep well operation, allowing for water extraction from greater depths.
- Pressure Gauge: Integrated to monitor system pressure.
- Pressure Switch: Automatically controls pump operation based on system pressure (not explicitly mentioned but implied for automatic operation).

Figure 3.1: Close-up view of the Everbilt pump's motor and pressure gauge. The yellow label indicates the factory preset voltage of 230V, and the gauge provides real-time pressure readings.
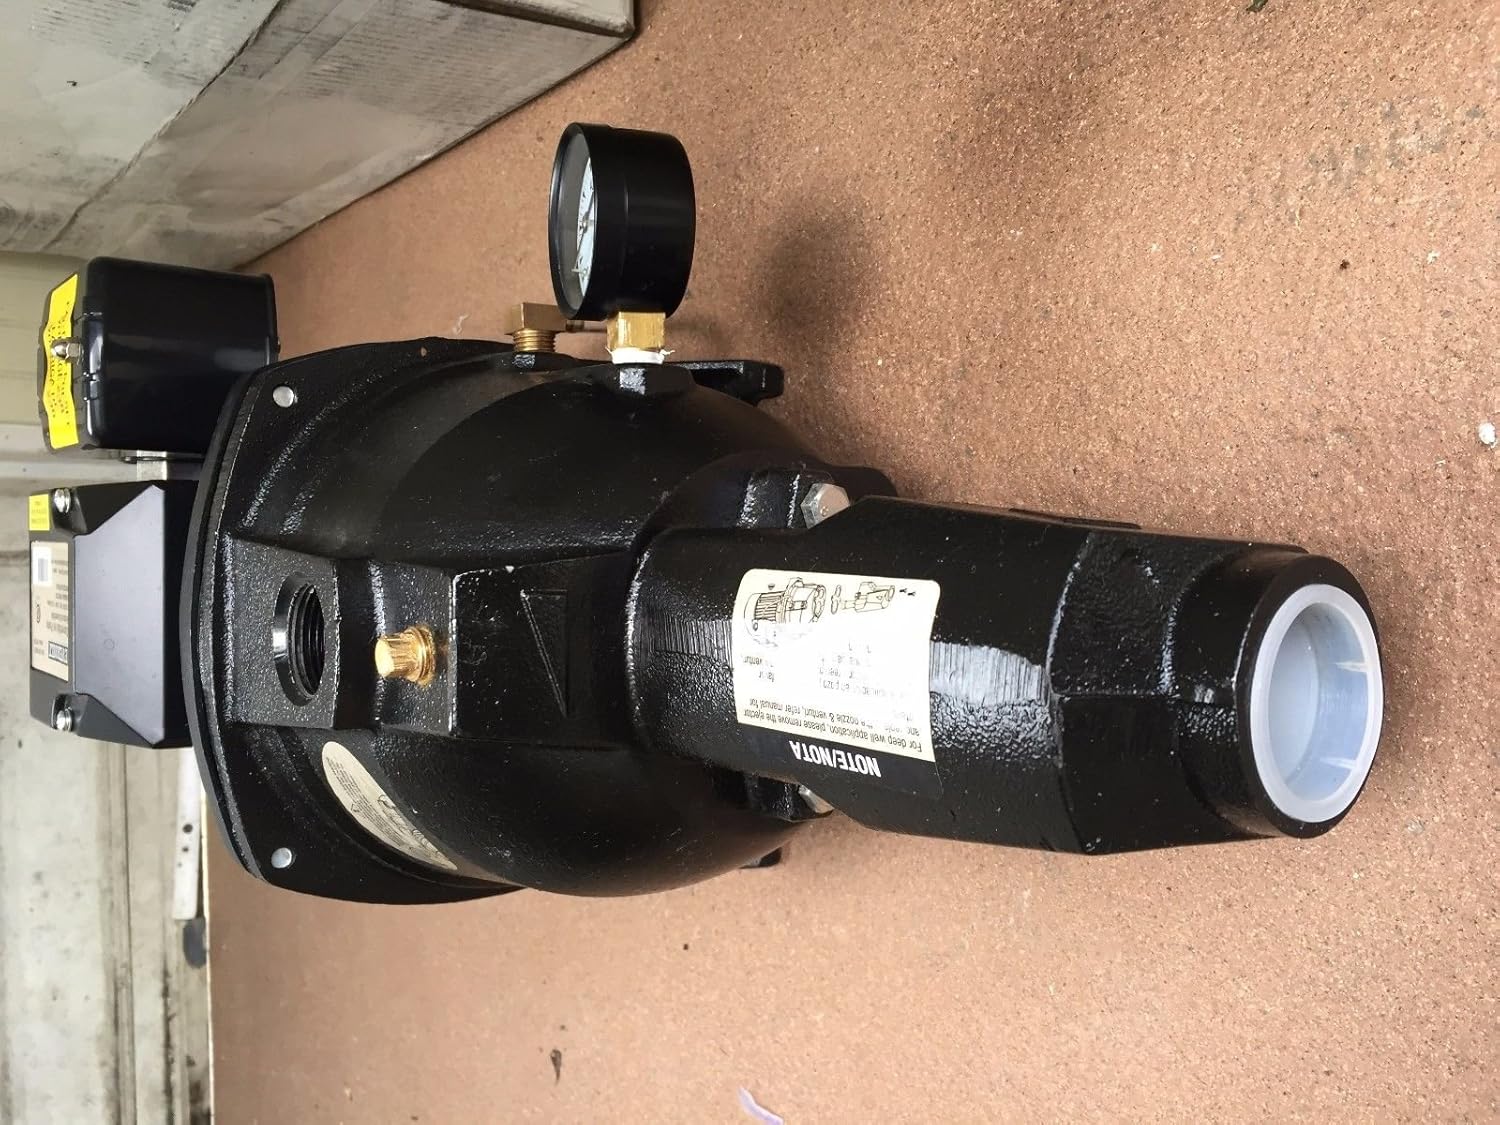
Figure 3.2: Side view of the Everbilt pump, illustrating the various connection points for water inlet and outlet pipes. This view also shows the robust construction and the location of the ejector assembly.
4. Setup and Installation
4.1. Pre-Installation Checklist
- Verify power supply voltage (115V or 230V) matches pump setting. The pump is factory pre-set to 230V. If 115V is required, consult the wiring diagram for conversion.
- Ensure adequate space for pump installation, allowing for ventilation and access for maintenance.
- Gather necessary plumbing fittings, pipes, and electrical supplies.
- Confirm the well depth is within the pump's operating range (25 ft for shallow, 70 ft for deep).
4.2. Plumbing Connections
- Connect the suction line from the well to the pump's inlet. Ensure all connections are airtight to prevent air leaks, which can cause the pump to lose prime.
- Connect the discharge line from the pump's outlet to your water distribution system.
- If converting to deep well operation, install the deep well ejector kit according to the provided instructions, connecting the pressure and suction lines to the well.
- Install a check valve in the suction line to maintain prime.
4.3. Electrical Connections
- Ensure the main power supply is OFF at the circuit breaker before making any electrical connections.
- Connect the pump to a dedicated electrical circuit with appropriate overcurrent protection.
- Wire the pump according to the wiring diagram located on the motor housing or in the included manual, ensuring proper grounding.
- Confirm the voltage setting (115V or 230V) matches your power supply. The pump is pre-set to 230V.
4.4. Priming the Pump
- Remove the priming plug located on the top of the pump casing.
- Fill the pump casing completely with clean water until it overflows.
- Replace the priming plug securely.
- Turn on the power supply to the pump. The pump should begin to draw water and build pressure. If it does not prime within 5 minutes, turn off the power, re-prime, and check for air leaks in the suction line.
5. Operating Instructions
5.1. Initial Start-up
After successful installation and priming, turn on the power to the pump. The pressure switch will engage the pump when system pressure drops below a pre-set level and turn it off when the desired pressure is reached. Monitor the pressure gauge to ensure proper operation.
5.2. Normal Operation
The pump is designed for automatic operation. It will cycle on and off as water is demanded by your system. Ensure that the pump is not running dry, as this can cause severe damage. If the pump runs continuously without building pressure, refer to the troubleshooting section.
5.3. Shutting Down the Pump
For temporary shutdown, simply turn off the power supply to the pump at the circuit breaker. For extended periods of non-use, especially in freezing conditions, follow the winterization procedures in the maintenance section.
6. Maintenance
Regular maintenance ensures the longevity and efficient operation of your Everbilt jet pump.
6.1. Routine Checks
- Monthly: Inspect all plumbing connections for leaks. Check the pressure gauge for consistent readings. Listen for unusual noises from the pump motor.
- Annually: Inspect the pump for any signs of corrosion or wear. Check electrical connections for tightness and signs of overheating.
6.2. Winterization (for cold climates)
If the pump is installed in an area subject to freezing temperatures and will not be used during winter, it must be drained to prevent damage:
- Disconnect power to the pump.
- Open all drain plugs on the pump casing and piping.
- Allow all water to drain completely. You may need to tilt the pump slightly to ensure full drainage.
- Store the pump in a dry, frost-free location if possible, or ensure all water is removed from the system.
- Once drained, replace the drain plugs loosely to allow for air circulation, or remove them and store them safely until spring.
6.3. Cleaning
Keep the exterior of the pump clean and free from debris. Do not use harsh chemicals or abrasive cleaners. Ensure ventilation openings on the motor are clear.
7. Troubleshooting
This section provides solutions to common issues you might encounter with your Everbilt jet pump.
| Problem | Possible Cause | Solution |
|---|---|---|
| Pump runs but no water or low pressure. |
|
|
| Pump does not start. |
|
|
| Pump cycles too frequently. |
|
|
If the problem persists after attempting these solutions, contact a qualified service technician.
8. Specifications
| Attribute | Detail |
|---|---|
| Brand | Everbilt |
| Model Number | DP370C |
| Horsepower (HP) | 3/4 HP |
| Voltage | 115V / 230V (Factory pre-set at 230V) |
| Material | Cast Iron |
| Color | Black |
| Shallow Well Application | Water level up to 25 ft |
| Deep Well Application | Water level up to 70 ft |
| Item Weight | 35.5 Pounds |
| Product Dimensions | 23 x 10 x 11 inches |
| Power Source | Electric |
9. Warranty and Support
The Everbilt 3/4 HP Convertible Jet Pump, Model DP370C, typically comes with a 1-year limited warranty from the date of purchase, as indicated on the product packaging. This warranty covers defects in materials and workmanship under normal use and service.
For warranty claims, technical support, or service inquiries, please contact Everbilt customer service. It is recommended to have your product model number (DP370C) and proof of purchase readily available when contacting support.
Note: This product may be refurbished. Refurbished products are tested and certified to look and work like new. The refurbishing process includes functionality testing, basic cleaning, inspection, and repackaging. The product ships with all relevant accessories, and may arrive in a generic box.


