Introduction
Product Overview
The De'Longhi Dedica KG 521.M Conical Burr Grinder is designed to provide freshly ground coffee beans for various brewing methods. It features a durable stainless steel conical burr grinder, 18 variable grind settings, and three strength settings to customize your coffee experience. The user-friendly LCD control panel allows for easy selection of grind settings, number of cups, and aroma preference. This grinder is equipped with a portafilter adapter for direct grinding and a 14-cup storage container for pre-ground coffee. Its removable upper burrs ensure simple cleaning and maintenance.
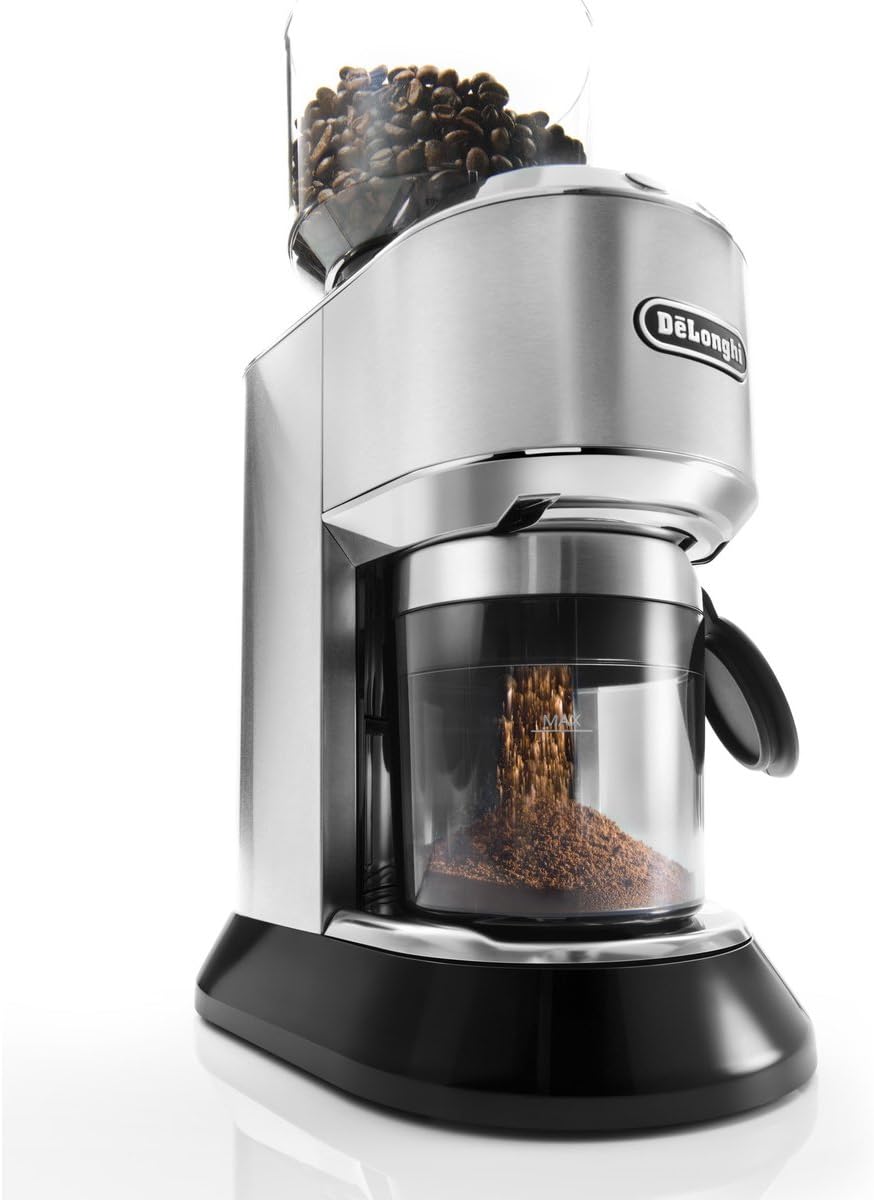
Image: The De'Longhi Dedica Grinder in operation, showing coffee grounds collecting in the container.
Components
Included Parts
- Main Grinder Unit: Houses the motor, burrs, and control panel.
- Bean Hopper: Transparent container for whole coffee beans.
- Ground Coffee Container: Airtight container for collecting ground coffee.
- Portafilter Adapter: Accessory for grinding directly into an espresso machine's portafilter.
- Cleaning Brush: For maintaining the burrs and grinding chamber.
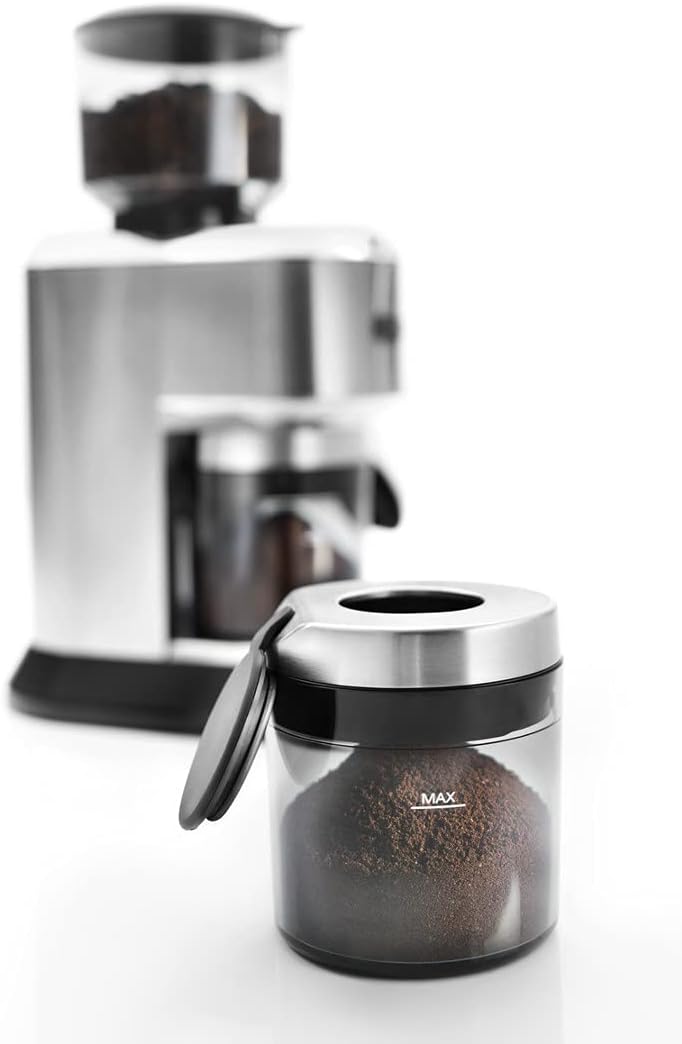
Image: Key accessories for the De'Longhi Dedica Grinder, including the ground coffee container and portafilter adapter.
Setup
First Use and Assembly
- Unpack: Carefully remove all components from the packaging.
- Clean: Before first use, wash the bean hopper, ground coffee container, and their lids with warm soapy water. Rinse thoroughly and dry completely. The main grinder unit should only be wiped with a damp cloth.
- Assemble Hopper: Place the bean hopper securely onto the top of the grinder unit. Ensure it clicks into place.
- Position Container: Place the ground coffee container or the portafilter adapter (with your portafilter) into the designated slot at the front of the grinder.
- Connect Power: Plug the power cord into a suitable electrical outlet (110-120 Volts).
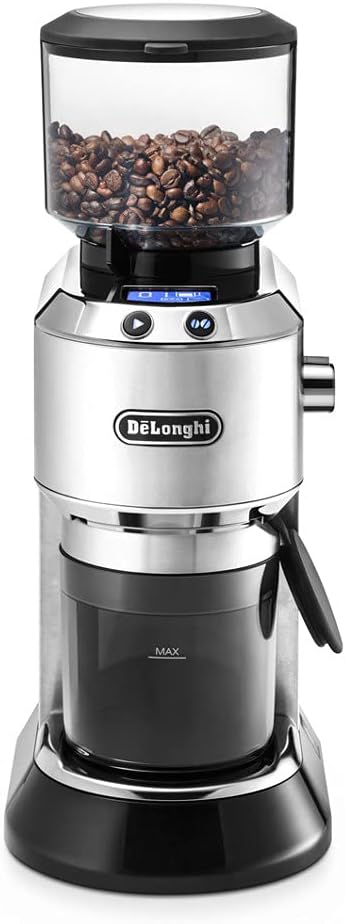
Image: Front view of the De'Longhi Dedica Grinder, ready for operation with beans in the hopper.
Operating Instructions
Grinding Coffee
- Add Beans: Fill the bean hopper with whole coffee beans. Do not overfill.
- Select Grind Setting: Use the grind setting dial to choose your desired fineness. The grinder offers 18 settings, suitable for:
- Espresso: Finer settings (1-6)
- Drip Coffee/Pour Over: Medium settings (7-12)
- French Press: Coarser settings (13-18)
- Choose Number of Cups/Strength: Use the digital LCD display and control buttons to select the number of cups you wish to grind (up to 14 cups) or the desired strength (Light, Normal, Strong).

Image: The digital LCD display and control buttons for adjusting grind settings and quantity.
- Start Grinding: Press the start button to begin grinding. The grinder will automatically stop once the selected quantity is reached.
- Direct Grinding into Portafilter: For espresso, attach the portafilter adapter and insert your portafilter. The grinder will dispense directly into it. The integrated storage drawer at the back of the machine houses the adapter when not in use.

Image: The grinder set up for direct grinding into a portafilter using the included adapter.
Maintenance
Cleaning the Grinder
Regular cleaning ensures optimal performance and extends the life of your grinder. Always unplug the grinder before cleaning.
- Empty Hopper and Container: Remove any remaining coffee beans from the hopper and ground coffee from the container.
- Remove Upper Burr: Twist and lift the upper burr to remove it from the grinding chamber.
- Brush Clean: Use the provided cleaning brush to remove any excess grounds from the upper burr and the lower burr in the grinding chamber.

Image: Cleaning the burr grinder with the provided brush after removing the upper burr.
- Wash Removable Parts: The bean hopper, ground coffee container, and their lids can be washed with warm soapy water. Rinse and dry thoroughly.
- Wipe Main Unit: Wipe the exterior of the grinder unit with a soft, damp cloth. Do not immerse the unit in water.
- Reassemble: Once all parts are dry, reinsert the upper burr and secure the bean hopper.
Troubleshooting
Common Issues and Solutions
| Issue | Possible Cause | Solution |
|---|---|---|
| Grinder does not start. | Not plugged in; hopper or container not correctly placed; safety interlock engaged. | Ensure power cord is securely plugged in. Check that the bean hopper and ground coffee container/portafilter adapter are correctly seated. |
| Inconsistent grind size. | Burrs are dirty or clogged; incorrect grind setting for bean type. | Clean the burrs thoroughly using the cleaning brush. Adjust the grind setting to a finer or coarser option as needed for your beans and brewing method. |
| Excessive static cling of grounds. | Dry air conditions; certain bean types. | This is common with coffee grinders. A small amount of static is normal. Try adding a single drop of water to the beans before grinding (Ross Droplet Technique) to reduce static. |
| Grinder is unusually loud or makes strange noises. | Foreign object in burrs; burrs are worn. | Unplug the grinder and carefully inspect the burrs for any foreign objects. If the issue persists after cleaning, contact customer support. |
Specifications
Technical Data
| Feature | Detail |
|---|---|
| Model Number | KG 521.M |
| Brand | De'Longhi |
| Colour | Silver |
| Material | Stainless Steel |
| Product Dimensions (L x W x H) | 17.53 x 28.45 x 45.97 cm (approx. 6.9 x 11.2 x 18.1 inches) |
| Item Weight | 2.8 kg (approx. 6.17 lbs) |
| Bean Hopper Capacity | 340 g (approx. 12 oz) |
| Power/Wattage | 150 watts |
| Voltage | 110-120 Volts |
| Grind Settings | 18 (Fine, Medium, Coarse) |
| Strength Settings | 3 (Light, Normal, Strong) |
Warranty and Support
Product Warranty
De'Longhi products are manufactured to the highest quality standards. This product comes with a limited warranty against defects in materials and workmanship. Please refer to the warranty card included with your product for specific terms, conditions, and duration. Keep your proof of purchase for warranty claims.
Customer Support
For technical assistance, troubleshooting beyond this manual, or warranty service, please contact De'Longhi customer support. Contact information can typically be found on the official De'Longhi website or on the product packaging.


