
SUNUV SUN9C
SUNUV UV Nail Lamp SUN9C User Manual
Model: SUN9C | Brand: SUNUV
Product Overview
The SUNUV SUN9C UV Nail Lamp is a versatile and efficient nail dryer designed for curing all types of gel nail polishes. Featuring a UV+LED dual light source, it significantly shortens curing times, making it ideal for both home and salon use. Its automatic sensor and user-friendly design ensure a convenient and safe manicure and pedicure experience.

Front view of the SUNUV SUN9C UV Nail Lamp, showcasing its sleek, arched design and internal LED lights.
Key Features
- Quick Drying & Auto Sensor: Equipped with UV+LED dual light sources for fast curing of all gels in 60 seconds. Features an automatic sensor that activates the lamp for 99 seconds when a hand is inserted, or use the 30s/60s timer buttons.
- Universal Gel Compatibility: Effectively cures all gel nail polishes, including base coat, top coat, color gel, hard gels, builder, acrylic, and sculpture gel. (Note: Not suitable for regular nail polish).
- Safe & User-friendly Design: Designed to be gentle on eyes and skin. Its lightweight, powerful, and compact form factor makes it easy to use and clean.
- Versatile Use: The open bottom design accommodates both fingernails and toenails, making it suitable for comprehensive manicure and pedicure needs.
- Efficient Lighting: Features 18 strategically placed UV+LED light beads for even and thorough curing.

Illustration of the 18 UV+LED light beads for faster, deeper curing.

The compact and portable dimensions of the SUNUV SUN9C nail lamp.
Setup Guide
Before first use, ensure all components are present and undamaged.
- Unpack the SUNUV SUN9C Nail Lamp and its accessories from the packaging.
- Connect the provided 1.5-meter power adapter to the DC input port on the back of the nail lamp.
- Plug the power adapter into a suitable electrical outlet (120 Volts).
- Place the lamp on a stable, flat surface.

The SUNUV SUN9C Nail Lamp and its included power adapter.
Operating Instructions
The SUNUV SUN9C offers both automatic and manual timer modes for optimal gel curing.
Automatic Sensor Mode (99s)
- Simply place your hand or foot into the lamp. The infrared sensor will automatically detect its presence and activate the lamp for a default curing time of 99 seconds.
- The lamp will automatically turn off once your hand or foot is removed.
Manual Timer Modes (30s/60s)
- Press the "30s" button once for a 30-second curing cycle.
- Press the "60s" button once for a 60-second curing cycle.
- The lamp will operate for the selected duration and then turn off automatically.

Smart infrared sensor for hands and feet, ensuring automatic operation.

The lamp features 30-second and 60-second timer settings for different gel types.
Step-by-Step Gel Polish Application
For best results, follow these general steps for gel polish application:
- Prep Nails: Clip nails to desired length, then file, shape, and buff nails.
- Cuticle Care: Trim and gently push back nail cuticles.
- Cleanse: Dust off nails and wipe with gel polish remover or rubbing alcohol until they are clean and oil-free.
- Apply Base Coat: Apply a thin, even layer of gel base coat.
- Cure Base Coat: Cure under the SUNUV lamp for 60-90 seconds.
- Apply Color Gel: Apply a thin, even layer of your chosen gel color polish.
- Cure Color Gel: Cure under the SUNUV lamp for 60-90 seconds. Repeat for additional coats as desired.
- Apply Top Coat: Apply a thin, even layer of gel top coat.
- Cure Top Coat: Cure under the SUNUV lamp for 60-90 seconds.
- Finish: Wipe the cured top coat with acetone or a gel cleanser to remove any sticky residue and reveal a high-gloss shine.
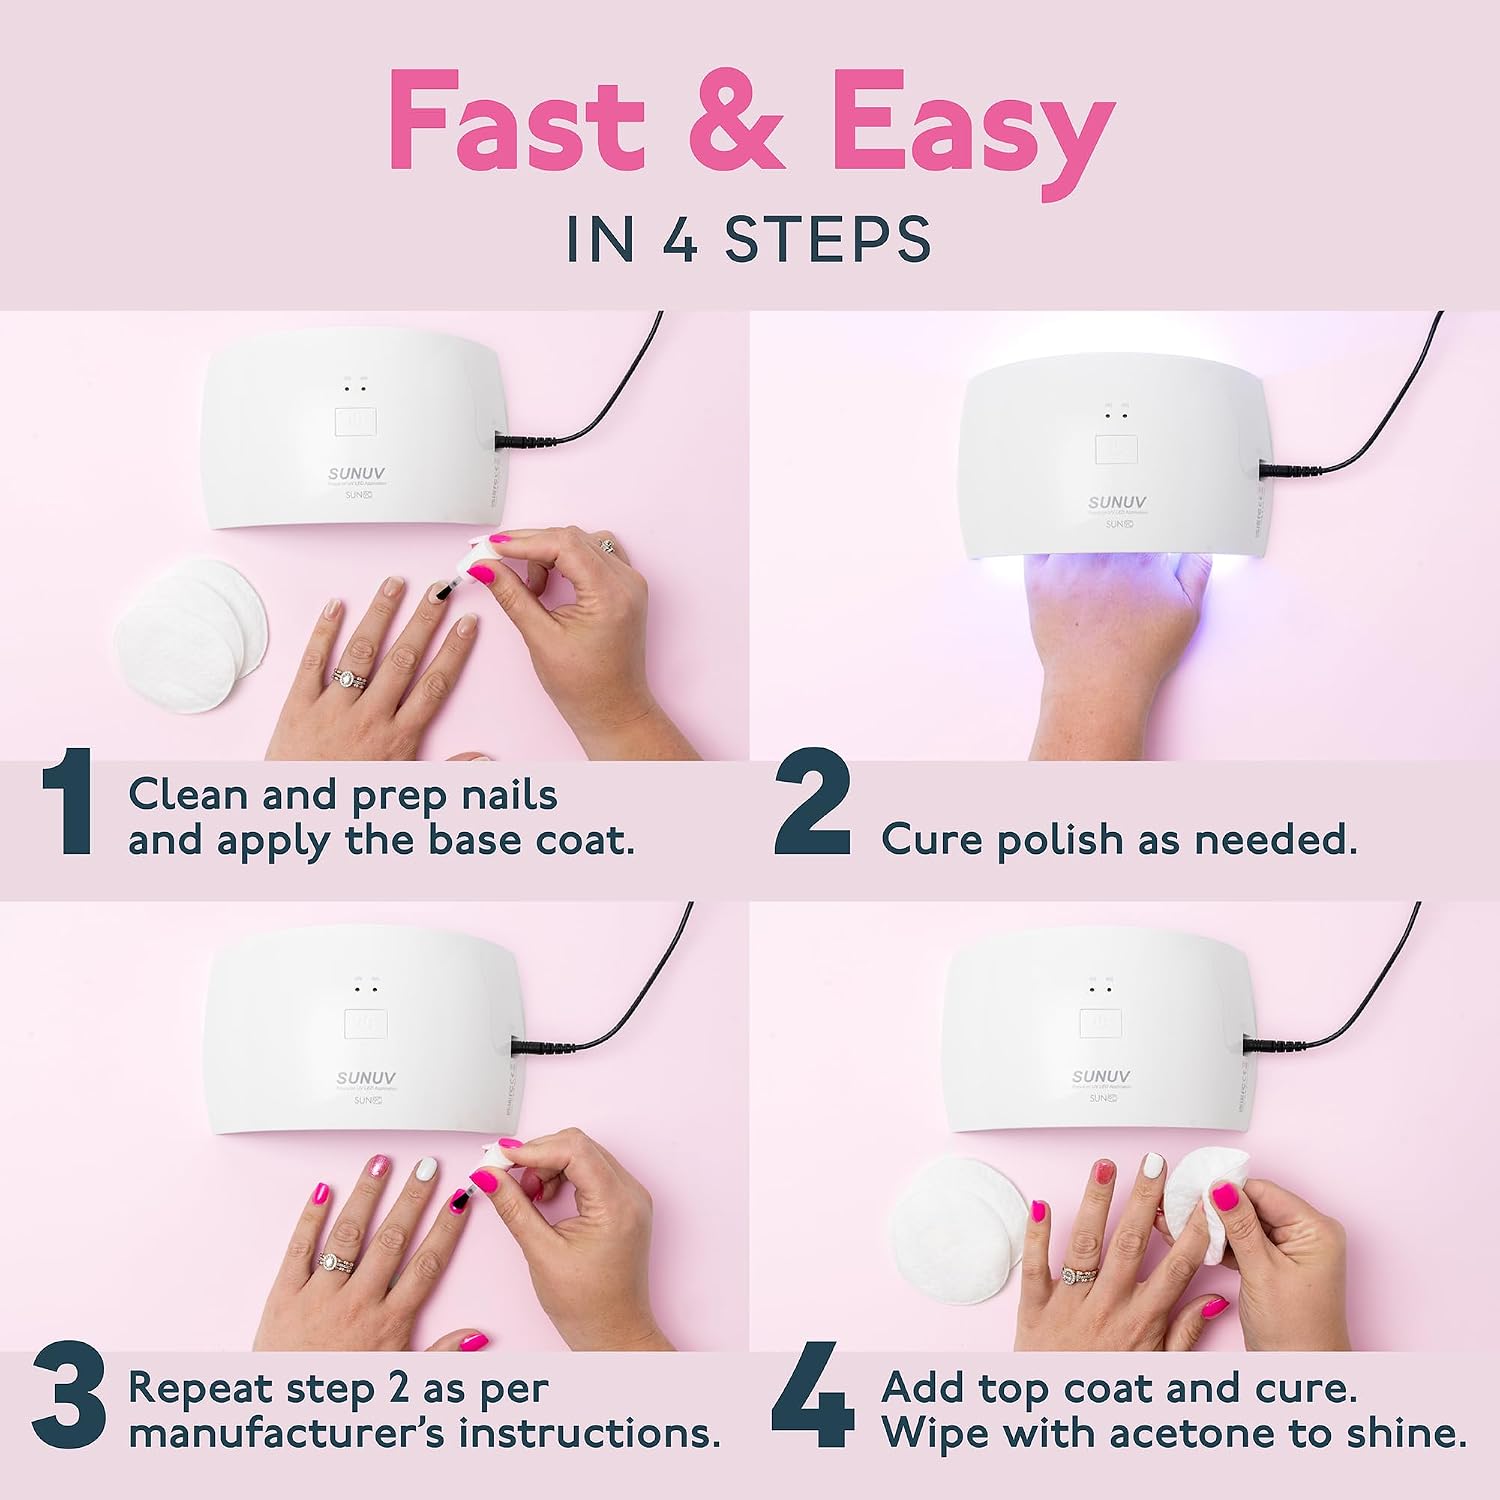
Simplified 4-step process for fast and easy gel nail application.
Important Information About Gel Curing
- It is normal for the base coat and color gel to be a little sticky after drying. This "tacky layer" helps subsequent layers of polish adhere fully and firmly to the nail.
- Only the top coat will be fully cured and dried to a non-tacky finish. This is normal and expected.
- Nail polish needs to maintain its brightness, so it won’t dry out completely until the final top coat is applied and cured.
- Do not apply gel polish too thick to avoid issues with curing and potential stinging sensations.
Gel Polish Application FAQs
- Why Won’t My Gel Polish Cure?
- It is completely normal for the base coat and color gel polish to be a little sticky after drying - this helps each layer of polish adhere fully and firmly to the nail.
- Only the top coat will fully cure and dry, giving you beautiful, salon quality nails.
- Our SUNUV nail lamps are designed to cure and dry gel polishes only, not regular nail polish. For regular nail polish, please use a fan or air dry.
- Help! My Gel Polish Is Taking Too Long To Dry.
- Curing time varies for each gel polish brand. Look at the recommended curing time for your specific polish and dry accordingly.
- We advise applying a thin layer of polish and curing each layer for 30-60 seconds. Avoid applying gel polish too thick.
- How Do I Avoid My Gel Polish From Stinging?
- Make sure you clean up any gel polish that may have gotten on your skin or cuticles before curing.
- Do not apply your gel polish too thick. If a stinging sensation occurs, remove your hand from the lamp for a few seconds, then reinsert.
Maintenance
Proper maintenance will ensure the longevity and optimal performance of your SUNUV SUN9C Nail Lamp.
- Cleaning: After each use, gently wipe the interior and exterior surfaces of the lamp with a soft, dry cloth. If necessary, use a small amount of rubbing alcohol on the cloth for stubborn residue, avoiding direct contact with the LED beads.
- Storage: Store the lamp in a cool, dry place away from direct sunlight and excessive moisture.
- Handling: Avoid dropping the lamp or subjecting it to strong impacts, as this may damage the internal components or LED beads.
- Power Cord: Always unplug the lamp by grasping the plug, not the cord. Do not use if the power cord is damaged.
Troubleshooting
| Problem | Possible Cause | Solution |
|---|---|---|
| Lamp does not turn on. | Power adapter not connected properly; no power from outlet; lamp malfunction. | Ensure power adapter is securely plugged into both the lamp and a working electrical outlet. Test the outlet with another device. If problem persists, contact customer support. |
| Gel polish is not curing or remains sticky. | Polish applied too thick; insufficient curing time; incorrect polish type (not gel); old/expired polish. | Apply thinner coats of gel polish. Increase curing time (e.g., 60-90 seconds per coat). Ensure you are using gel polish, not regular nail polish. Check polish expiration date. |
| Stinging or burning sensation during curing. | Gel polish on skin/cuticles; polish applied too thick; sensitive nails. | Ensure no gel polish is on your skin or cuticles before curing. Apply thinner coats. If sensation occurs, remove hand for a few seconds, then reinsert. This is often a temporary reaction. |
| Automatic sensor not working. | Obstruction to sensor; sensor malfunction. | Ensure nothing is blocking the sensor area. Try manually pressing the timer buttons. If the issue continues, contact customer support. |
Technical Specifications
| Feature | Specification |
|---|---|
| Brand | SUNUV |
| Model | SUN9C |
| Power | 24 Watts |
| Light Source Type | UV + LED (Dual Light Source) |
| Number of Light Sources | 18 LED Beads |
| Product Dimensions | 5"D x 8.2"W x 4"H (approx. 12.7cm D x 20.8cm W x 10.2cm H) |
| Item Weight | 7.84 ounces (approx. 222g) |
| Cable Length | 1.5 Meters |
| Timer Settings | 30s, 60s, 99s (Automatic Sensor) |
| Control Method | Touch Buttons, Automatic Sensor |
| Power Source | Corded Electric |
| Included Components | User Manual, Adapter |
Warranty and Customer Support
SUNUV stands behind the quality of its products. The SUNUV SUN9C Nail Lamp comes with a 12-Month Customer Service period.
If you encounter any issues or have questions regarding your product, please contact SUNUV customer service for assistance. You can find more information and contact details on the official SUNUV store page:
Related documentsSUN9C


Ask a question about this manual
Ask about setup, troubleshooting, compatibility, parts, safety, or missing instructions. Manuals+ will review the question and use this page’s manual context to help answer it.