
STANLEY SL18116
STANLEY SL18116 6-Gallon 4-Peak HP Stainless Steel Wet/Dry Vacuum Instruction Manual
Model: SL18116
Introduction
This manual provides essential instructions for the safe operation, maintenance, and troubleshooting of your STANLEY SL18116 6-Gallon 4-Peak HP Stainless Steel Wet/Dry Vacuum. Please read this manual thoroughly before using the product to ensure proper function and to prevent injury or damage.
Important Safety Note: This appliance is designed for indoor use only.
Product Overview
The STANLEY SL18116 is a versatile 6-gallon wet/dry vacuum featuring a 4-peak horsepower motor, designed for various cleaning tasks in garages, workshops, and homes. It offers 3-in-1 functionality for wet vacuuming, dry vacuuming, and blowing.
Components and Features
- 6-Gallon Stainless Steel Tank: Provides ample capacity for extended cleaning without frequent emptying.
- 4-Peak HP Motor: Delivers strong suction for various debris types.
- Rear Blower Port: Converts the vacuum into a powerful blower for clearing leaves and debris.
- Swivel Casters: Four casters ensure easy maneuverability.
- Accessory Holders: Integrated storage for included attachments.
- Large Carry Handle: For convenient transport and cord wrapping.
- Large Lid Latches: Securely fasten the motor head to the tank.
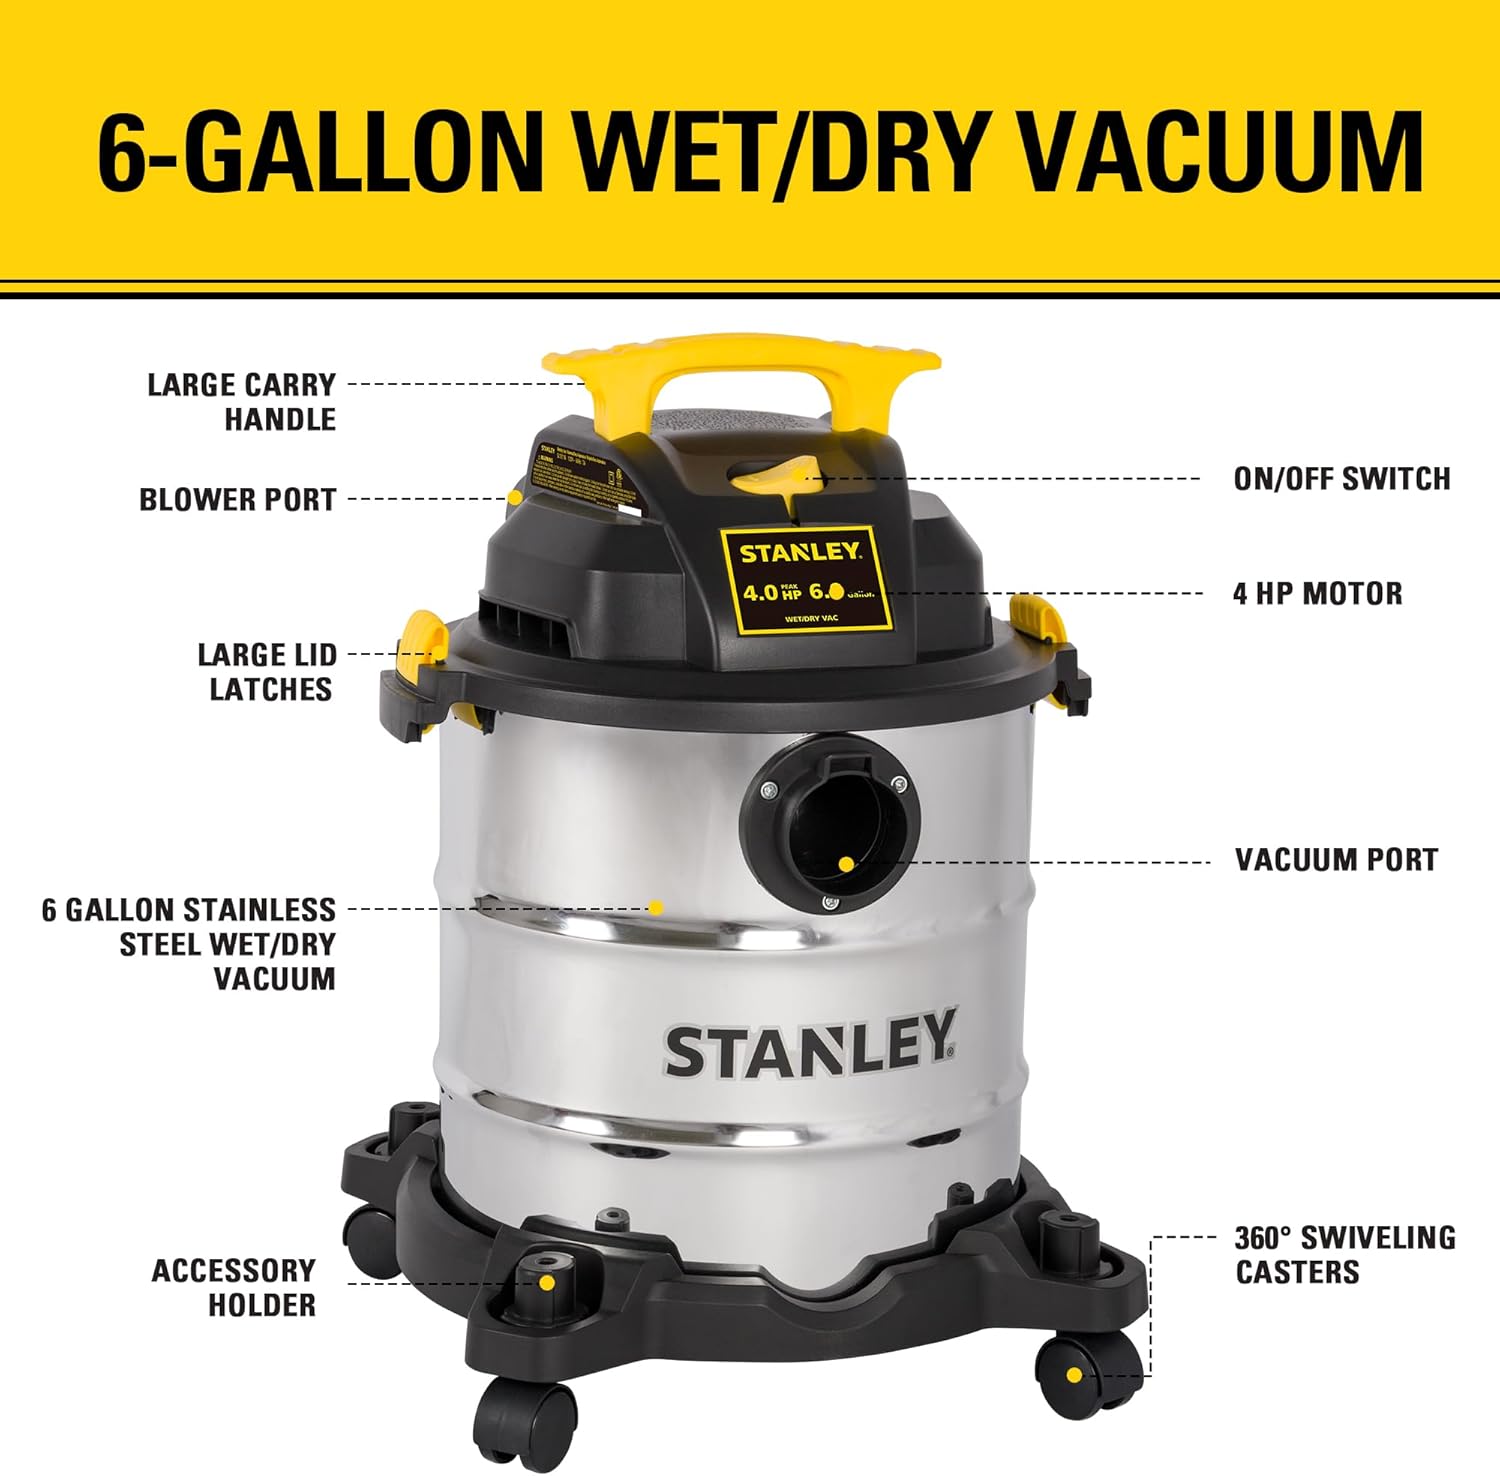
Figure 1: Labeled components of the STANLEY SL18116 Wet/Dry Vacuum, including the 4 HP motor, 6-gallon stainless steel tank, blower port, and swivel casters.
Included Accessories
- 1-1/4 inch x 6-foot Super Flexible Hose
- 3 Extension Wands
- Gulper Nozzle
- Floor Nozzle
- Crevice Nozzle
- Foam Filter (for wet use)
- Dust Bag (for dry use)
- Reusable Dry Filter (for dry use)
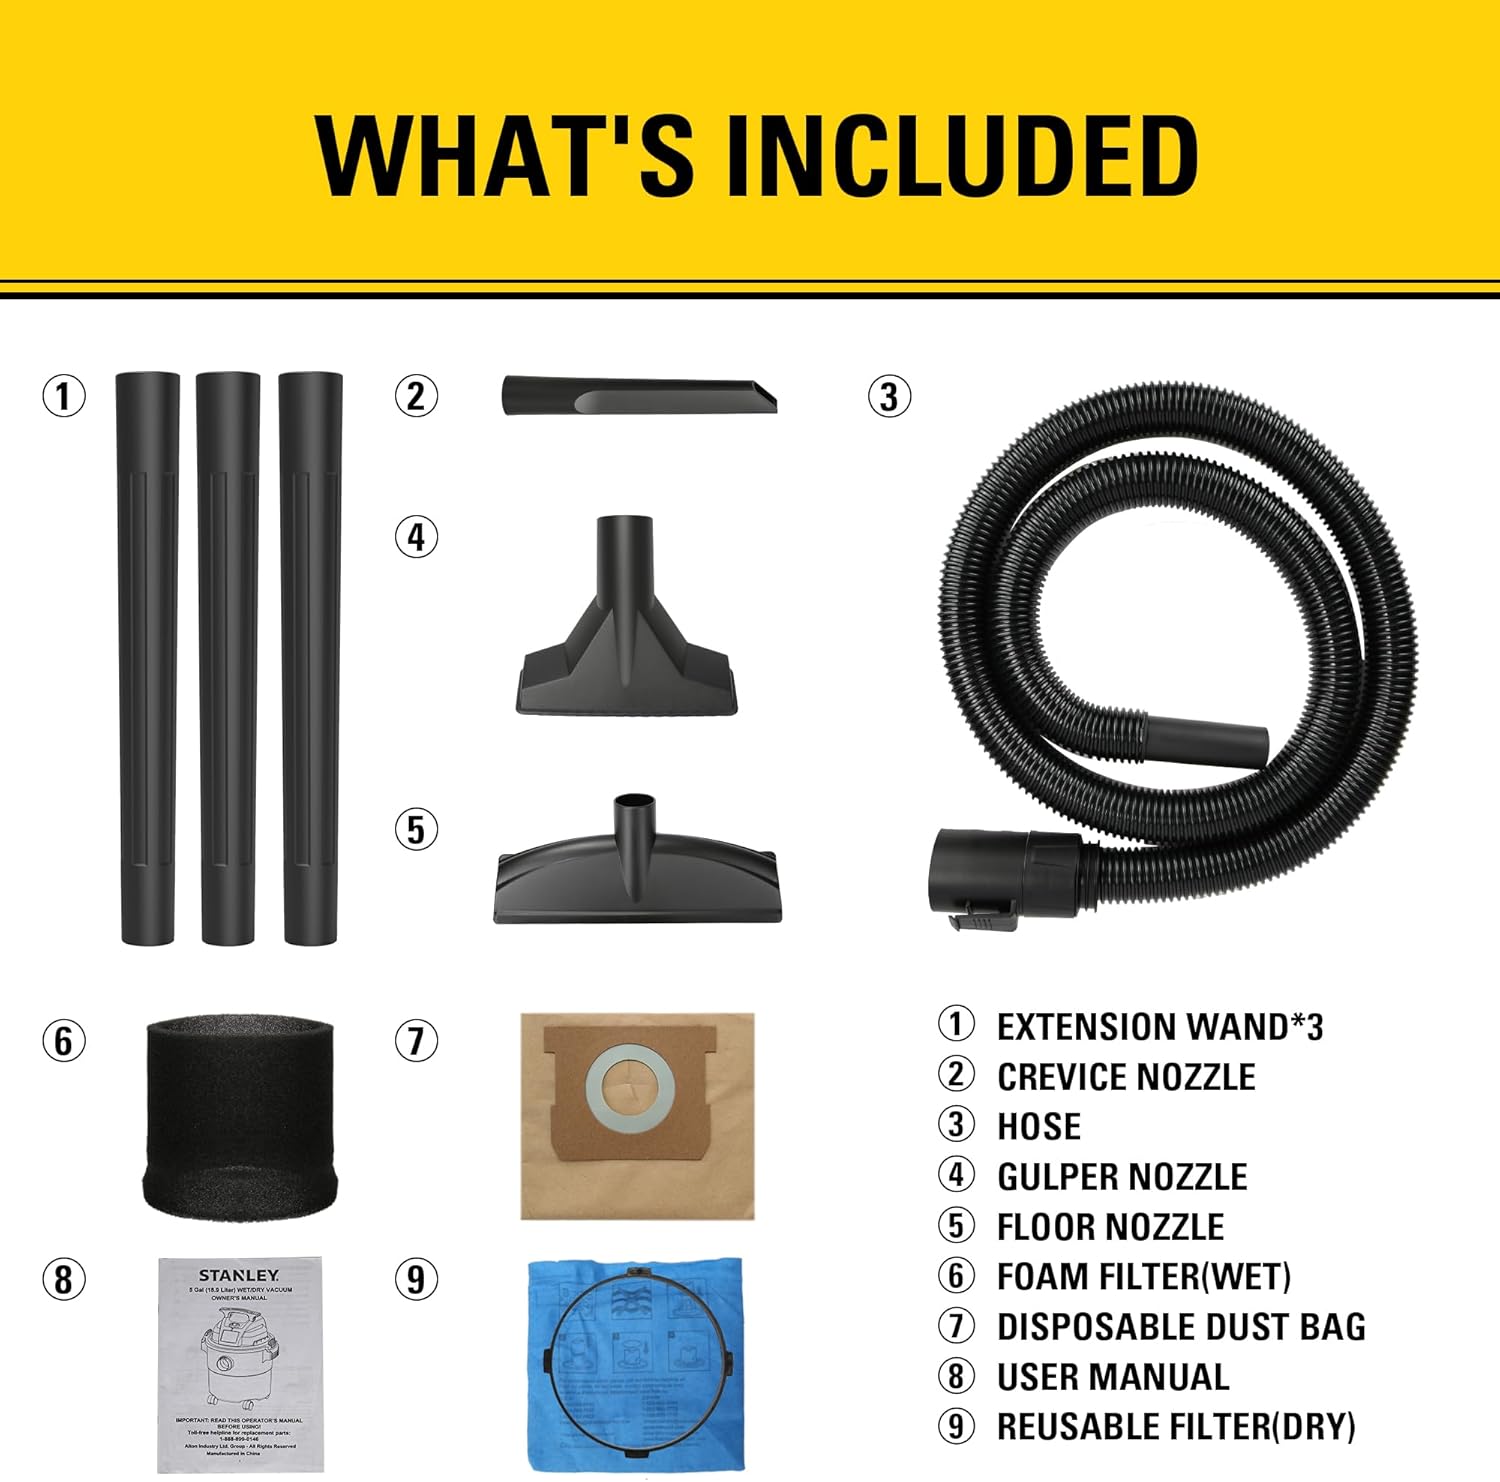
Figure 2: Overview of all accessories included with the vacuum, such as extension wands, various nozzles, hose, and filters.
Setup Instructions
- Unpacking: Carefully remove all components from the packaging. Ensure all listed accessories are present.
- Caster Assembly: Insert the four swivel casters into the base of the vacuum until they click securely into place.
- Filter Installation (Dry Vacuuming):
- Ensure the foam filter is removed.
- Place the reusable dry filter over the filter cage.
- For fine dust, install a disposable dust bag inside the tank, ensuring the opening aligns with the vacuum port.

Figure 3: Visual guide for washing the foam filter, washing the reusable filter, and installing the dust collection bag.
- Filter Installation (Wet Vacuuming):
- Remove the reusable dry filter and any dust bag.
- Install the foam filter over the filter cage. This filter protects the motor from liquids.
- Attach Hose: Connect the flexible hose to the vacuum port on the front of the motor head. Ensure it clicks into place.
- Attach Accessories: Connect extension wands and desired nozzle (gulper, floor, or crevice) to the end of the hose.
Operating Instructions
Dry Vacuuming
For dry debris, ensure the reusable dry filter is installed and a dust bag is optionally used. Connect the hose and appropriate nozzle. Plug the vacuum into a suitable power outlet and turn the ON/OFF switch to 'ON'.
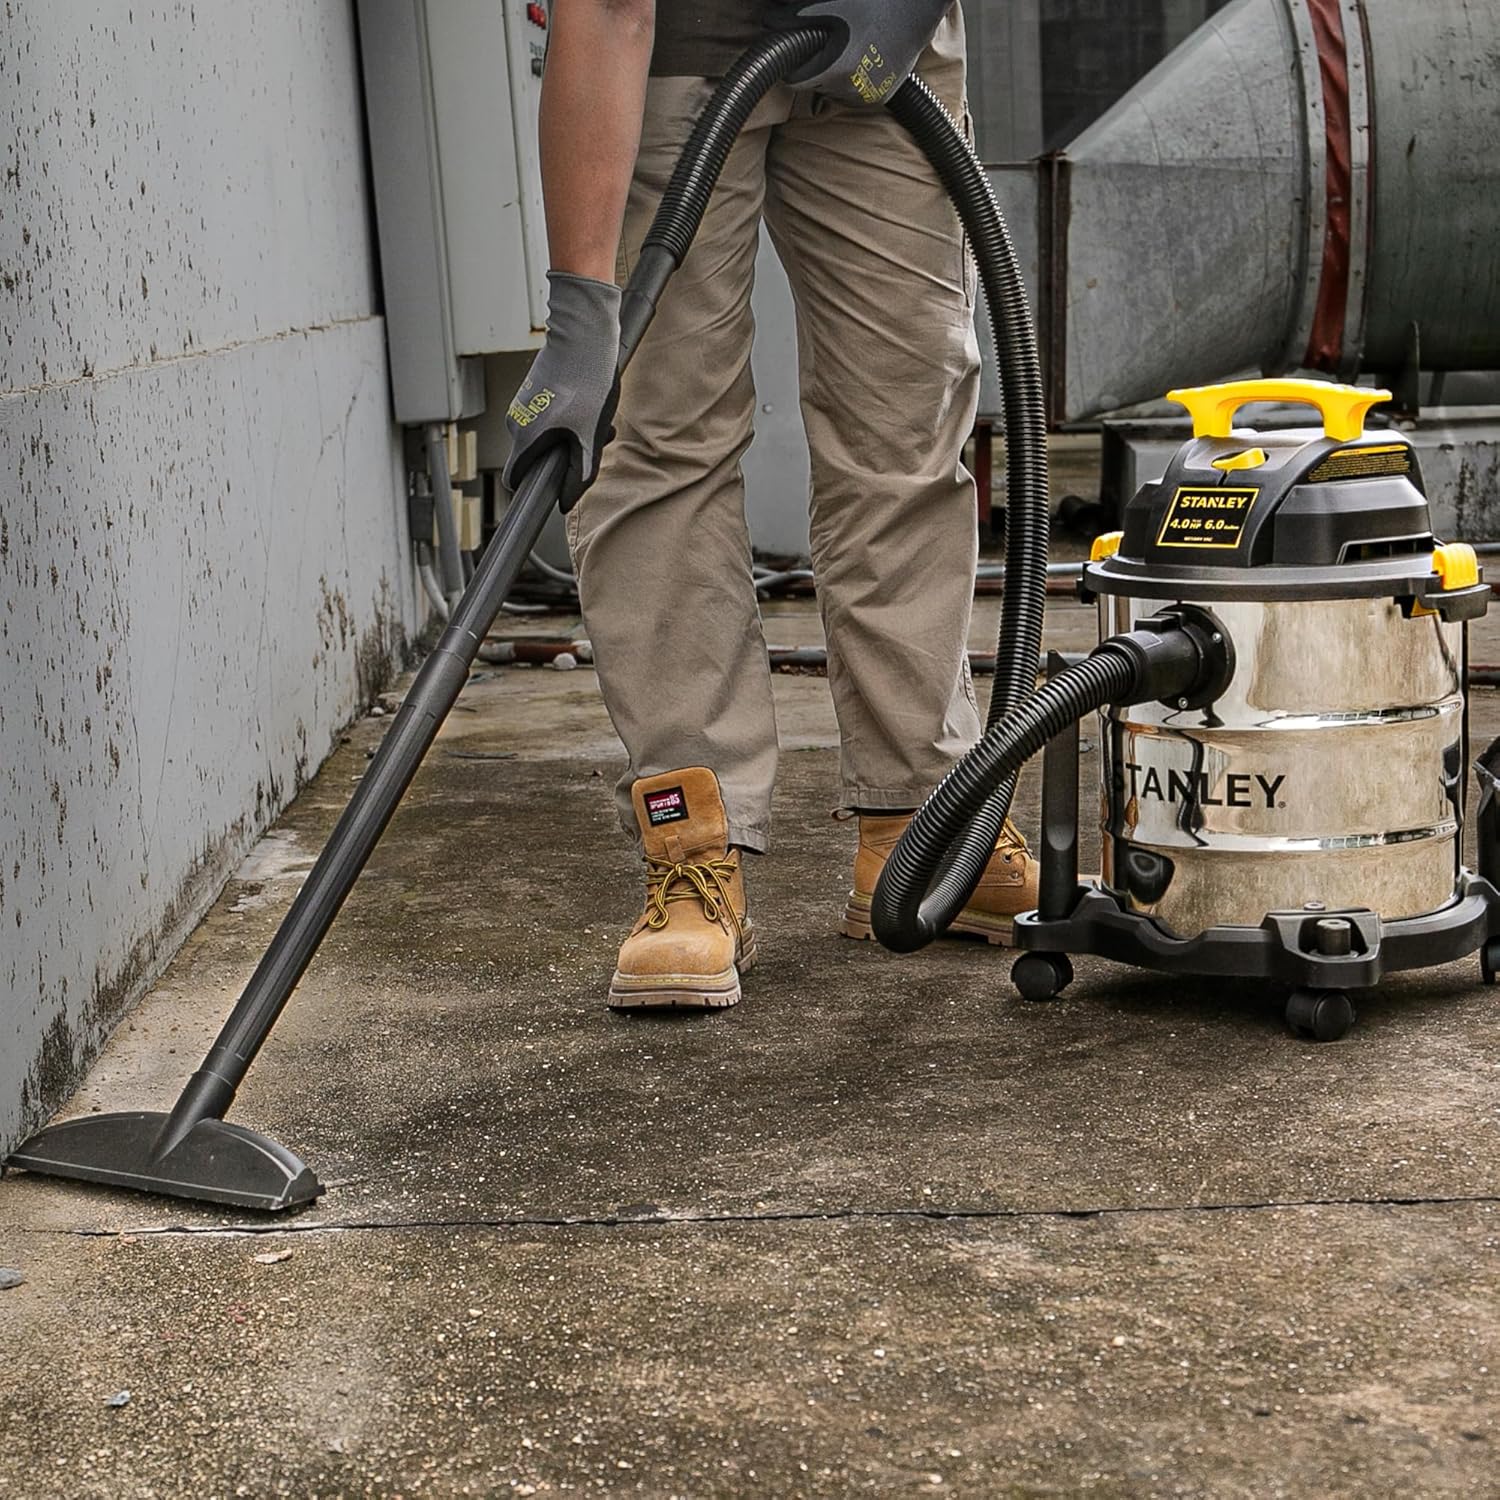
Figure 4: Operating the vacuum for dry cleaning tasks, demonstrating the use of the floor nozzle on a concrete surface.
Wet Vacuuming
For liquid spills, ensure the foam filter is installed and the reusable dry filter and dust bag are removed. The vacuum features a float shut-off mechanism that automatically stops suction when the tank is full, preventing overflow and motor damage.

Figure 5: Explanation of the safe buoy technology, which automatically stops the vacuum when the tank is full during wet operation.

Figure 6: Demonstrating wet vacuuming, showing the vacuum effectively picking up liquid from a hard surface.
Blower Function
To use the blower function, detach the hose from the vacuum port and connect it to the rear blower port. This allows the vacuum to expel air, useful for clearing leaves or light debris from surfaces.

Figure 7: The vacuum being used as a blower to clear leaves and light debris from an outdoor area.
Using Specific Nozzles
- Floor Nozzle: Ideal for general cleaning of large floor areas.
- Gulper Nozzle: Designed for picking up larger debris.
- Crevice Nozzle: Perfect for reaching tight spaces, corners, and edges.

Figure 8: Detailed view of the gulper nozzle, floor brush, and crevice nozzle, highlighting their distinct designs for various cleaning applications.
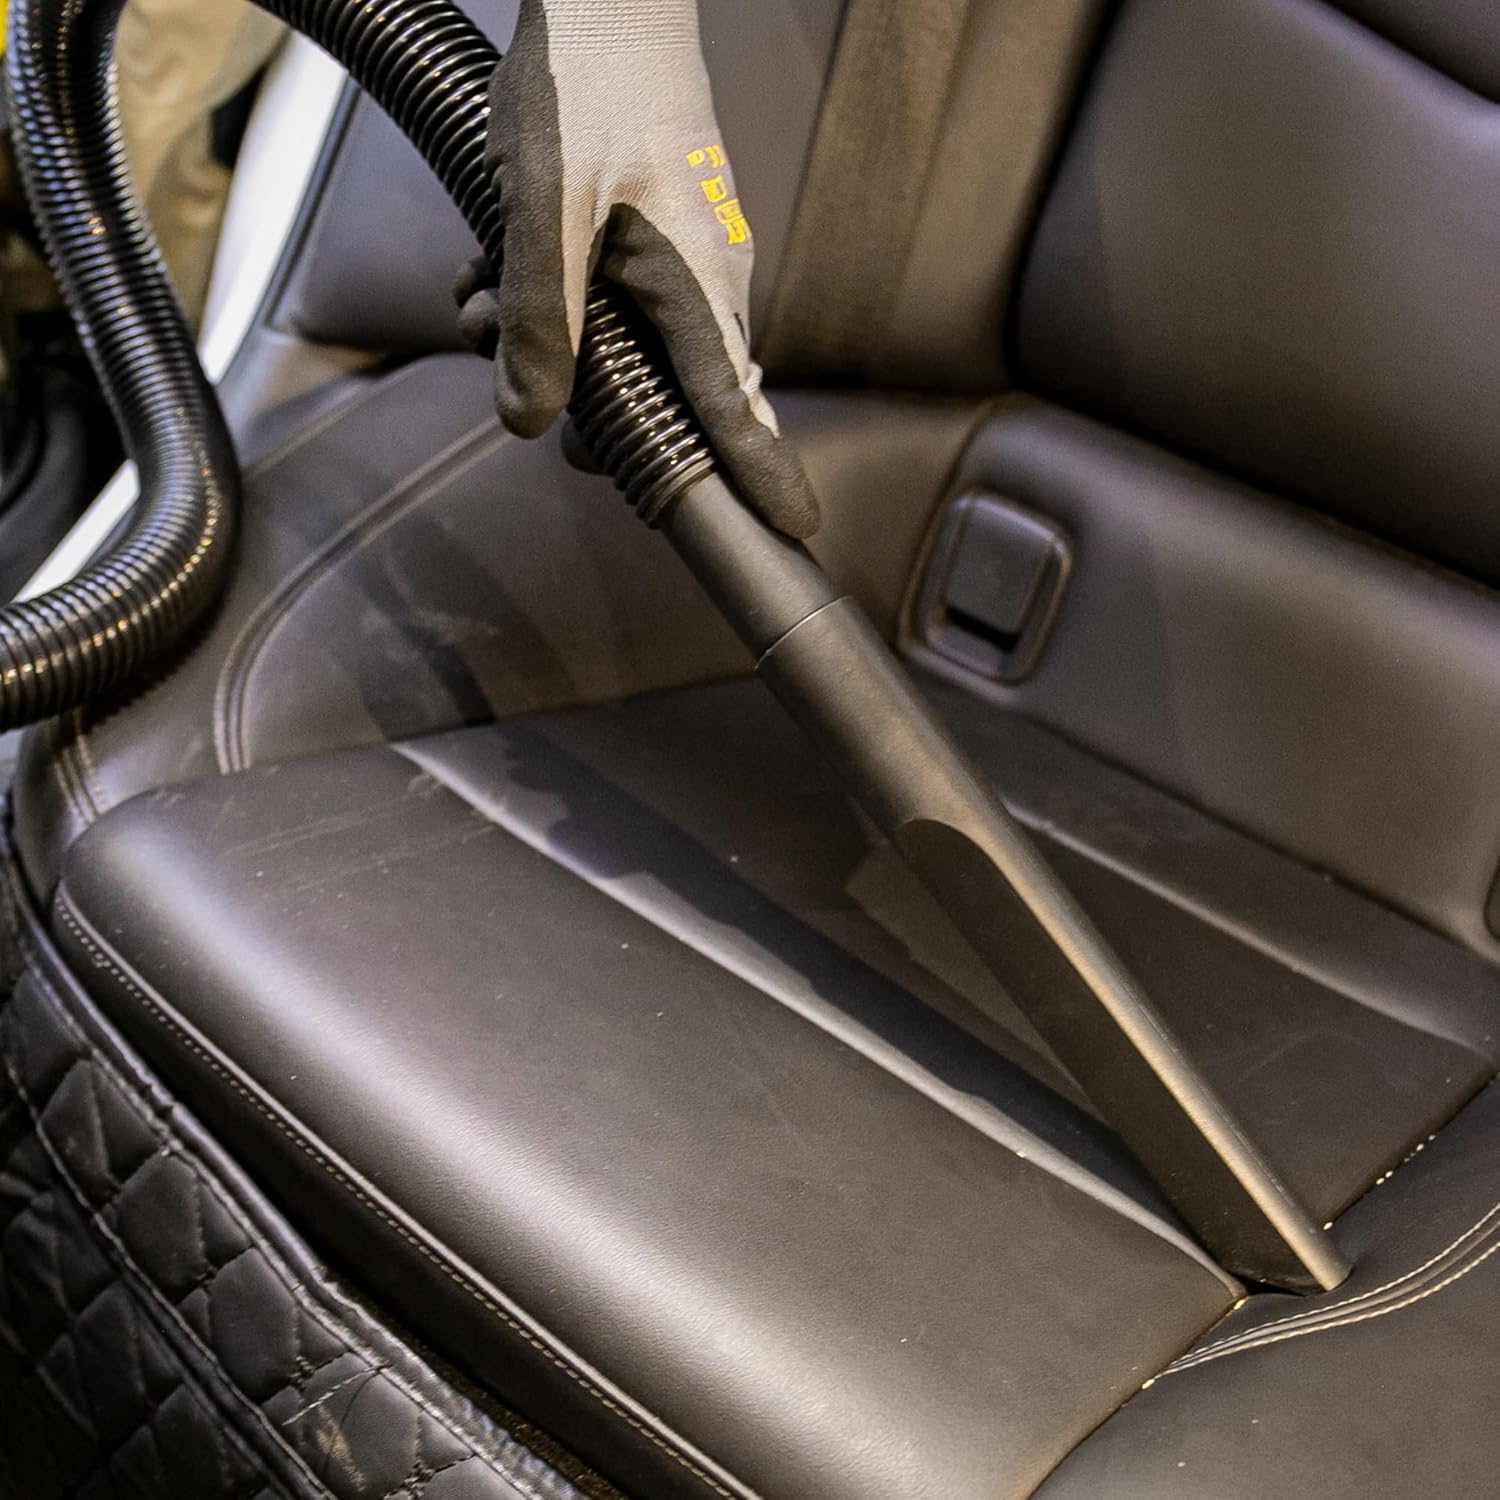
Figure 9: Demonstrating the crevice nozzle in use for detailed cleaning inside a vehicle, reaching narrow gaps between seats.
Maintenance
Regular maintenance ensures optimal performance and extends the life of your vacuum.
Emptying the Tank
After wet or dry vacuuming, unlatch the motor head and carefully lift it off the tank. Dispose of collected debris or liquids responsibly. Clean the inside of the tank as needed.
Filter Cleaning
- Foam Filter: For wet use, rinse the foam filter with water and allow it to air dry completely before reinstallation.
- Reusable Dry Filter: For dry use, tap off excess dust or rinse with water. Ensure it is completely dry before reuse.
- Dust Bag: Replace disposable dust bags when full.
Figure 10: Visual instructions for cleaning the foam filter and reusable filter, and for installing a new dust collection bag.
Troubleshooting
| Problem | Possible Cause | Solution |
|---|---|---|
| Vacuum does not turn on | No power, faulty switch, tripped circuit breaker | Check power cord connection, test outlet, reset circuit breaker, contact support if switch is faulty. |
| Loss of suction | Clogged hose/nozzle, full tank, dirty filter, improperly sealed lid | Clear obstructions, empty tank, clean/replace filter, ensure lid latches are secure. |
| Water/debris escaping from exhaust | Incorrect filter for wet use, damaged filter, tank overfilled (wet use) | Ensure foam filter is installed for wet use, replace damaged filter, empty tank. |
| Motor overheats | Blocked airflow, prolonged heavy use | Check for blockages in hose/filters, allow motor to cool down. |
Specifications
- Model Name: STANLEY SL18116
- Capacity: 6 Gallons
- Motor Horsepower: 4 Peak HP
- Hose Length: 6 Feet
- Power Cord Length: 10 Feet
- Product Dimensions: 12.5"L x 12.5"W x 20"H
- Item Weight: 14.82 pounds
- Filter Type: Foam (wet), Reusable Dry Filter, Disposable Dust Bag
- Special Feature: Rear Blower Port
- Indoor/Outdoor Usage: Indoor Only
- Noise Level: 80 dB
- Amperage: 3.7 Amps
- Control Method: Touch (ON/OFF Switch)
- Finish Type: Stainless Steel
- UPC: 871613007560
Warranty
The STANLEY SL18116 Wet/Dry Vacuum comes with a manufacturer and distributor 1-year limited warranty. Please retain your proof of purchase for warranty claims.
Support
For further assistance, replacement parts, or warranty inquiries, please refer to the contact information provided with your product packaging or visit the official STANLEY website.
Related documentsSL18116


Ask a question about this manual
Ask about setup, troubleshooting, compatibility, parts, safety, or missing instructions. Manuals+ will review the question and use this page’s manual context to help answer it.