
1. Introduction
Thank you for choosing the Absaar AB100-1215 Automatic Battery Charger GPA15. This charger is designed for safe and efficient charging of 12V and 24V lead-acid batteries, including standard, GEL, and AGM types. It features automatic voltage recognition, insulated clamps, and protection against reverse polarity, overload, and short circuits. Please read this manual carefully before use to ensure proper operation and to prevent damage to the charger or battery.
2. Safety Instructions
- Always wear eye protection and protective clothing when working with batteries.
- Ensure the charging area is well-ventilated to disperse explosive gases.
- Never smoke or allow sparks or flames in the vicinity of the battery or charger.
- Disconnect the AC power supply before connecting or disconnecting the charging clamps.
- Connect the positive (red) clamp to the positive (+) battery terminal and the negative (black) clamp to the negative (-) battery terminal or vehicle chassis away from the battery.
- Avoid touching the clamps together when the charger is powered on.
- Do not charge frozen batteries. Allow them to thaw before charging.
- Keep the charger away from water, rain, or excessive moisture.
- Do not attempt to open or modify the charger. Refer all servicing to qualified personnel.
- This appliance is not intended for use by persons (including children) with reduced physical, sensory or mental capabilities, or lack of experience and knowledge, unless they have been given supervision or instruction concerning use of the appliance by a person responsible for their safety.
3. Product Overview
The Absaar AB100-1215 GPA15 charger features a robust design with an integrated handle for portability. The front panel includes a digital display and indicator LEDs for monitoring the charging process.
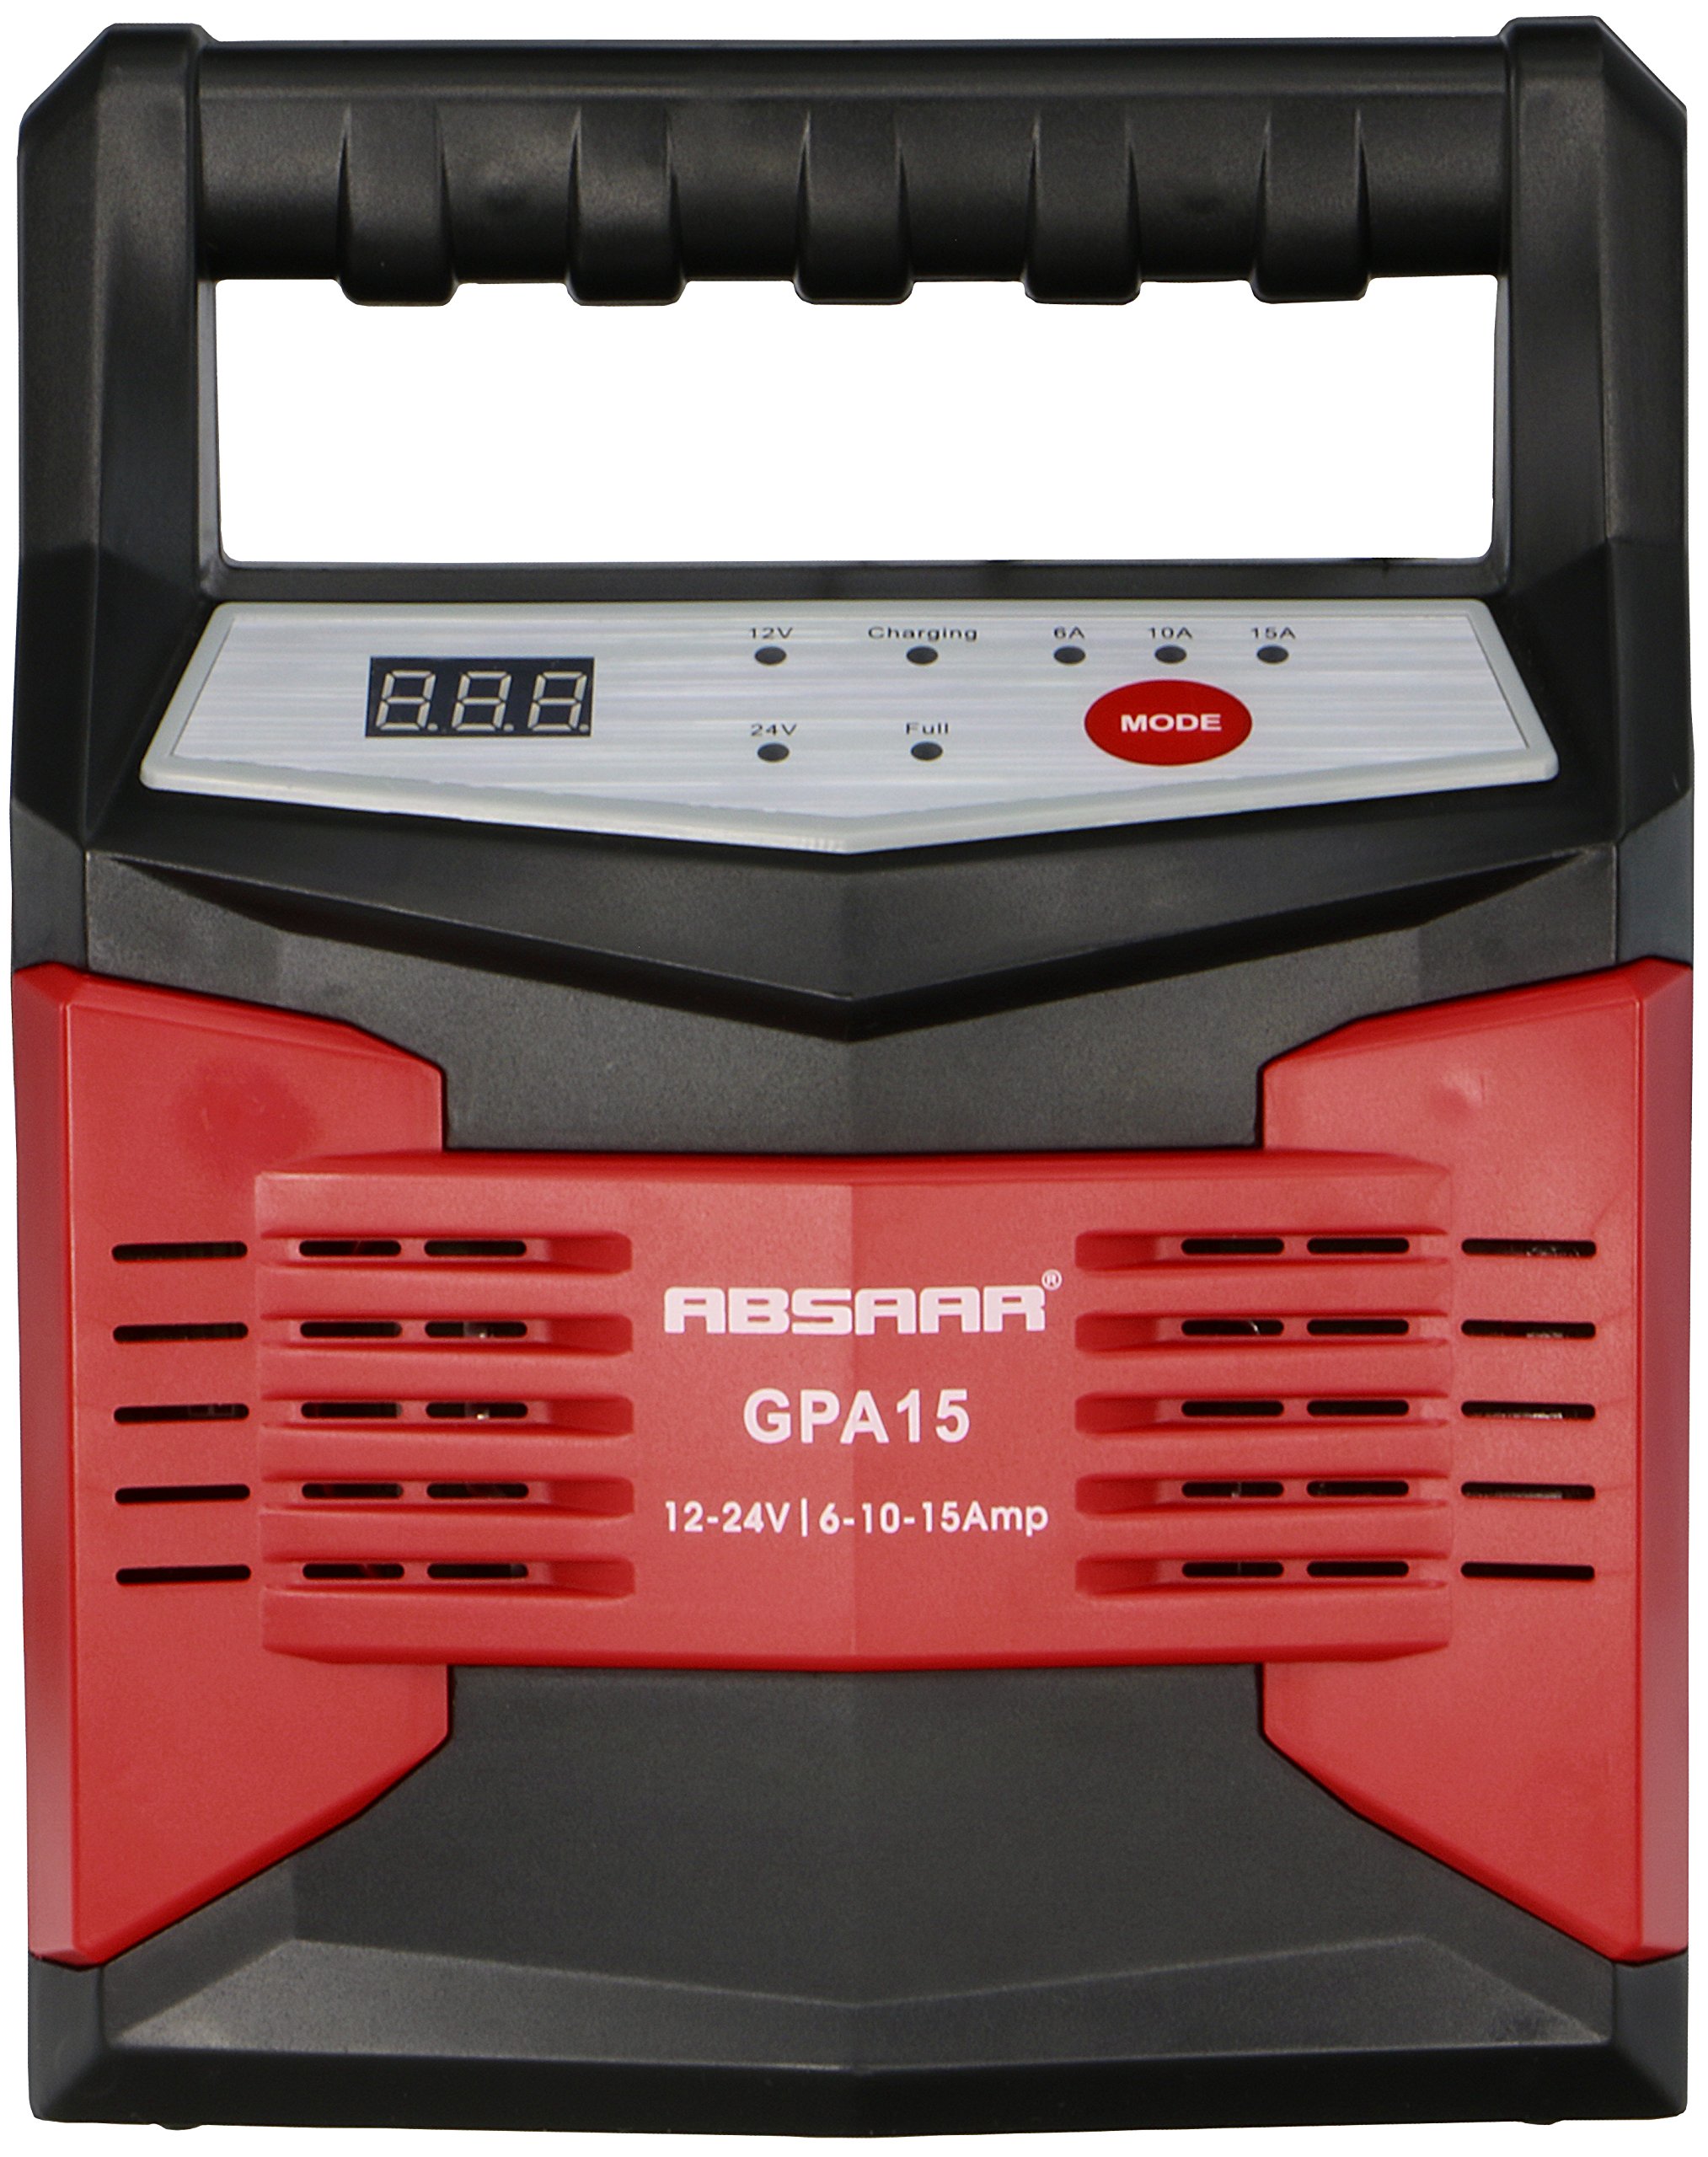
Figure 1: Absaar AB100-1215 GPA15 Automatic Battery Charger. This image shows the overall unit with its integrated handle, control panel, power cable, and battery clamps.
Control Panel Features:

Figure 2: Close-up view of the control panel. The digital display shows charging status, and LEDs indicate 12V/24V, Charging, Full, and current output (6A, 10A, 15A). The red 'MODE' button allows selection of charging current.
- Digital Display: Shows charging voltage, current, or error codes.
- 12V / 24V Indicators: Lights up to show the detected battery voltage.
- Charging Indicator: Illuminates when the battery is actively charging.
- Full Indicator: Illuminates when the battery is fully charged.
- Current Output Indicators (6A, 10A, 15A): Shows the selected or active charging current.
- MODE Button: Used to select the desired charging current (6A, 10A, 15A) for 12V batteries. For 24V batteries, the charger automatically selects the appropriate current.
4. Setup
- Prepare the Battery: Ensure the battery terminals are clean and free of corrosion. If charging a conventional lead-acid battery with removable caps, check the electrolyte level and top up with distilled water if necessary.
- Connect the Clamps:
- Connect the red positive (+) clamp to the positive (+) terminal of the battery.
- Connect the black negative (-) clamp to the negative (-) terminal of the battery. If charging a battery installed in a vehicle, connect the black clamp to the vehicle chassis away from the battery and fuel line.
Note: The charger features reverse polarity protection. If connected incorrectly, the charger will not operate, and an error may be displayed.
- Connect to Power: Plug the charger's AC power cord into a standard electrical outlet (230V AC, 50Hz). The charger will power on and automatically detect the battery voltage (12V or 24V).
5. Operating Instructions
Once connected and powered on, the charger will automatically detect the battery voltage. The corresponding 12V or 24V indicator will illuminate.
Charging 12V Batteries:
- After voltage detection, the charger will default to a charging current.
- Press the MODE button to cycle through the available charging currents: 6A, 10A, or 15A. Select the appropriate current based on your battery's capacity and manufacturer recommendations.
- 6A: Suitable for smaller 12V batteries (e.g., motorcycle, lawnmower) or for a slower, gentler charge on larger batteries.
- 10A: General purpose charging for most car batteries.
- 15A: Faster charging for larger car batteries (20-100 Ah).
- The "Charging" indicator will illuminate, and the digital display will show the charging status (e.g., voltage, current).
- When the battery is fully charged, the "Full" indicator will illuminate, and the charger will switch to maintenance mode (float charge) to prevent overcharging.
Charging 24V Batteries:
- For 24V batteries (e.g., heavy vehicles, construction equipment), the charger automatically selects the appropriate charging current. The MODE button is not active for 24V charging.
- The "Charging" indicator will illuminate, and the digital display will show the charging status.
- When the battery is fully charged, the "Full" indicator will illuminate, and the charger will switch to maintenance mode.
Disconnecting the Charger:
- Unplug the AC power cord from the electrical outlet.
- Disconnect the black negative (-) clamp from the battery terminal or vehicle chassis.
- Disconnect the red positive (+) clamp from the battery terminal.
6. Maintenance
- Cleaning: Disconnect the charger from power before cleaning. Wipe the exterior with a soft, dry cloth. Do not use solvents or abrasive cleaners.
- Storage: Store the charger in a cool, dry place when not in use. Ensure cables are neatly coiled and clamps are clean.
- Cable Inspection: Regularly inspect the power cord and charging cables for any signs of damage, cuts, or fraying. Do not use the charger if cables are damaged.
7. Troubleshooting
| Problem | Possible Cause | Solution |
|---|---|---|
| Charger does not turn on. | No AC power; faulty outlet; internal fault. | Check power outlet with another appliance. Ensure power cord is fully plugged in. If problem persists, contact support. |
| "Charging" indicator does not light up. | Incorrect battery connection (reverse polarity); battery is already full; battery is severely discharged or faulty. | Verify correct clamp connection (+ to +, - to -). Check if "Full" indicator is on. Test battery condition. |
| Digital display shows an error code. | Specific error (e.g., reverse polarity, short circuit, over-temperature). | Refer to the charger's specific error code list (if available on the unit or packaging). Common errors include:
|
| Battery not charging or charging slowly. | Incorrect current selection (for 12V); battery too large for selected current; faulty battery. | For 12V, ensure appropriate current (6A, 10A, 15A) is selected. Allow more time for charging. Have battery tested by a professional. |
8. Specifications

Figure 3: Product label on the back of the Absaar AB100-1215 GPA15 charger, detailing electrical specifications and certifications.
| Feature | Detail |
|---|---|
| Model Number | AB100-1215 |
| Brand | Absaar |
| Input Voltage | 230V AC, 50Hz (Standard European) |
| Output Voltage | 12V / 24V DC (Automatic Recognition) |
| Charging Current (12V) | 6A, 10A, 15A (Selectable) |
| Charging Current (24V) | Automatic selection |
| Battery Capacity (12V) | 20 - 100 Ah |
| Battery Types | Standard Lead-Acid, GEL, AGM |
| Protection Features | Reverse Polarity, Overload, Short Circuit |
| Manufacturer | MSA International S.A. |
9. Warranty Information
This Absaar AB100-1215 Automatic Battery Charger GPA15 comes with a 2-year warranty from the date of purchase. This warranty covers defects in materials and workmanship under normal use. It does not cover damage resulting from misuse, abuse, unauthorized modification, or improper installation. Please retain your proof of purchase for warranty claims. For specific warranty terms and conditions, refer to the documentation included with your product or contact Absaar customer support.
10. Support
For technical assistance, troubleshooting beyond this manual, or warranty inquiries, please contact Absaar customer support. Contact information can typically be found on the product packaging, the Absaar official website, or through your retailer.
Manufacturer: MSA International S.A.