Dorman 924-611
Dorman 924-611 Trailer Hitch Connector User Manual
Model: 924-611
1. Product Overview
The Dorman 924-611 Trailer Hitch Connector is engineered as a direct replacement for the original hardware on specified vehicle applications. This component is manufactured from quality materials to ensure reliable performance and extended service life, providing a dependable solution for your towing needs.
Key Features:
- Direct Replacement: Designed to match the appearance and function of the factory hardware on specified applications.
- Ideal Solution: A reliable replacement for an original part that may be missing or has failed due to fatigue.
- Durable Construction: Manufactured from quality materials to ensure reliable performance and long service life.
- Trustworthy Quality: Backed by a team of product experts with over a century of automotive experience.
- Ensured Fit: Verify compatibility by inputting your vehicle's make, model, and trim level into a fitment tool.
Product Components:

Figure 1.1: Front view of the Dorman 924-611 Trailer Hitch Connector and its accompanying mounting bracket. The connector features a multi-pin electrical interface, and the bracket is designed for secure attachment to the vehicle chassis.

Figure 1.2: Rear view of the Dorman 924-611 Trailer Hitch Connector, showing the wiring harness connection point and the reverse side of the mounting bracket with part numbers.
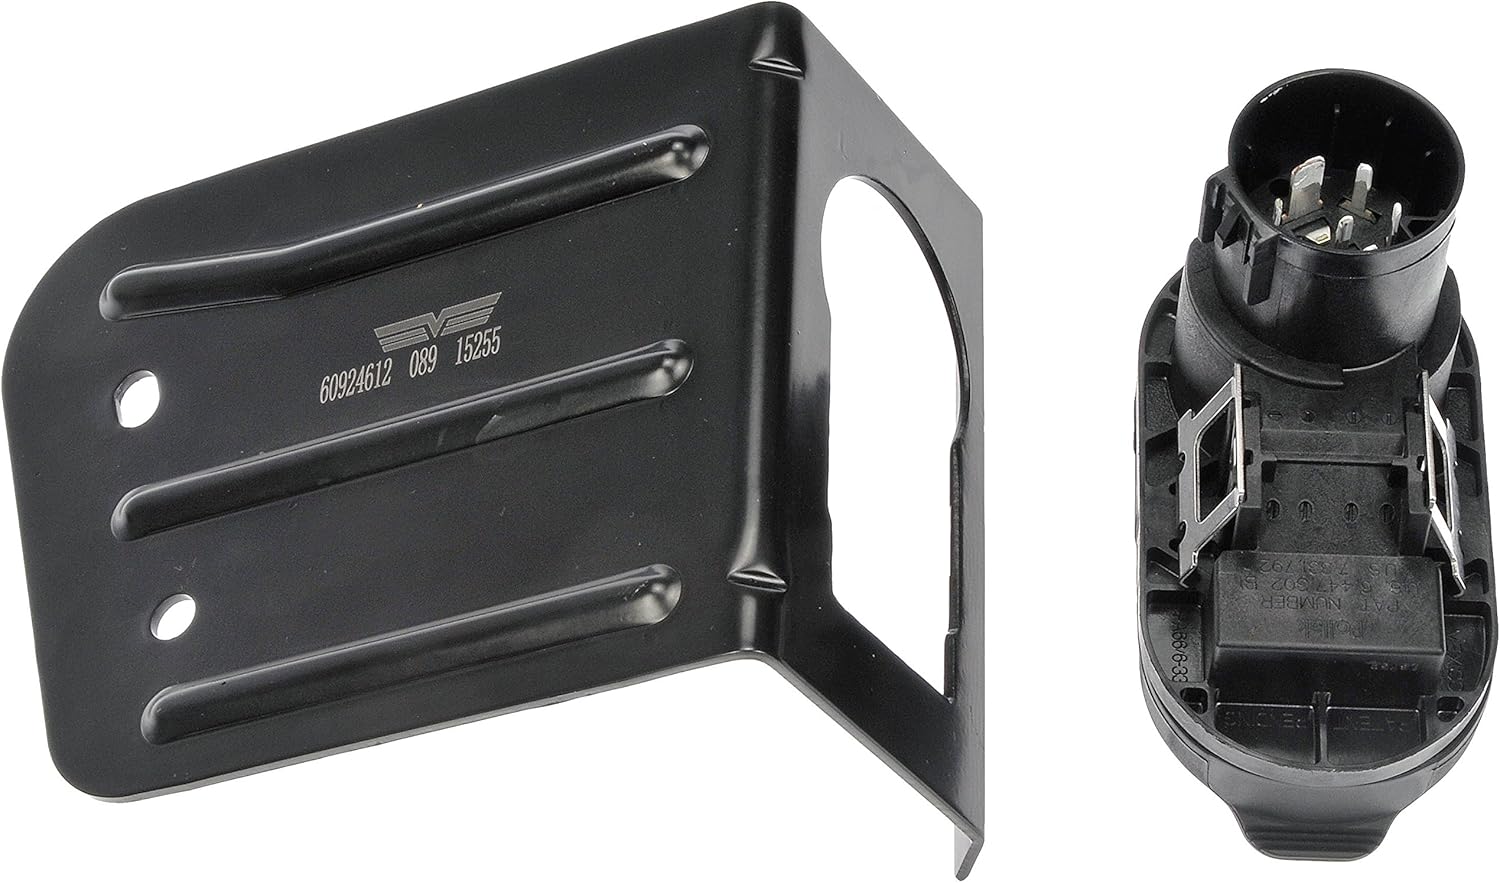
Figure 1.3: Side view of the Dorman 924-611 Trailer Hitch Connector, illustrating the profile of the connector and the mounting bracket's L-shape for installation.
2. Specifications
| Attribute | Detail |
|---|---|
| Brand | Dorman |
| Model Number | 924-611 |
| Item Weight | 1.34 pounds |
| Product Dimensions | 6.65 x 6.55 x 3.7 inches |
| Manufacturer Part Number | 924-611 |
| OEM Part Numbers | 68014986AB; 9C3Z-14489-A; 9U5Z-14489-MAA; BU5Z-14A541-A |
| Exterior Finish | Machined |
| Date First Available | July 13, 2016 |
3. Installation Instructions
This Dorman trailer hitch connector is designed for direct replacement. While installation can be straightforward for experienced individuals, it is recommended that installation be performed by a qualified automotive technician if you are unsure of the process.
Required Tools (May Vary):
- Basic hand tools (wrenches, sockets, screwdrivers)
- Wire cutters/strippers (if wiring modifications are needed)
- Electrical tape or heat shrink tubing (for securing connections)
- Dielectric grease (optional, for electrical connections)
Installation Steps:
- Safety First: Ensure the vehicle is turned off, the parking brake is engaged, and the battery is disconnected before beginning any electrical work.
- Locate Existing Connector: Identify the location of the existing trailer hitch connector on your vehicle. This is typically near the rear bumper or within the vehicle's frame.
- Disconnect Old Connector: Carefully disconnect the wiring harness from the old connector. If the connector is mounted to a bracket, unbolt or unclip it from the vehicle.
- Inspect Wiring: Examine the vehicle's wiring harness for any signs of corrosion, damage, or wear. Repair any issues before proceeding.
- Connect New Connector: Attach the vehicle's wiring harness to the new Dorman 924-611 connector. Ensure a secure and proper connection. Apply dielectric grease to the electrical pins if desired, to prevent corrosion.
- Mount New Connector: Secure the new connector and its mounting bracket to the vehicle using the appropriate hardware. Ensure it is firmly attached and not loose.
- Test Functionality: Reconnect the vehicle's battery. Test all trailer light functions (running lights, brake lights, turn signals) using a trailer or a trailer light tester.
- Secure Wiring: Ensure all wiring is routed safely and secured away from moving parts or hot surfaces.
4. Operating Instructions
Once the Dorman 924-611 Trailer Hitch Connector is properly installed, it facilitates the electrical connection between your vehicle and a trailer. Follow these steps for safe operation:
- Prepare Trailer: Ensure your trailer's electrical plug is clean and free of debris or corrosion.
- Align and Connect: Align the trailer's electrical plug with the Dorman 924-611 connector on your vehicle. Push the plug firmly into the connector until it is fully seated and locked into place.
- Secure Connection: If your trailer plug has a locking mechanism or clip, engage it to prevent accidental disconnection during travel.
- Verify Lights: Before driving, perform a complete check of all trailer lights:
- Running lights (headlights on)
- Brake lights (brake pedal pressed)
- Left turn signal
- Right turn signal
- Reverse lights (if applicable)
- Disconnecting: To disconnect, disengage any locking mechanisms, then firmly pull the trailer plug straight out from the vehicle connector.
5. Maintenance
Regular maintenance of your Dorman 924-611 Trailer Hitch Connector will ensure its longevity and reliable performance.
- Regular Inspection: Periodically inspect the connector for any signs of physical damage, cracks, or loose wiring. Check the mounting bracket for secure attachment.
- Clean Contacts: Keep the electrical contacts inside the connector clean and free of dirt, dust, and corrosion. Use a non-abrasive electrical contact cleaner if necessary.
- Apply Dielectric Grease: Applying a thin layer of dielectric grease to the electrical pins can help prevent corrosion and improve conductivity, especially in harsh weather conditions.
- Protect When Not In Use: If the connector is exposed to the elements when not in use, consider using a protective cap or cover to shield it from moisture and debris.
6. Troubleshooting
If you experience issues with your trailer's electrical functions after installing the Dorman 924-611 connector, consider the following troubleshooting steps:
- No Trailer Lights:
- Check vehicle fuses related to trailer wiring.
- Ensure the trailer plug is fully seated in the vehicle connector.
- Inspect the trailer's wiring and bulbs for damage or burnt filaments.
- Verify the vehicle's ground connection for the trailer wiring.
- Intermittent Lights:
- Check for loose connections at both the vehicle and trailer ends.
- Clean any corrosion from the electrical pins on both the vehicle connector and trailer plug.
- Ensure the trailer plug's locking mechanism is engaged.
- Specific Light Not Working (e.g., only brake lights, no turn signals):
- Identify the specific wire/pin for that function and inspect its connection.
- Check the corresponding bulb on the trailer.
- Verify the vehicle's fuse for that specific circuit.
- Corrosion on Pins:
- Use a fine-grit sandpaper or wire brush to gently remove corrosion from the metal pins.
- Apply dielectric grease after cleaning to prevent future corrosion.
If troubleshooting steps do not resolve the issue, it is advisable to consult a professional automotive electrician or mechanic.
7. Warranty and Support
Dorman products are designed and manufactured to high-quality standards. While specific warranty details may vary, Dorman stands by the quality of its parts.
For further assistance, technical support, or detailed warranty information, please visit the official Dorman website or contact Dorman customer service. You can also find more information and products at the Dorman Brand Store on Amazon.
Dorman has over a century of automotive experience, providing reliable solutions to repair professionals and vehicle owners.
Ask a question about this manual
Ask about setup, troubleshooting, compatibility, parts, safety, or missing instructions. Manuals+ will review the question and use this page’s manual context to help answer it.