
Dorman 904-7512
Dorman 904-7512 Engine Oil Pressure Sensor User Manual
Model: 904-7512 | Brand: Dorman
1. Product Overview
The Dorman 904-7512 Engine Oil Pressure Sensor is a direct replacement component designed to accurately monitor engine oil pressure in specified vehicles. This sensor is engineered to restore proper function when an original sensor has failed due to heat exposure or internal damage, ensuring the vehicle's engine management system receives correct oil pressure readings.
It is manufactured to strict specifications to provide reliable performance and is backed by Dorman's extensive automotive experience.
What's in the Box:
- 1 Engine Oil Pressure Sensor (Dorman 904-7512)
Key Features:
- Direct Replacement: Designed to match the fit and function of the original equipment sensor.
- Accurate Monitoring: Engineered to provide precise oil pressure readings to the vehicle's engine control unit.
- Durable Construction: Manufactured with quality materials for long-lasting reliability.
- Vehicle Specific Fitment: Compatible with select International truck models (refer to specifications for details).
2. Product Images

Main view of the Dorman 904-7512 Engine Oil Pressure Sensor, showing the black electrical connector and the metallic threaded body.
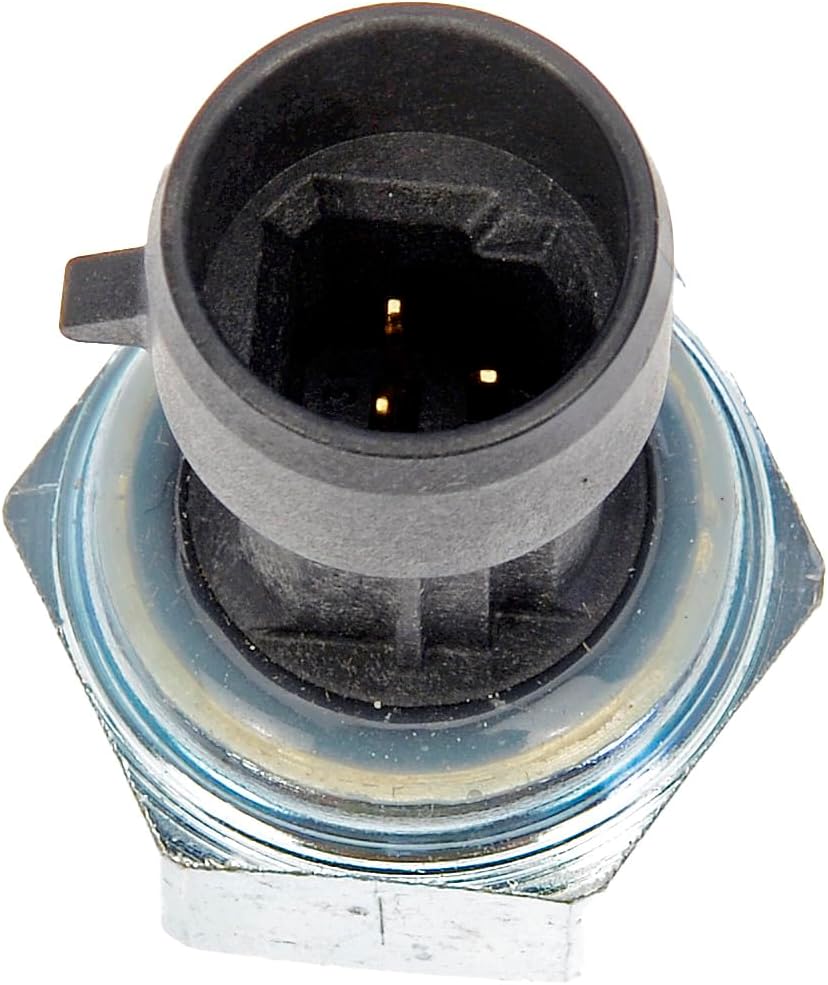
Top-down view of the sensor's electrical connector, showing the internal pins for connection to the vehicle's wiring harness.

View of the sensor's threaded end, which screws into the engine block or oil gallery, showing the pressure sensing element.

Side profile of the sensor, illustrating its overall dimensions and the transition from the electrical connector to the threaded body.
3. Setup and Installation
Installation of the Dorman 904-7512 Engine Oil Pressure Sensor typically involves replacing an existing faulty sensor. Due to the critical nature of engine oil pressure monitoring and the potential for engine damage if installed incorrectly, professional installation by a qualified mechanic is highly recommended.
General Installation Guidelines (for reference only):
- Safety First: Ensure the vehicle's engine is cool and the battery is disconnected before beginning any work. Use appropriate personal protective equipment.
- Locate Sensor: Identify the location of the existing engine oil pressure sensor. This can vary by vehicle model and engine configuration. Consult your vehicle's service manual for the exact location.
- Disconnect Wiring: Carefully disconnect the electrical connector from the old sensor.
- Remove Old Sensor: Use an appropriate wrench or sensor socket to unscrew and remove the old sensor. Be prepared for a small amount of oil leakage.
- Prepare New Sensor: Inspect the new Dorman sensor for any damage. Ensure the O-ring or sealing washer is properly seated on the new sensor's threads.
- Install New Sensor: Carefully thread the new sensor into the engine block or oil gallery by hand to prevent cross-threading. Tighten to the vehicle manufacturer's specified torque using a torque wrench. Do not overtighten.
- Reconnect Wiring: Reconnect the electrical connector to the new sensor, ensuring it clicks securely into place.
- Test: Reconnect the battery, start the engine, and check for any oil leaks around the new sensor. Verify that the oil pressure warning light (if applicable) turns off and that the oil pressure gauge (if equipped) shows a normal reading.
Vehicle Compatibility: This sensor is compatible with specific International models. Always confirm fitment using your vehicle's make, model, and trim level before installation. Refer to the product description or consult a Dorman fitment guide for a comprehensive list of compatible vehicles.
4. Operation
The Dorman 904-7512 Engine Oil Pressure Sensor operates by converting the mechanical oil pressure within the engine's lubrication system into an electrical signal. This signal is then sent to the vehicle's Engine Control Unit (ECU) or directly to the oil pressure gauge/warning light on the dashboard.
- Monitoring Function: The sensor continuously measures the oil pressure.
- Signal Transmission: It sends real-time data to the vehicle's computer.
- Warning System: If oil pressure drops below a safe threshold, the sensor triggers the oil pressure warning light on the dashboard, alerting the driver to a potential issue.
- Gauge Display: In vehicles equipped with an oil pressure gauge, the sensor provides the input for the gauge to display the current oil pressure.
Proper operation of this sensor is crucial for protecting the engine from damage due to insufficient lubrication.
5. Maintenance
Engine oil pressure sensors are generally maintenance-free components. However, regular vehicle maintenance practices can help ensure their longevity and proper function:
- Regular Oil Changes: Adhere to your vehicle manufacturer's recommended oil change intervals using the correct type and viscosity of engine oil. Clean oil helps prevent sensor clogging and premature wear.
- Check for Leaks: Periodically inspect the area around the sensor for any signs of oil leaks. Address any leaks promptly to prevent damage to the sensor or surrounding components.
- Wiring Inspection: During routine inspections, check the sensor's electrical connector and wiring for any signs of corrosion, fraying, or damage. Ensure the connection is secure.
- Monitor Dashboard Lights: Pay attention to your vehicle's dashboard warning lights. If the oil pressure warning light illuminates, or if the oil pressure gauge shows abnormal readings, have the system diagnosed by a qualified technician immediately.
While the sensor itself does not require routine cleaning or adjustment, maintaining a healthy engine and lubrication system is key to its reliable performance.
6. Troubleshooting
If you experience issues related to engine oil pressure readings or warning lights after installing or while using the Dorman 904-7512 sensor, consider the following common troubleshooting steps. Always consult a professional mechanic for diagnosis and repair if you are unsure.
| Symptom | Possible Cause | Solution |
|---|---|---|
| Oil pressure warning light remains on after engine start. |
|
|
| Oil pressure gauge reads erratically or stuck at zero/max. |
|
|
| Oil leak around the sensor. |
|
|
Important: A persistent oil pressure warning light or consistently low oil pressure readings can indicate severe engine problems. Do not continue to operate the vehicle under these conditions without professional diagnosis.
7. Specifications
| Attribute | Detail |
|---|---|
| Model Number | 904-7512 |
| Brand | Dorman |
| Part Type | Engine Oil Pressure Sensor |
| Operation Mode | Automatic |
| Contact Type | Normally Open |
| Connector Type | Screw Terminals |
| Terminal | Screw |
| Item Dimensions (L x W x H) | 4.06 x 2.87 x 2.36 inches |
| Circuit Type | 1-way |
| Mounting Type | Panel Mount |
| Actuator Type | Plunger |
| Contact Material | Copper |
| International Protection Rating | IP00 |
| Number of Positions | 1 |
| Control Method | Touch |
| Color | Black |
| Unit Count | 1 Count |
| Number of Items | 1 |
| GTIN (UPC) | 00885484436817 |
| Manufacturer | Dorman Products |
| Item Weight | 0.32 ounces |
| Exterior | Machined |
| OEM Part Numbers | 577.55623; ISK935; 1834538C91; 1839412C91; 1839415C91; 1872556C91 |
| First Available | July 13, 2016 |
8. Warranty and Support
Dorman Products are designed and manufactured to high-quality standards. For specific warranty information regarding the Dorman 904-7512 Engine Oil Pressure Sensor, please refer to the warranty documentation included with your purchase or visit the official Dorman website.
Dorman provides technical support and resources to assist with product inquiries and installation. For further assistance, you can visit the Dorman Store on Amazon or their official corporate website.
Dorman has over a century of automotive experience, providing reliable replacement products engineered to save time and money.
Related Documents - 904-7512
 |
Dorman New Must-See Solutions: Automotive Aftermarket Parts & Innovations Explore Dorman's latest automotive aftermarket parts and OE FIX solutions designed for service professionals. Find innovative replacements for vacuum pumps, loaded knuckles, transmission components, and more, with detailed vehicle compatibility. |
 |
Upplýsingar um Getraunadeild 2025 og Dagskrá Nákvæmar upplýsingar um Getraunadeild 2025, þar á meðal skráningu, dagskrá, deildarskiptingu, reglur og vinninga. Lærðu hvernig á að taka þátt og komast áfram á Íslandsmótið. |
 |
PINNTORP Chair Assembly Instructions Step-by-step guide for assembling the PINNTORP chair from IKEA, including parts list and assembly diagrams. |
 |
NOYAFA NF-904 Visual Fault Locator: Instruction Manual & Specifications Comprehensive instruction manual for the NOYAFA NF-904 Visual Fault Locator. Learn about its usage, technical specifications, maintenance, safety guidelines, and available models for effective fiber optic cable testing. |
 |
Manual de Instalação e do Usuário CommBox Plus - Munters Guia completo para instalação, configuração e operação do Munters CommBox Plus. Aprenda a gerenciar controladores, acessar dados via internet e otimizar sua rede de comunicação. |
 |
CommBox Plus 使用和维护手册 - Munters Munters CommBox Plus 设备的使用和维护手册。本指南提供关于安装、配置、操作和故障排除的详细信息,以确保最佳性能和可靠性。 |
Ask a question about this manual
Ask about setup, troubleshooting, compatibility, parts, safety, or missing instructions. Manuals+ will review the question and use this page’s manual context to help answer it.