
Newport Brass 9458/03N
Newport Brass Chesterfield Kitchen Bridge Faucet User Manual
Model: 9458/03N
Introduction
This user manual provides detailed instructions for the installation, operation, maintenance, and troubleshooting of your Newport Brass Chesterfield Kitchen Bridge Faucet with Side Spray. Please read this manual thoroughly before installation and use to ensure proper function and longevity of your product.
The Chesterfield faucet features an ornate, yet elegant design, reflecting old-world craftsmanship and traditional styling. It is constructed from durable brass and includes a side spray for enhanced functionality.
Product Overview
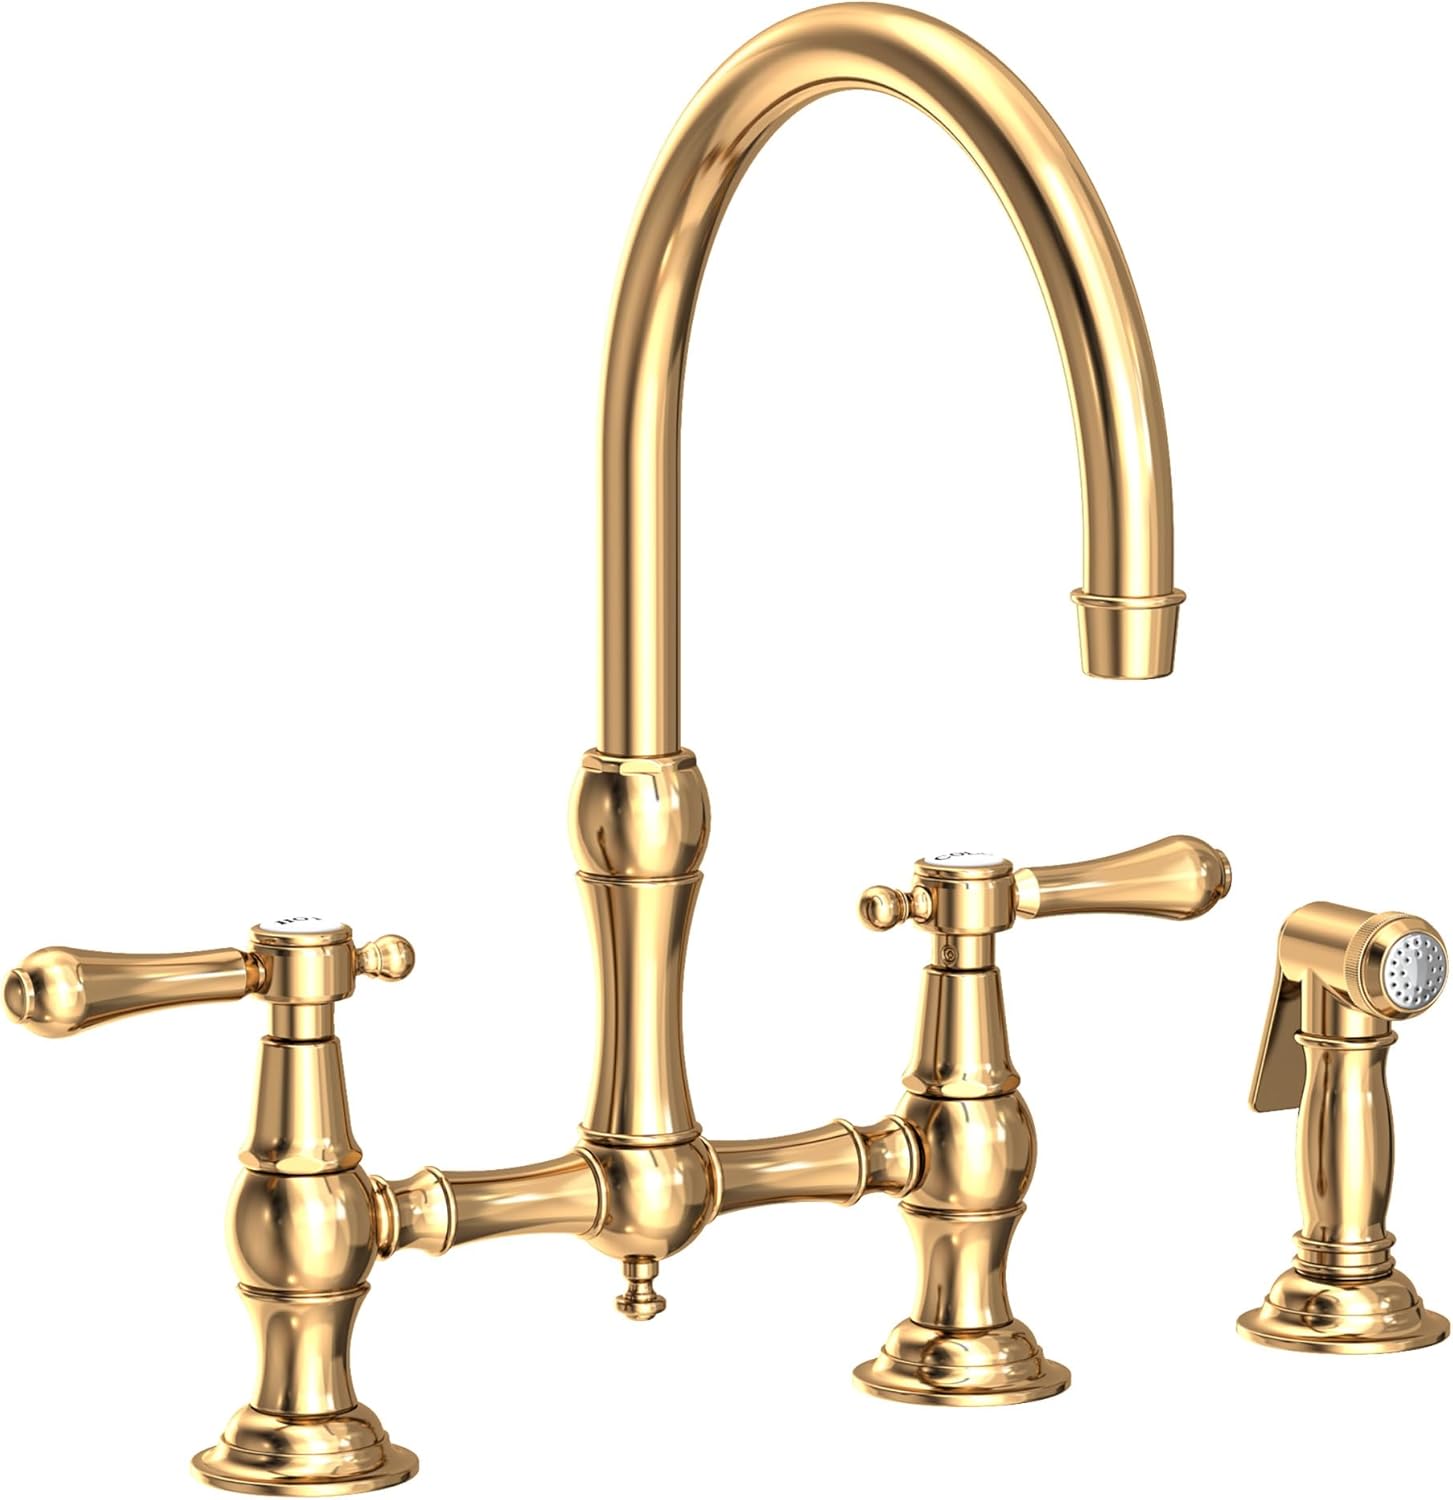
Figure 1: Newport Brass Chesterfield Kitchen Bridge Faucet (Model 9458) in Polished Brass Uncoated finish, featuring a high-arc spout, two lever handles, and a matching side spray.
Key Features:
- Construction: Faucet body constructed of solid brass.
- Design: Widespread bridge-style design, coordinating with the Chesterfield line.
- Mounting: Deck mounted, suitable for installation directly to sink or countertop.
- Spout: Swivel spout for extended reach and flexibility.
- Controls: Double lever handles for precise control of water flow and temperature.
- Cartridge: Includes durable washerless cartridge.
- Included: Mounting hardware and side spray.
Specifications:
| Feature | Measurement |
|---|---|
| Height (deck to top of faucet) | 15-1/8 inches |
| Spout Height (deck to spout outlet) | 9 inches |
| Spout Reach (center of faucet body to center of spout outlet) | 9 inches |
| Flow Rate | 1.8 gallons-per-minute (GPM) |
| Faucet Holes Required | 3 |
| Faucet Centers (distance between centers of outside faucet holes) | 8 inches |
| Faucet Hole Size | 1-1/4 inches |
| Max Deck Thickness | 1-13/16 inches |
| Material | Brass |
| Color/Finish | Polished Brass Uncoated (Living) |
| Item Weight | 8 pounds |
| Model Number | 9458/03N |
Setup and Installation
Professional installation is recommended for this product. Ensure all local plumbing codes are followed. Before beginning, turn off the main water supply.
Tools and Materials Required:
- Adjustable wrench
- Basin wrench (if needed)
- Plumber's putty or silicone sealant
- Phillips and flathead screwdrivers
- Measuring tape
- Safety glasses
- Flashlight
Pre-Installation Steps:
- Inspect Components: Unpack all components and inspect for any damage. Ensure all parts listed in the packaging are present.
- Clear Workspace: Clear the area under the sink and ensure adequate lighting.
- Water Supply Shut-off: Locate and turn off the hot and cold water supply valves under the sink. If no shut-off valves are present, turn off the main water supply to the house.
- Drain Lines: Disconnect existing faucet supply lines and drain lines if replacing an old faucet.
Installation Procedure:
- Prepare Faucet Base: Apply a thin bead of plumber's putty or silicone sealant around the base of the faucet body and the side spray escutcheon.
- Mount Faucet: Insert the faucet body and side spray through the pre-drilled holes in the sink or countertop. Ensure the faucet is centered and aligned.
- Secure Faucet: From underneath the sink, thread the mounting nuts onto the faucet shanks and side spray shank. Hand-tighten, then use a basin wrench or adjustable wrench to secure firmly, but do not overtighten.
- Connect Water Supply: Attach the hot and cold water supply lines to the corresponding inlets on the faucet. Use an adjustable wrench to tighten connections, ensuring a watertight seal. Do not overtighten.
- Connect Side Spray: Connect the side spray hose to the dedicated port on the faucet body. Ensure the connection is secure.
- Test for Leaks: Slowly turn on the hot and cold water supply valves. Check all connections for leaks. If leaks are present, gently tighten the connections until they stop.
- Flush Faucet: Remove the aerator from the spout. Turn on both hot and cold water to full flow for several minutes to flush out any debris from the supply lines. Turn off the water, reattach the aerator.

Figure 2: Illustrative diagram of faucet dimensions and typical installation points on a kitchen sink or countertop. This image highlights the height, spout reach, and required faucet hole spacing for proper setup.
Operating Instructions
Your Newport Brass Chesterfield Kitchen Bridge Faucet is designed for ease of use and precise control.
Water Flow and Temperature Control:
- The faucet features two lever handles: one for hot water and one for cold water.
- To turn on the water, rotate the desired handle(s) counter-clockwise.
- To increase water flow, rotate the handle further counter-clockwise.
- To decrease water flow, rotate the handle clockwise.
- To mix hot and cold water, adjust both handles simultaneously until the desired temperature is achieved.
- To turn off the water, rotate both handles fully clockwise.
Side Spray Operation:
- The side spray provides a concentrated stream of water for rinsing and cleaning.
- To activate the side spray, ensure the main faucet handles are in the "on" position.
- Press the lever or button on the side spray handle to divert water flow from the main spout to the spray.
- Release the lever or button to return water flow to the main spout.
Care and Maintenance
Proper care and maintenance will preserve the finish and functionality of your Newport Brass faucet.
Cleaning Instructions:
- Clean the faucet regularly with a soft, damp cloth and mild soap.
- Avoid abrasive cleaners, harsh chemicals, or polishes containing alcohol, ammonia, or bleach, as these can damage the finish.
- For the Polished Brass Uncoated (Living) finish, expect a natural patina to develop over time. This is a characteristic of the finish and not a defect.
- Rinse thoroughly after cleaning and dry with a soft cloth to prevent water spots.
Aerator Maintenance:
- If water flow becomes restricted, the aerator may be clogged with debris.
- Unscrew the aerator from the end of the spout.
- Rinse the aerator screen under running water to remove any particles.
- Reassemble the aerator and screw it back onto the spout.

Figure 3: A detailed view of the Polished Brass Uncoated (Living) finish, showcasing its natural luster. This finish is designed to develop a unique patina over time, enhancing its traditional aesthetic.
Troubleshooting Guide
This section addresses common issues you might encounter with your faucet. For problems not listed here, please contact customer support.
| Problem | Possible Cause | Solution |
|---|---|---|
| Low Water Flow | Clogged aerator; partially closed supply valves; debris in supply lines. | Clean aerator (see Maintenance); ensure supply valves are fully open; flush supply lines. |
| Leaking at Faucet Base | Improperly sealed base; loose mounting nuts. | Ensure plumber's putty/sealant is properly applied; tighten mounting nuts. |
| Dripping from Spout | Worn cartridge; debris in cartridge. | Contact customer support for cartridge replacement or service. |
| Side Spray Not Working | Main faucet not on; clogged spray head; kinked hose. | Ensure main faucet is on; clean spray head; check hose for kinks. |
Warranty Information
Newport Brass products are manufactured to the highest quality standards and are backed by a limited warranty. The warranty covers defects in material and manufacturing for a specified period from the date of purchase. For specific warranty terms and conditions, please refer to the warranty card included with your product or visit the official Newport Brass website.
Note: The Polished Brass Uncoated (Living) finish is designed to naturally age and develop a unique patina over time. This characteristic is not considered a defect and is not covered under warranty as a finish flaw.
Customer Support
If you require further assistance or have questions regarding your Newport Brass Chesterfield Kitchen Bridge Faucet, please contact our customer support team:
- Website: www.newportbrass.com
- Phone: Refer to the Newport Brass website for regional contact numbers.
- Service: When contacting support, please have your model number (9458/03N) and purchase date available.
Related documents9458/03N


Ask a question about this manual
Ask about setup, troubleshooting, compatibility, parts, safety, or missing instructions. Manuals+ will review the question and use this page’s manual context to help answer it.