
SNARK ST-2
Snark ST-2 Multi-Instrument Chromatic Tuner RECHARGEABLE User Manual
1. Introduction
The Snark ST-2 Multi-Instrument Chromatic Tuner is a versatile and accurate clip-on tuning device designed for a wide range of musical instruments. It features a high-sensitivity vibration sensor and an internal microphone for precise tuning in various environments. The tuner boasts a high-definition, full-color display that rotates 360 degrees for optimal viewing. With its faster and more accurate tuning chip, extended frequency range, and rechargeable battery, the ST-2 provides reliable performance for all musicians.
2. Setup
2.1. Charging the Tuner
The Snark ST-2 tuner is equipped with a rechargeable Lithium Metal battery. Before first use, or when the battery indicator on the display shows low charge, connect the tuner to a USB power source using the provided USB cable. The charging port is located on the back of the tuner. A full charge ensures extended usage time.

Figure 1: Rear view of the Snark ST-2 tuner, highlighting the USB charging port.
2.2. Attaching the Tuner
The ST-2 features a secure, stay-put clip designed to attach firmly to various parts of an instrument, such as the headstock of a guitar or the bell of a wind instrument. The clip includes soft, grippy cushions to protect your instrument's finish. To attach, gently press the two ends of the clip together to open the jaws, position it on your instrument, and release. Ensure the tuner is securely fastened but not overly tight.

Figure 2: Side view of the Snark ST-2 tuner, illustrating the clip design.

Figure 3: The Snark ST-2 tuner attached to a guitar headstock.
3. Operating Instructions
3.1. Power On/Off
To power on the tuner, press and hold the power button (typically located on the front or back of the unit, often marked with a power symbol) for a few seconds until the display illuminates. To power off, press and hold the same button until the display turns off. The tuner also features an automatic shut-off function that activates after 10 minutes of inactivity to conserve battery life.
3.2. Tuning Modes: Vibration vs. Microphone
The ST-2 offers two tuning modes: vibration and microphone. The vibration mode is ideal for noisy environments as it detects pitch directly from the instrument's vibrations when clipped on. The microphone mode uses an internal microphone to pick up sound, suitable for quieter settings or when clipping is not feasible (e.g., attaching to a music stand for vocal tuning). Use the 'MIC/VIB' button (located on the side or back) to toggle between these modes.

Figure 4: Rear view of the Snark ST-2 tuner, indicating the MIC/VIB button.
3.3. Display Interpretation
The high-definition, full-color display provides clear visual feedback. When a note is played, the display shows the note name and a meter indicating whether the pitch is flat, sharp, or in tune. The display rotates 360 degrees, allowing for optimal viewing from any angle. A green indication typically signifies that the note is in tune, while red or yellow indicates flat or sharp, respectively.
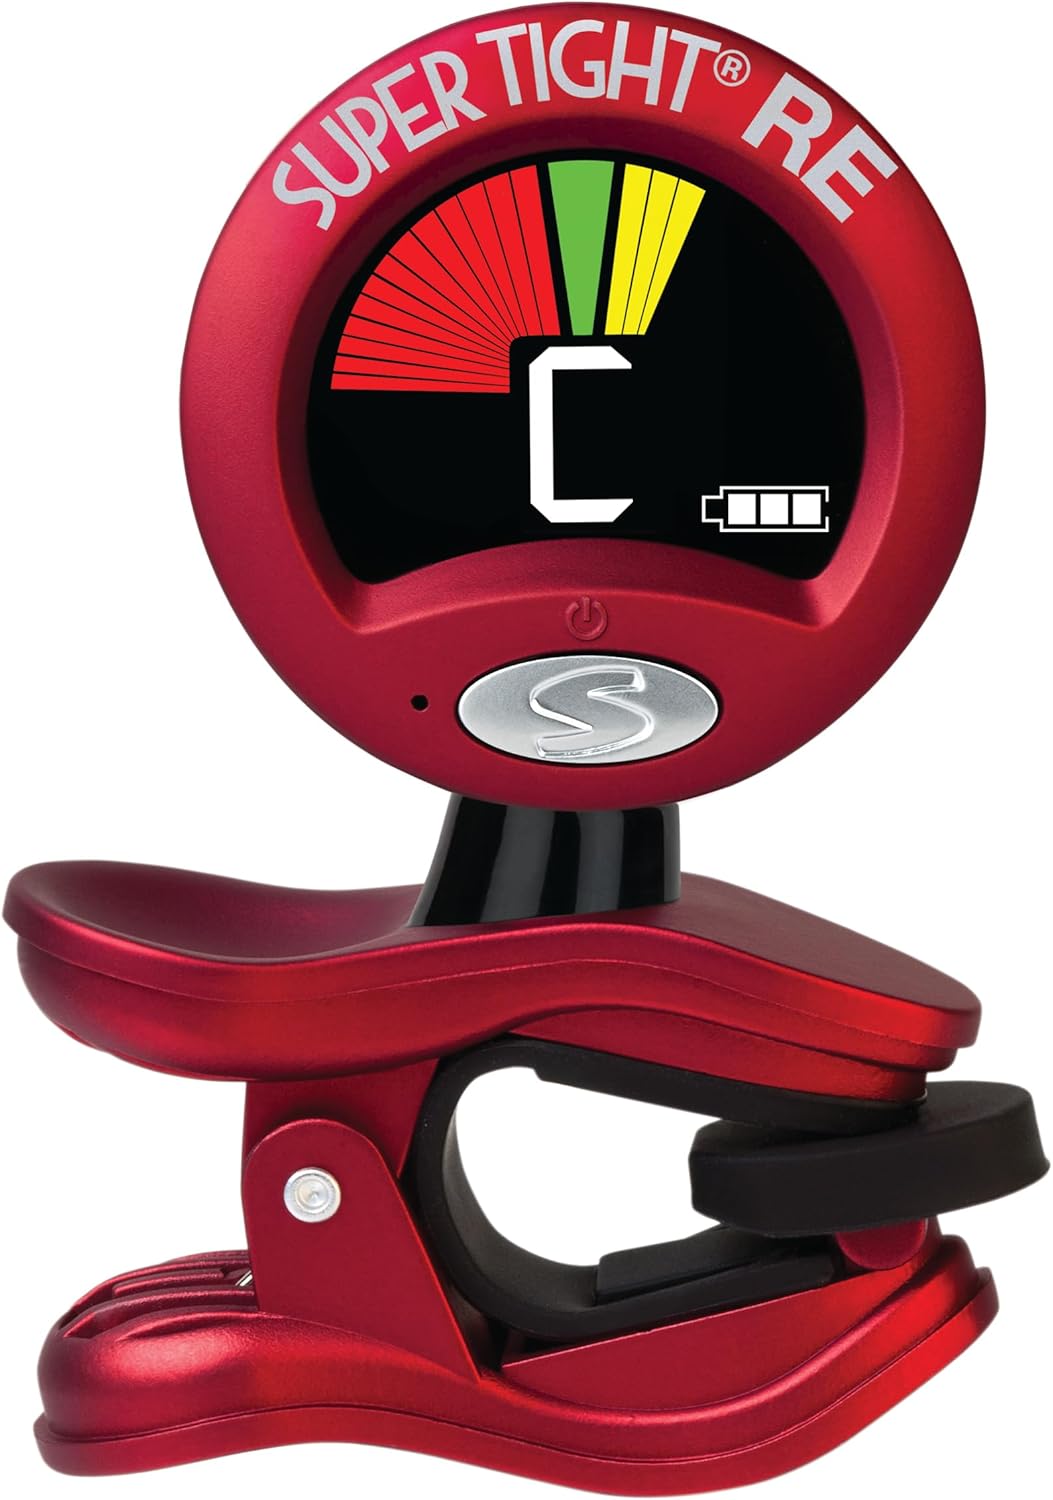
Figure 5: Front display of the Snark ST-2 tuner, showing tuning feedback.
3.4. Pitch Calibration
The ST-2 allows for pitch calibration, enabling you to adjust the reference 'A' frequency. This is useful for tuning to instruments or ensembles that use a different standard pitch. Use the 'PITCH CAL +' and 'PITCH CAL -' buttons (located on the back) to adjust the calibration from 415 Hz to 466 Hz. The default standard pitch is typically 440 Hz.
3.5. Tap Tempo Metronome
The tuner includes a tap tempo metronome feature. Refer to the specific instructions on the device or packaging for activating and using this function to set your desired tempo.
4. Maintenance
To ensure the longevity and optimal performance of your Snark ST-2 tuner, follow these maintenance guidelines:
- Cleaning: Wipe the tuner with a soft, dry cloth. Avoid using abrasive cleaners or solvents, which can damage the display or casing.
- Storage: Store the tuner in a cool, dry place away from direct sunlight and extreme temperatures.
- Battery Care: Recharge the battery regularly, even if the tuner is not in frequent use, to maintain battery health. Avoid fully depleting the battery for extended periods.
- Handling: Handle the tuner with care to prevent drops or impacts that could damage internal components or the display.
5. Troubleshooting
If you encounter issues with your Snark ST-2 tuner, refer to the following common troubleshooting steps:
- Tuner does not power on: Ensure the battery is charged. Connect the tuner to a USB power source and allow it to charge for at least 30 minutes before attempting to power it on again.
- Inaccurate tuning:
- Check that the tuner is securely clipped to the instrument for vibration mode.
- Ensure you are in the correct tuning mode (vibration for clip-on, microphone for ambient sound).
- Verify the pitch calibration setting (default is 440 Hz). Adjust if necessary.
- In microphone mode, ensure there is no excessive background noise interfering with the tuning.
- Display is dim or unresponsive: Recharge the battery. If the issue persists after charging, contact customer support.
- Tuner not detecting notes: Ensure the instrument is producing clear, sustained notes. For vibration mode, ensure good contact with the instrument. For microphone mode, ensure the instrument is close enough to the tuner's microphone.
6. Specifications
| Feature | Detail |
|---|---|
| Model Number | ST-2 |
| Tuning Type | Chromatic, Multi-Instrument |
| Detection Method | Vibration Sensor, Internal Microphone |
| Display | High-definition, Full-color, 360° Rotatable |
| Pitch Calibration Range | 415 Hz to 466 Hz |
| Battery Type | Rechargeable Lithium Metal (included) |
| Charging Port | USB |
| Item Weight | 1.6 ounces |
| Product Dimensions | 3.6 x 1.8 x 1.9 inches |
| Additional Features | Tap Tempo Metronome, Automatic Shut-off (10 mins) |
7. Warranty and Support
For information regarding warranty coverage, technical support, or service, please refer to the documentation included with your product packaging or visit the official SNARK website. Keep your purchase receipt as proof of purchase for warranty claims.
Related documentsST-2


Ask a question about this manual
Ask about setup, troubleshooting, compatibility, parts, safety, or missing instructions. Manuals+ will review the question and use this page’s manual context to help answer it.