Introduction
This manual provides essential instructions for the safe and effective use of your Proscan PAC2501 1080P Sports & Action Video Camera. Please read this manual thoroughly before operating the device and retain it for future reference.
Product Overview
The Proscan PAC2501 is a versatile 1080P sports and action camera designed to capture high-quality video and photos. It features a 2-inch LCD display, built-in Wi-Fi, and comes with a waterproof case and various mounting accessories.
Camera Components

Figure 1: Front view of the Proscan PAC2501 camera, showing the lens and power button.

Figure 2: Rear view of the camera, displaying the 2-inch LCD screen and control buttons.
Key Features
- 1080p Full High Definition video and photo quality.
- Built-in Wi-Fi for connectivity.
- 2-inch LCD display for live view and playback.
- 5MP CMOS image sensor.
- Supports Micro SD cards for expandable storage (up to 32GB).
- Integrated microphone.
- HDMI output port.
- Rechargeable battery.
Setup
1. Charging the Battery
Before first use, fully charge the camera's internal rechargeable battery. Connect the camera to a USB power source using the provided USB cable. The charging indicator light will typically show red while charging and turn off or change color when fully charged.
2. Inserting a Micro SD Card
The camera requires a Micro SD card (not included) for storing videos and photos. Insert a formatted Micro SD card (up to 32GB capacity recommended) into the designated slot on the camera. Ensure the card is inserted correctly until it clicks into place.
3. Using the Waterproof Case
For underwater activities or protection against water, dust, and impact, use the included waterproof case. Ensure the camera is securely placed inside the case and all latches are properly sealed before exposure to water.

Figure 3: The camera inside its waterproof housing, ready for use in wet conditions.

Figure 4: The waterproof case shown separately, highlighting its robust design.
4. Attaching Mounts
The camera comes with various mounts for different activities. Attach the camera (often within its protective or waterproof case) to the desired mount using the provided screws and adapters. Ensure all connections are tight and secure.
- Bike Mount: Use for attaching the camera to bicycle handlebars or similar cylindrical surfaces.
- Helmet Mount: Designed for securing the camera to helmets.
- Protective Casing: A frame mount for general protection without the full waterproofing.
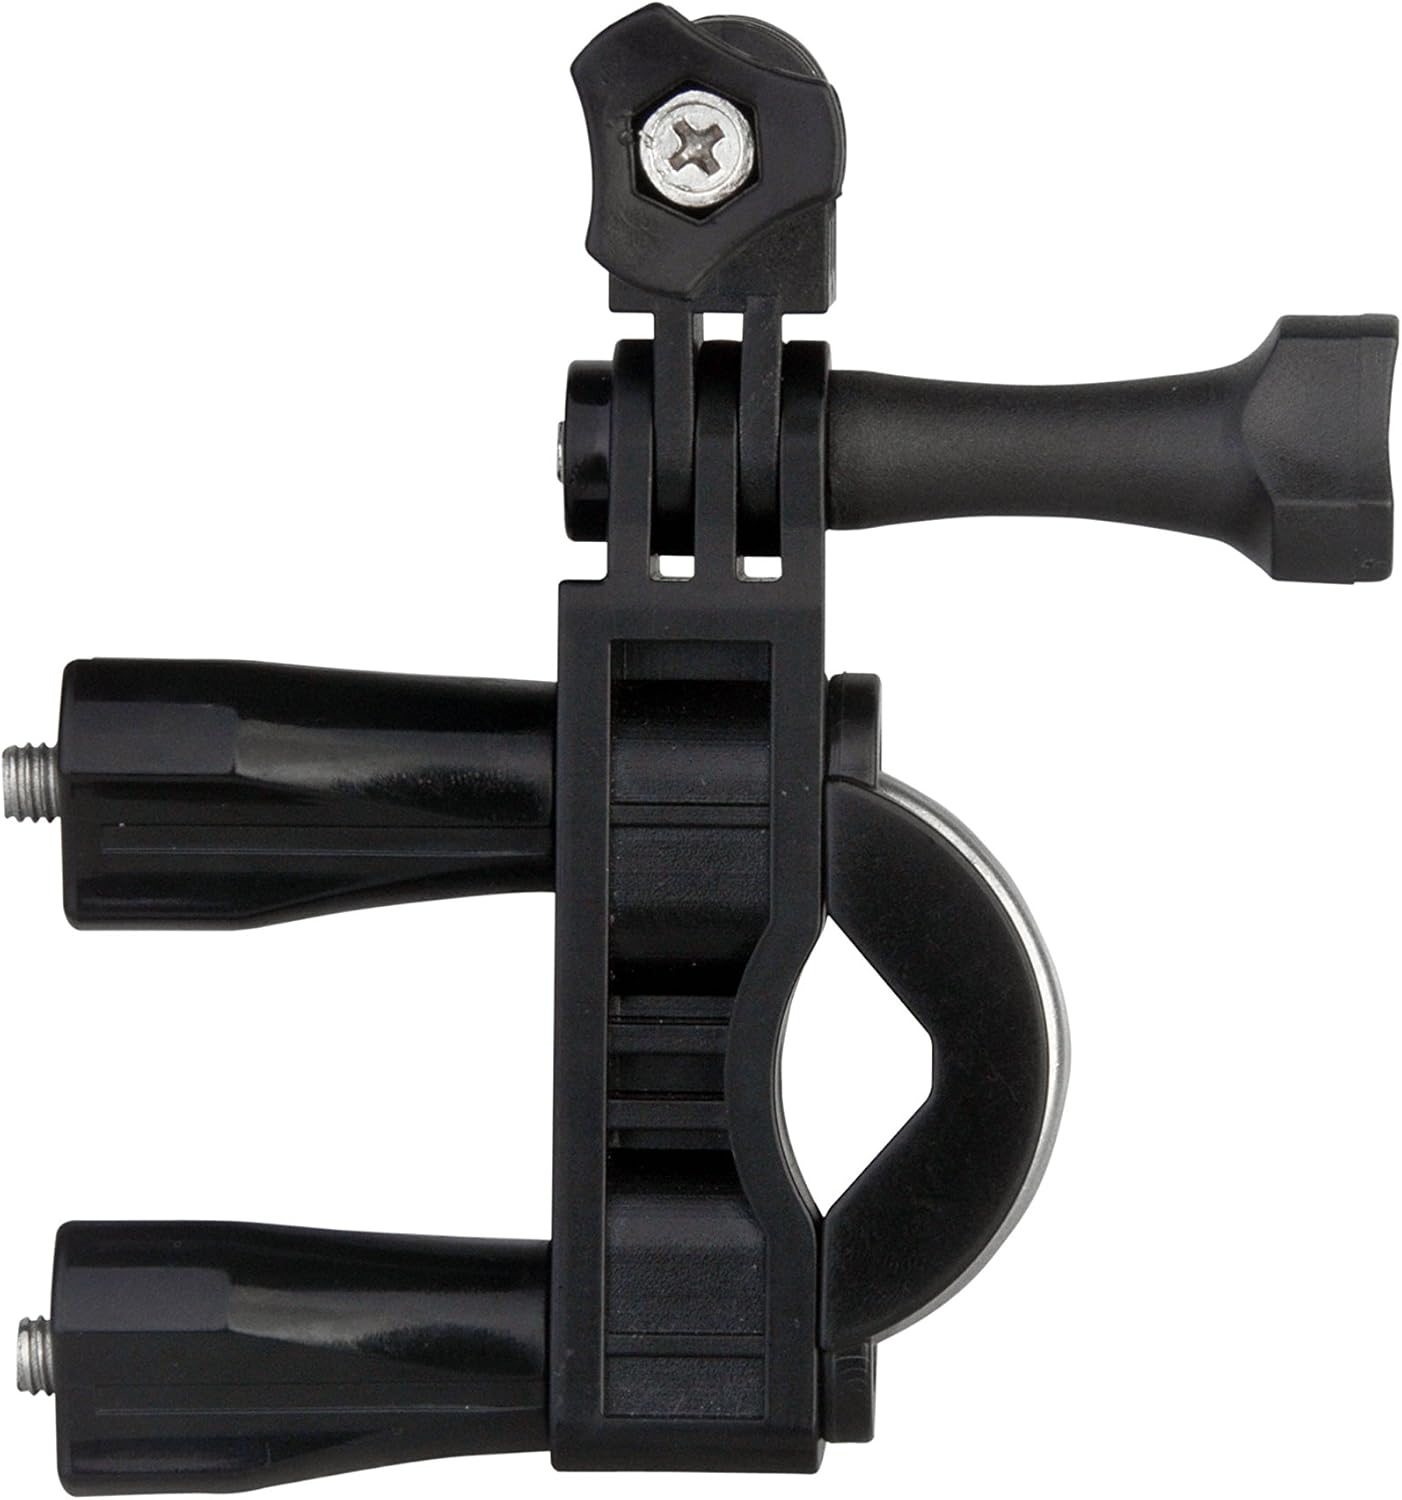
Figure 5: The bike mount accessory, designed for secure attachment to handlebars.

Figure 6: The helmet mount accessory, providing a stable platform for head-mounted recording.
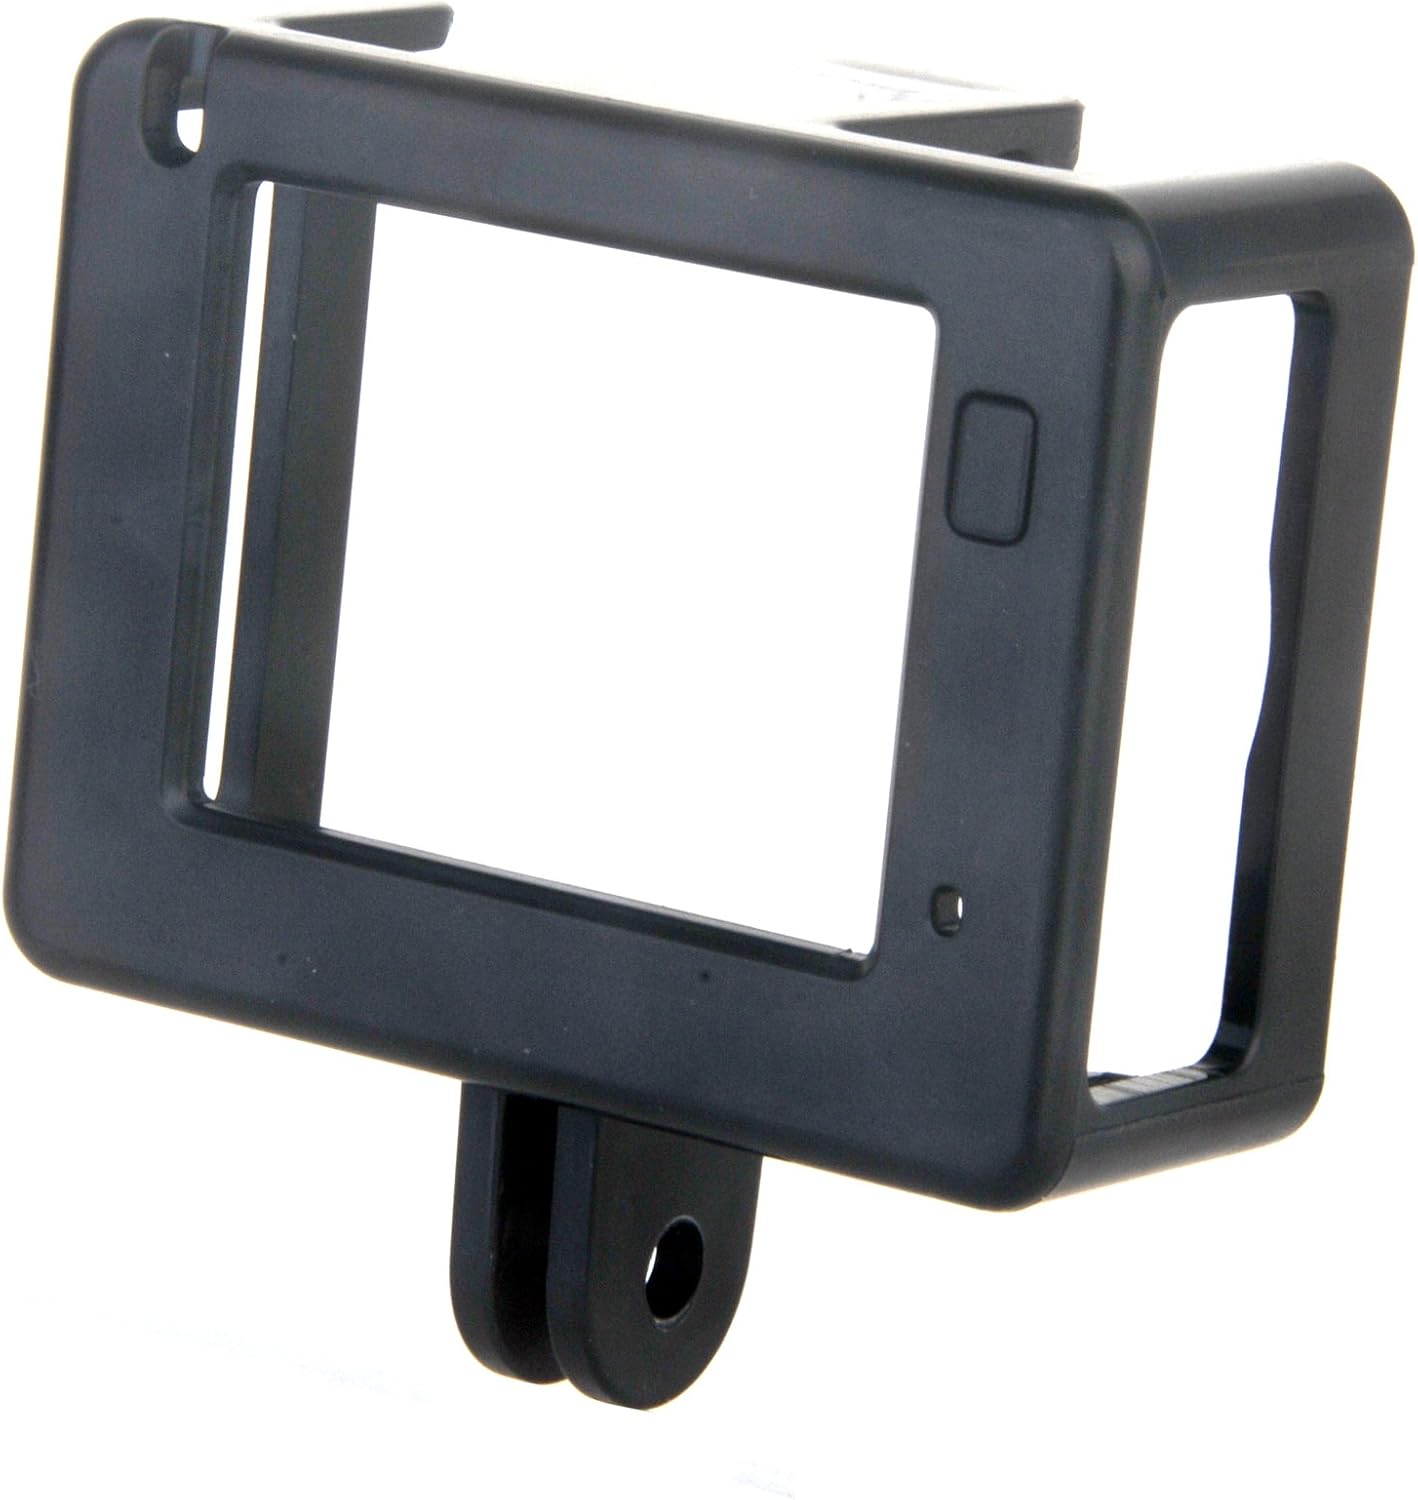
Figure 7: The protective frame casing, offering basic protection and access to ports.
Operating Instructions
1. Power On/Off
To power on the camera, press and hold the power button (usually located on the front or top) for a few seconds until the screen illuminates. To power off, press and hold the power button again until the screen turns off.
2. Recording Video
Once powered on, the camera typically defaults to video recording mode. Press the 'OK' or 'Record' button to start recording. A red indicator light or an on-screen icon will usually flash to indicate recording is in progress. Press the button again to stop recording.
3. Taking Photos
To switch to photo mode, use the 'Mode' button to cycle through the available modes until the photo icon is displayed on the screen. Press the 'OK' or 'Shutter' button to take a photograph.
4. Wi-Fi Connection
Activate the Wi-Fi function through the camera's menu settings. Once Wi-Fi is enabled, you can connect your smartphone or tablet to the camera's Wi-Fi network using the dedicated Proscan app (if available) to control the camera remotely and view footage.
5. Using the Remote Control
The included remote control allows for convenient operation of the camera from a distance. Typically, it has buttons for power, video recording, and photo capture. Ensure the remote's battery is functional and it is within range of the camera.
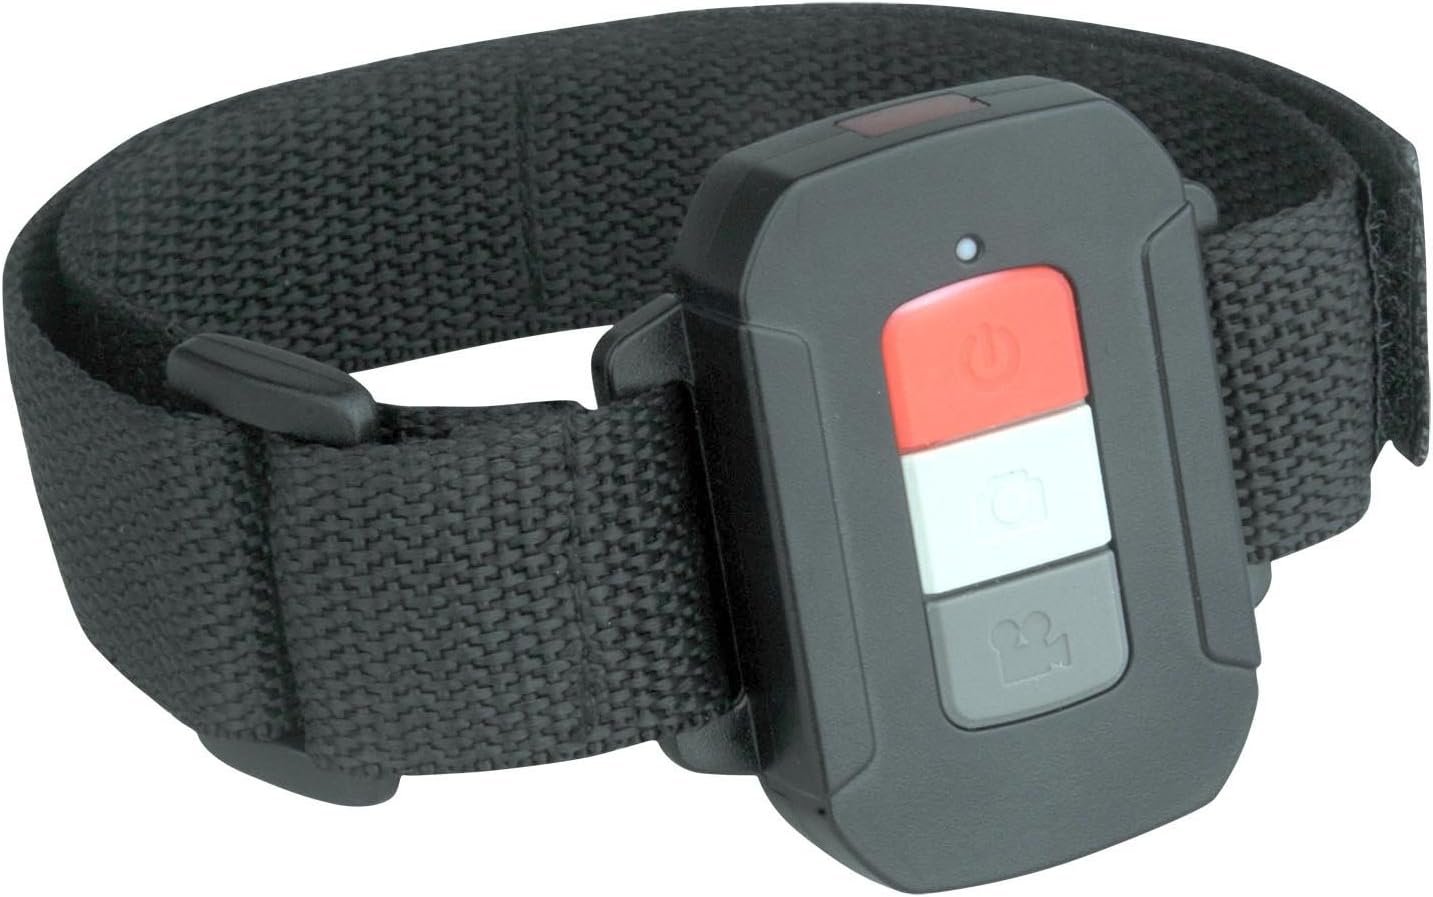
Figure 8: The remote control, designed to be worn on the wrist for easy access during activities.
Maintenance
- Cleaning: Use a soft, dry cloth to clean the camera body. For the lens, use a specialized lens cleaning cloth and solution. Do not use abrasive cleaners.
- Waterproof Case: After use in saltwater, rinse the waterproof case with fresh water and allow it to air dry. Check the seals regularly for any damage.
- Storage: Store the camera in a cool, dry place away from direct sunlight and extreme temperatures. Remove the Micro SD card if storing for extended periods.
Troubleshooting
If you encounter issues with your Proscan PAC2501 camera, consider the following common solutions:
- Camera not turning on: Ensure the battery is fully charged.
- Recording issues: Check if a Micro SD card is inserted and has sufficient free space. Ensure the card is formatted correctly.
- Poor image/video quality: Clean the camera lens. Ensure adequate lighting.
- Wi-Fi connection problems: Ensure Wi-Fi is enabled on the camera and your mobile device. Try restarting both devices.
- Remote control not working: Check the remote's battery and ensure it is within operational range.
For further assistance, please refer to the manufacturer's support resources.
Specifications
| Model | PAC2501 |
| Video Resolution | 1080p Full HD |
| Image Sensor | 5MP CMOS |
| Screen Size | 2 Inches |
| Connectivity | Wi-Fi, HDMI |
| Storage | Micro SD (up to 32GB) |
| Special Features | Waterproof (with case), Expandable storage, Remote control included |
| Dimensions | 10.8 x 10.8 x 25.4 cm |
| Weight | 544.31 g |
| Manufacturer | Proscan |
| Country of Origin | China |
Warranty and Support
For warranty information and technical support, please contact Proscan customer service directly. Details can typically be found on the product packaging or the official Proscan website. Keep your purchase receipt as proof of purchase for warranty claims.


