
INSIZE 1108-200
INSIZE 1108-200 Electronic Caliper User Manual
Model: 1108-200 | Brand: INSIZE
Introduction
This manual provides comprehensive instructions for the safe and effective use of your INSIZE 1108-200 Electronic Caliper. This precision measuring instrument is designed for accurate dimensional measurements up to 8 inches (200mm). It features a digital display for easy reading and is constructed from durable stainless steel.
Product Overview
The INSIZE 1108-200 Electronic Caliper is a versatile tool for various measurement tasks. Key components and features include:
- Digital Display: Provides clear and precise measurement readings.
- Measuring Jaws: Used for external and internal measurements.
- Depth Rod: Extends from the end of the beam for depth measurements.
- Thumb Roller: Allows for fine adjustment of the measuring jaws.
- Locking Screw: Secures the jaws in position for holding a measurement.
- Control Buttons:
- ON/OFF: Powers the unit on or off.
- ZERO: Sets the display to zero at any point.
- INCH/MM: Toggles between imperial (inches) and metric (millimeters) units.
- Automatic Power Off: The unit will automatically power off after a period of inactivity. Moving the digital unit will turn it back on.
- Data Output Port: For connecting an optional data output cable (7302-SPC5A, 7305-SPC2A).
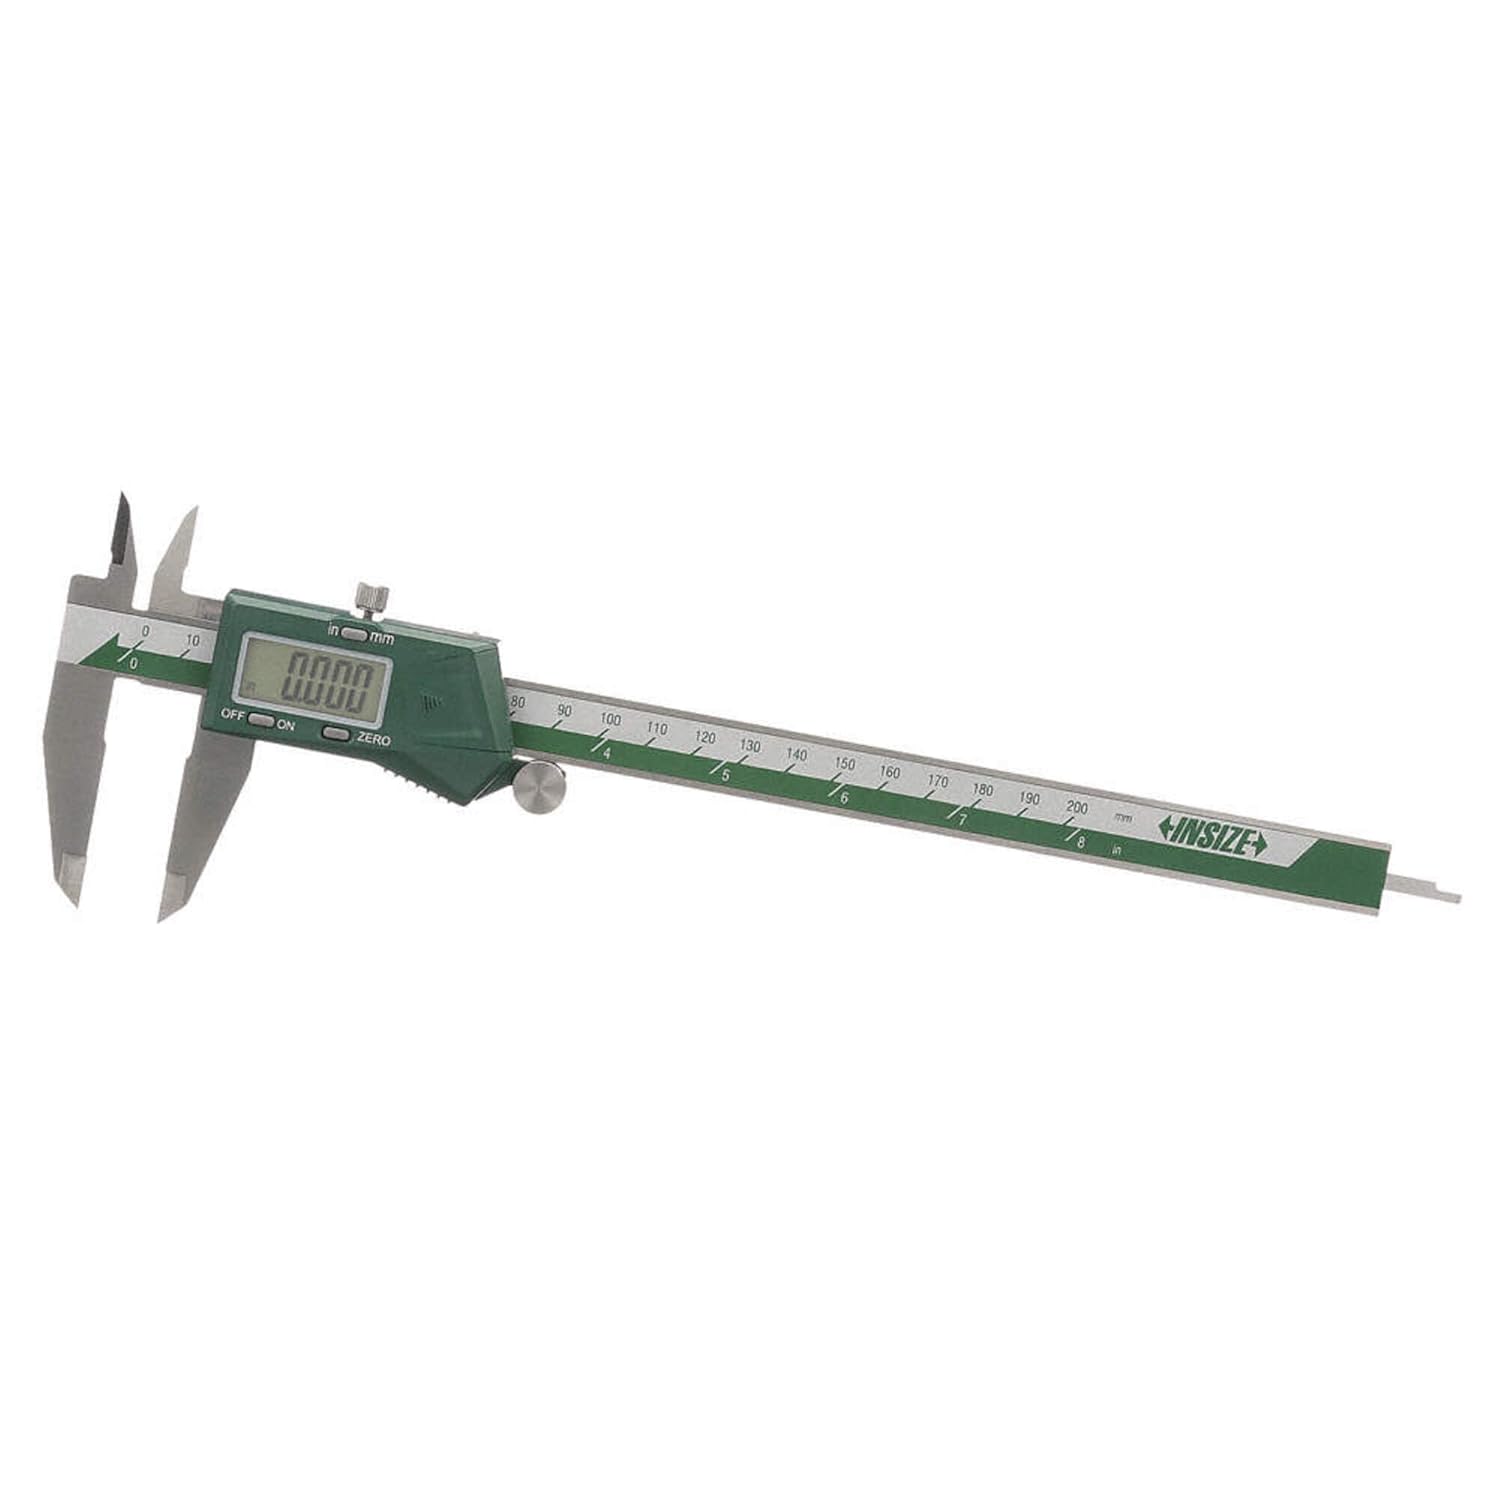
Figure 1: Overview of the INSIZE 1108-200 Electronic Caliper, showing its main components including the digital display, measuring jaws, and control buttons.
Setup
Before first use, or after replacing the battery, follow these steps:
- Battery Installation:
- Locate the battery compartment cover on the digital unit.
- Slide or unclip the cover to open.
- Insert one CR2032 battery with the positive (+) side facing up.
- Close the battery compartment cover securely.
- Power On: Press the ON/OFF button or slide the digital unit along the beam to power on the caliper.
- Initial Zeroing:
- Close the measuring jaws completely.
- Press the ZERO button. The display should read "0.000" or "0.00".
- If the display does not zero, ensure the jaws are clean and fully closed, then repeat the process.
Operating Instructions
Follow these instructions for accurate measurements:
1. Selecting Units
Press the INCH/MM button to switch between imperial (inches) and metric (millimeters) units. The selected unit will be indicated on the digital display.
2. Taking Measurements
Always ensure the caliper jaws are clean before taking a measurement.
- External Measurement:
- Open the large measuring jaws and place the object between them.
- Close the jaws firmly but gently onto the object using the thumb roller.
- Read the measurement on the digital display.
- Internal Measurement:
- Insert the small measuring jaws into the opening of the object.
- Open the jaws until they firmly contact the inner surfaces.
- Read the measurement on the digital display.
- Depth Measurement:
- Place the end of the caliper beam on the top surface of the object.
- Extend the depth rod into the hole or recess until it touches the bottom.
- Read the measurement on the digital display.
- Step Measurement:
- Place the end of the fixed jaw on the higher surface of the step.
- Extend the movable jaw until its end touches the lower surface of the step.
- Read the measurement on the digital display.

Figure 2: A user demonstrating an external measurement using the INSIZE 1108-200 Electronic Caliper on a cylindrical metal component. The digital display shows the measured value.
3. Zeroing at Any Point (Relative Measurement)
The ZERO button can be used to set the display to zero at any point along the measuring range. This is useful for differential measurements or setting a reference point.
- Position the jaws at the desired reference point.
- Press the ZERO button. The display will show "0.000" or "0.00".
- Subsequent measurements will be relative to this new zero point.
Maintenance
Proper maintenance ensures the longevity and accuracy of your caliper.
- Cleaning:
- Wipe the caliper clean with a dry, soft cloth after each use.
- Do not use solvents or harsh chemicals, as they may damage the finish or electronic components.
- Ensure no dust or debris accumulates on the measuring surfaces or the beam.
- Storage:
- Store the caliper in its supplied protective case when not in use.
- Keep it in a dry environment, away from direct sunlight, extreme temperatures, and humidity.
- Avoid storing the caliper with the jaws fully closed or fully open to prevent stress on the mechanism. Leave a small gap.
- Battery Replacement:
- When the display becomes dim or erratic, replace the CR2032 battery.
- Follow the battery installation steps outlined in the "Setup" section.
- Dispose of old batteries according to local regulations.
Troubleshooting
If you encounter issues with your INSIZE 1108-200 Electronic Caliper, refer to the table below:
| Problem | Possible Cause | Solution |
|---|---|---|
| Display does not turn on. | Battery is dead or incorrectly installed. | Replace the CR2032 battery, ensuring correct polarity. |
| Display shows erratic readings or "E" error. | Low battery, dirt on the beam, or electromagnetic interference. | Replace battery. Clean the beam thoroughly. Move away from strong magnetic fields or electronic devices. |
| Caliper does not zero properly. | Jaws are not fully closed, or there is debris on the measuring faces. | Ensure jaws are clean and fully closed. Press the ZERO button again. |
| Jaws do not slide smoothly. | Dirt or debris on the beam. | Clean the beam and sliding surfaces with a dry, soft cloth. Do not lubricate. |
Specifications
Detailed technical specifications for the INSIZE 1108-200 Electronic Caliper:
- Model Number: 1108-200
- Measuring Range: 0-8 inches (0-200 mm)
- Resolution: 0.0005 inches (0.01 mm)
- Measurement Accuracy: ±0.0012 inches
- Material: Stainless Steel
- Power Source: 1 x CR2032 battery
- Features: Automatic power off, data output, inch/mm conversion, zero setting at any position.
- Product Dimensions: Approximately 12.28" L x 4.8" W x 1.3" H
- Weight: Approximately 15.87 ounces
Warranty and Support
The INSIZE 1108-200 Electronic Caliper is supplied with a Manufacturer Inspection Certificate traceable to NIST, ensuring its quality and accuracy.
For warranty information, technical support, or service inquiries, please contact INSIZE customer service or refer to the documentation provided with your purchase. Keep your purchase receipt for warranty claims.
For additional resources and product information, you may visit the official INSIZE website or contact your local distributor.
Ask a question about this manual
Ask about setup, troubleshooting, compatibility, parts, safety, or missing instructions. Manuals+ will review the question and use this page’s manual context to help answer it.