
Collomix XM 2 650
COLLOMIX XM 2 650 Heavy Duty Forced-Action Mixer User Manual
Model: XM 2 650
1. Introduction
This manual provides essential information for the safe and efficient operation, maintenance, and troubleshooting of your COLLOMIX XM 2 650 Heavy Duty Forced-Action Mixer. Please read this manual thoroughly before operating the machine to ensure proper usage and to prevent injury or damage.
The COLLOMIX XM 2 650 is designed for mixing various construction materials, offering high performance and durability for demanding tasks. Its forced-action mixing system ensures thorough and consistent results.
2. Safety Instructions
Always prioritize safety when operating heavy machinery. Failure to follow these instructions may result in serious injury or property damage.
- Read the Manual: Understand all operating procedures and safety warnings before use.
- Personal Protective Equipment (PPE): Always wear appropriate PPE, including safety glasses, hearing protection, gloves, and sturdy footwear.
- Stable Surface: Operate the mixer on a level, stable surface to prevent tipping.
- Electrical Safety: Ensure the power supply matches the mixer's requirements (110 volts). Do not operate with damaged cords or plugs. Keep electrical connections dry.
- Clear Work Area: Keep the work area clear of bystanders, especially children and pets.
- No Loose Clothing: Avoid loose clothing or jewelry that could get caught in moving parts.
- Emergency Stop: Familiarize yourself with the location and operation of the emergency stop button.
- Maintenance: Disconnect power before performing any maintenance, cleaning, or adjustments.
3. Setup and Assembly
Before initial operation, ensure the mixer is correctly assembled and positioned.
- Unpacking: Carefully remove all components from the packaging. Verify all parts are present according to the packing list.
- Frame Assembly: Assemble the main frame and ensure all bolts are securely tightened.
- Wheel Attachment: Attach the wheels to the designated axles on the mixer frame. Ensure they are securely fastened for stability and mobility.
- Mixing Tool Installation: Install the mixing paddles into the planetary gear system. Ensure they are correctly seated and secured.
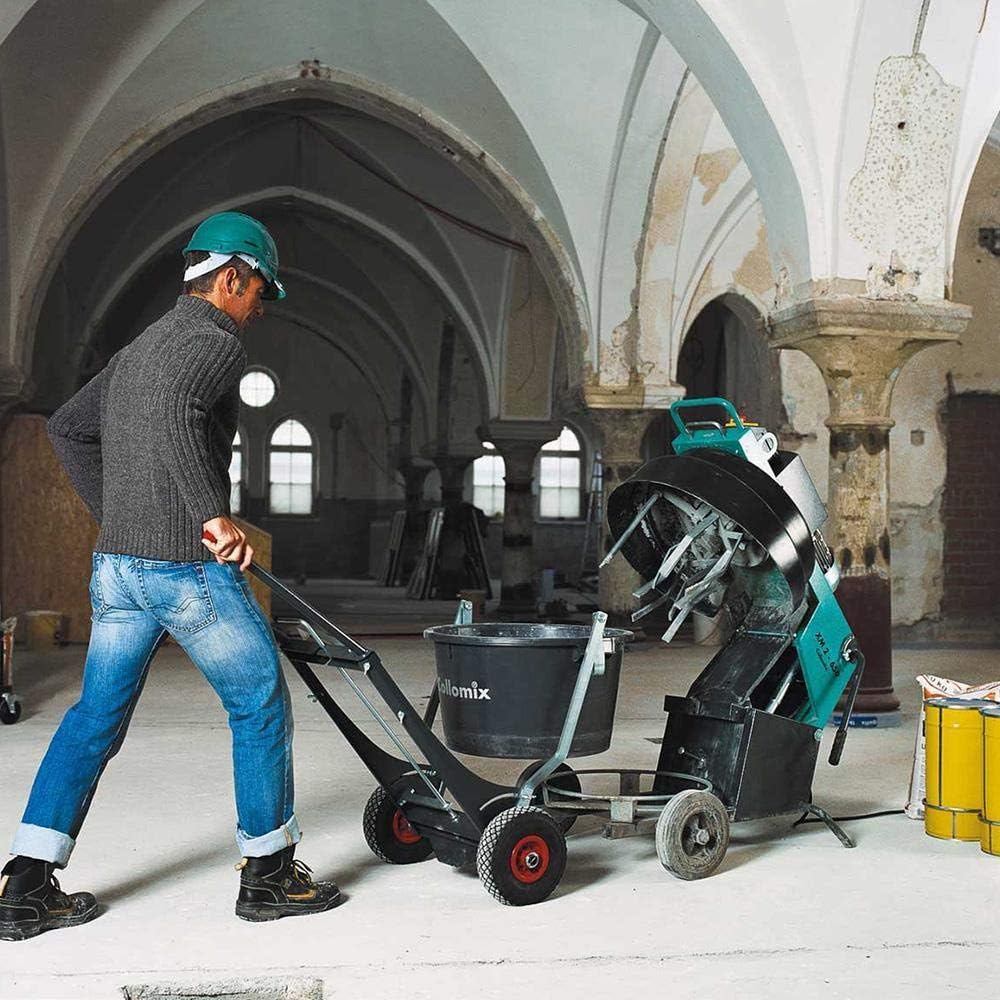
- Bucket Placement: Position the mixing bucket securely within the mixer's designated area. The bucket dolly, if included, facilitates transport and pouring.
- Power Connection: Connect the mixer to a grounded 110-volt power outlet.


4. Operating Instructions
The XM 2 650 is designed for efficient mixing of various materials. Follow these steps for optimal performance.
- Material Loading: With the mixer turned off and disconnected from power, carefully load the desired material into the mixing bucket. Ensure the material volume does not exceed the mixer's 17-gallon capacity.
- Power On: Connect the mixer to power and switch it on using the main power switch.
- Speed Selection: Use the knob control to select the appropriate mixing speed. The mixer offers two mixing speeds to accommodate different material consistencies.
- Mixing Process: The planetary gear system and counter-rotating motion will thoroughly mix the material. A built-in timer can be set for precise mixing durations.
- Material Compatibility: This mixer is suitable for a wide range of materials, including quartz-filled epoxy resins, industrial floor coatings, concrete, mortar, screeds, steel fiber mixes, and stone carpets. It is also an optimal choice for green concrete.
- Monitoring: Observe the mixing process. The rim scraper helps ensure all material is incorporated.
- Power Off: Once mixing is complete, switch off the mixer and disconnect it from the power supply.
- Material Discharge: Utilize the bucket dolly for effortless transport and pouring of the mixed material.

5. Maintenance
Regular maintenance ensures the longevity and optimal performance of your mixer.
- Cleaning After Use: Immediately after each use, clean the mixing paddles, rim scraper, and the interior of the mixing bucket. Hardened material is difficult to remove. The height-adjustable tools facilitate easier cleaning.
- Inspection: Periodically inspect all moving parts, electrical cords, and connections for wear or damage. Replace any worn or damaged components immediately.
- Lubrication: Refer to the detailed service manual for specific lubrication points and schedules.
- Storage: Store the mixer in a dry, protected area when not in use.

6. Troubleshooting
This section addresses common issues you might encounter with your mixer.
- Mixer Does Not Start:
- Check if the power cord is securely plugged into a functional outlet.
- Verify that the main power switch is in the 'ON' position.
- Inspect the circuit breaker or fuse for the power supply.
- Ensure the emergency stop button is not engaged.
- Poor Mixing Performance:
- Ensure the mixing paddles are clean and free of hardened material.
- Verify that the correct mixing speed is selected for the material type.
- Check if the material quantity exceeds the mixer's capacity.
- Inspect mixing paddles for wear or damage; replace if necessary.
- Unusual Noise or Vibration:
- Turn off the mixer immediately and disconnect power.
- Inspect for loose components, foreign objects, or damaged parts.
- Contact customer support if the issue persists after inspection.
For issues not covered here, please contact Collomix customer support.
7. Specifications
| Feature | Detail |
|---|---|
| Brand | Collomix |
| Model Name | Heavy Duty Forced-Action Mixer |
| Model Number | XM 2 650 |
| Power Source | AC/DC |
| Voltage | 110 volts |
| Wattage | 1140 watts |
| Capacity | 17 Gallons |
| Controls Type | Knob |
| Special Feature | Adjustable Speed Control |
| Item Weight | 300 pounds |
| Product Dimensions | 42 x 29 x 33 inches |
| Color | Teal |
| Included Components | Mixer |
| UPC | 849215000623 |
8. Warranty Information
The COLLOMIX XM 2 650 Heavy Duty Forced-Action Mixer comes with a 1-year warranty from the date of purchase. This warranty covers defects in materials and workmanship under normal use. It does not cover damage resulting from misuse, abuse, unauthorized modifications, or normal wear and tear.
For warranty claims or further details, please retain your proof of purchase and contact Collomix customer support.
9. Customer Support
If you have any questions, require technical assistance, or need to report an issue with your COLLOMIX XM 2 650 mixer, please contact Collomix customer support.
- Online Support: Visit the official Collomix website for FAQs, product information, and contact forms.
- Contact Information: Refer to the contact details provided on your product packaging or the official Collomix website for phone numbers and email addresses.
Related documentsXM 2 650


Ask a question about this manual
Ask about setup, troubleshooting, compatibility, parts, safety, or missing instructions. Manuals+ will review the question and use this page’s manual context to help answer it.