1. Introduction
Thank you for choosing the TecTake Garden Greenhouse. This manual provides essential information for the safe and efficient assembly, operation, and maintenance of your greenhouse. Please read these instructions carefully before beginning assembly or use to ensure optimal performance and longevity of your product.
1.1 Safety Information
Warning: Users must take general precautions during assembly, use, and maintenance of the greenhouse. Elements such as the steel structure, metal grids, pegs, and ropes can pose potential risks of cuts. It is advisable to handle these parts with care and use protective equipment, such as gloves, if necessary. Keep all packaging materials away from children.
2. Product Overview
The TecTake Garden Greenhouse is designed to provide a protected environment for your plants, promoting healthy growth by shielding them from adverse weather conditions and UV radiation. Its robust construction and thoughtful design make it an ideal solution for gardening enthusiasts.
2.1 Key Features
- Superior Stability: Constructed with a high-quality steel frame, designed to withstand various weather conditions and protect plants from cold, rain, and frost.
- Ideal Height and Versatility: The design accommodates a wide range of plants, from fruits and vegetables to exotic flowers, maximizing available space for vigorous growth.
- Optimal Organization: Features a shelf with four metal support grids, offering extra space for meticulous plant organization and easy care.
- Maximum Protection: The high-quality polyethylene film provides an effective barrier against UV rays and maintains an optimal internal environment for healthy plant growth.
- Convenient Access: An ample access door facilitates management operations, allowing easy entry without compromising structural stability.
- Unequaled Stability: Includes 4 pegs and tensioning ropes for enhanced stability against adverse weather and strong gusts of wind.
2.2 Components
Before assembly, ensure all components are present and undamaged. Refer to the packing list for a complete inventory.
- Steel frame tubes (various lengths)
- Plastic connectors
- Metal support grids (4 units)
- Polyethylene cover
- Ground pegs (4 units)
- Tensioning ropes (4 units)

Figure 1: Fully assembled TecTake Garden Greenhouse.

Figure 2: Visual representation of key features including robust steel frame, UV protection, and metal grids.
3. Setup and Assembly
Assembly of the TecTake Garden Greenhouse is designed to be straightforward with its interlocking system. It is recommended to assemble the greenhouse with at least two people.
3.1 Preparation
- Choose a level and sheltered location for your greenhouse.
- Unpack all components and verify against the packing list.
- Lay out all parts to ensure easy access during assembly.
3.2 Assembly Steps
- Assemble the Base Frame: Connect the longest steel tubes using the appropriate plastic connectors to form the rectangular base of the greenhouse.
- Construct Vertical Supports: Attach vertical steel tubes to the base frame using connectors, ensuring they are securely fitted.
- Install Shelf Frames: Insert the shorter steel tubes and connectors to create the frames for the metal support grids at the desired heights.
- Place Metal Grids: Carefully place the four metal support grids onto their respective frames. Ensure they are stable.
- Assemble Roof Structure: Connect the remaining steel tubes and connectors to form the pitched roof frame.
- Drape the Cover: Carefully drape the polyethylene cover over the assembled frame. Ensure the zippered door aligns correctly with the front opening.
- Secure the Cover: Fasten the cover to the frame using the integrated ties. Ensure it is taut to prevent flapping in the wind.
- Anchor the Greenhouse: Use the provided ground pegs and tensioning ropes to firmly anchor the greenhouse to the ground. This is crucial for stability, especially in windy conditions.
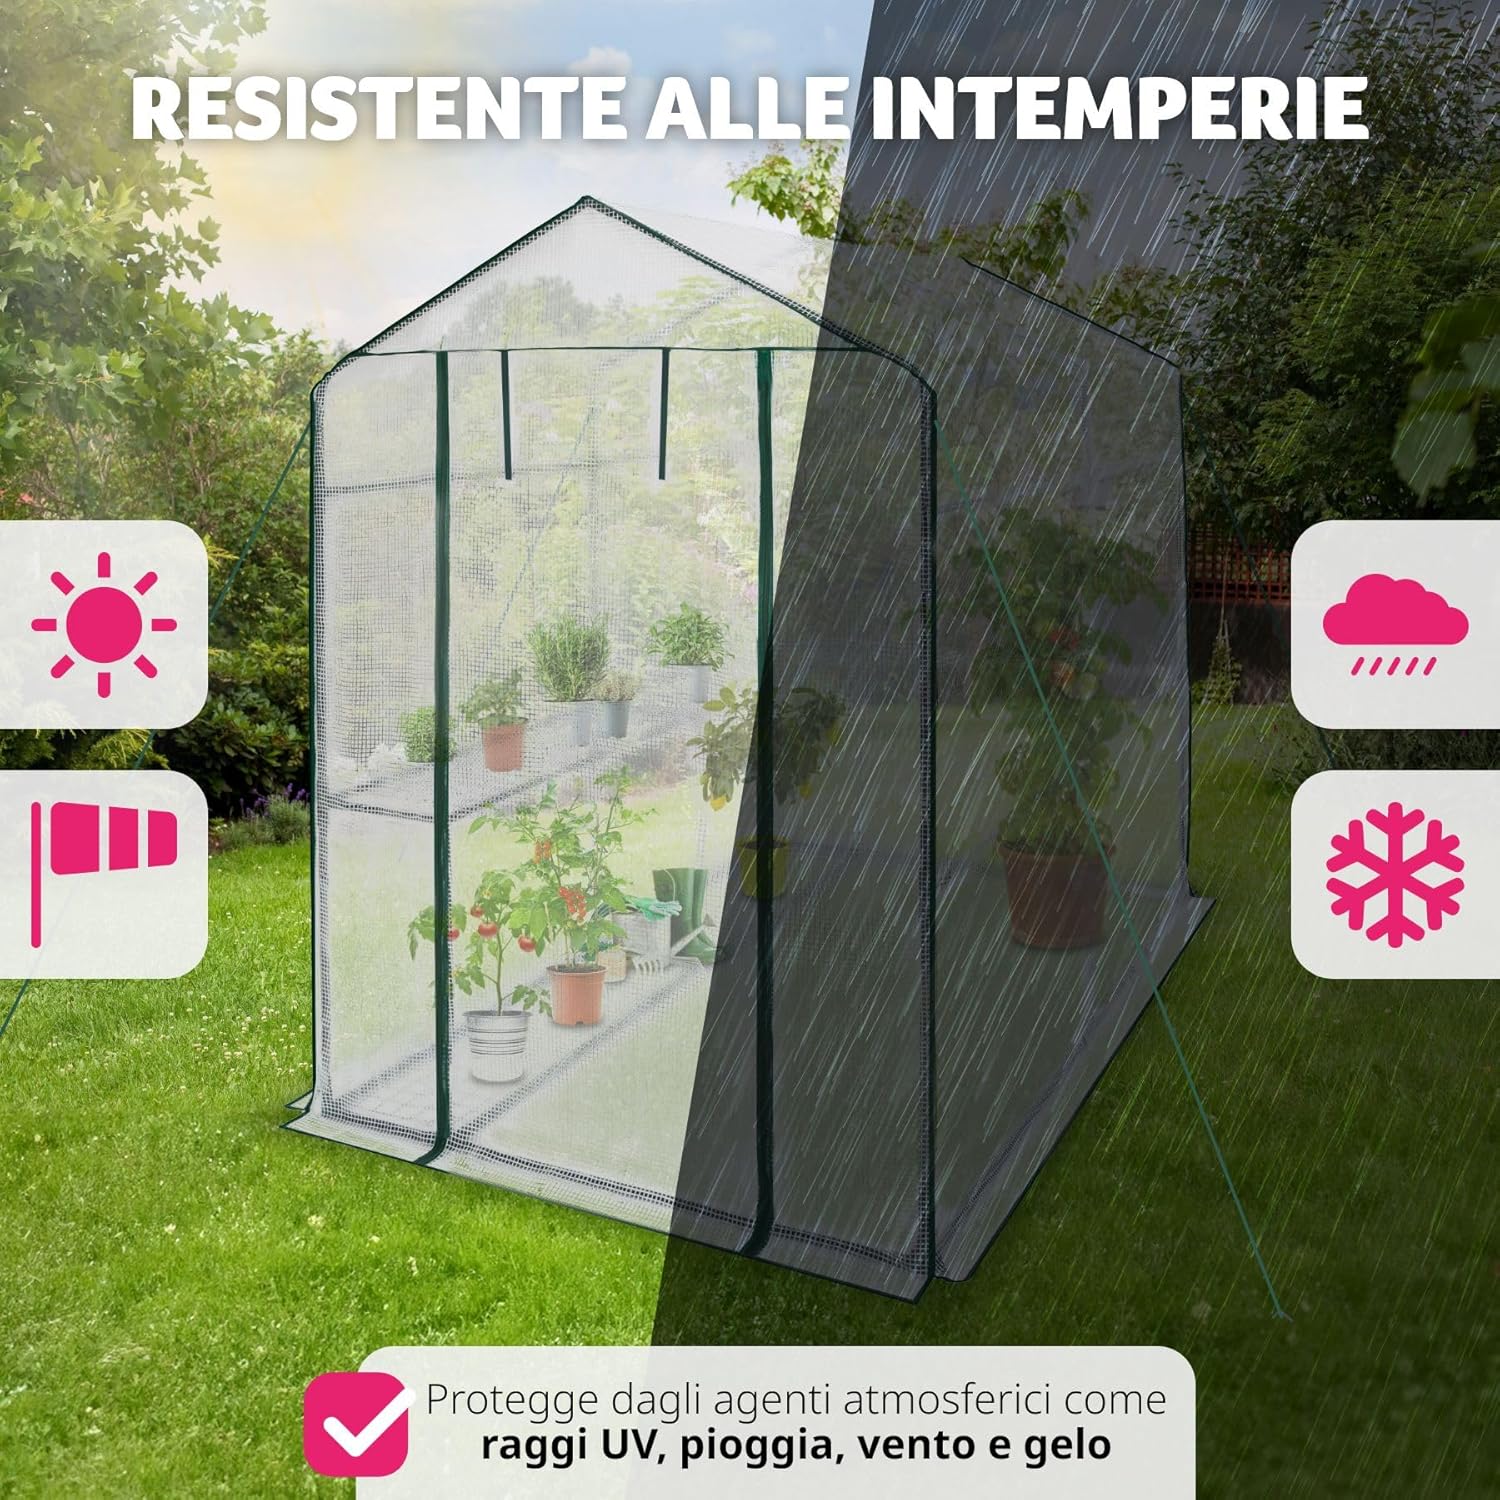
Figure 3: Detail of the interlocking steel frame system for easy assembly.
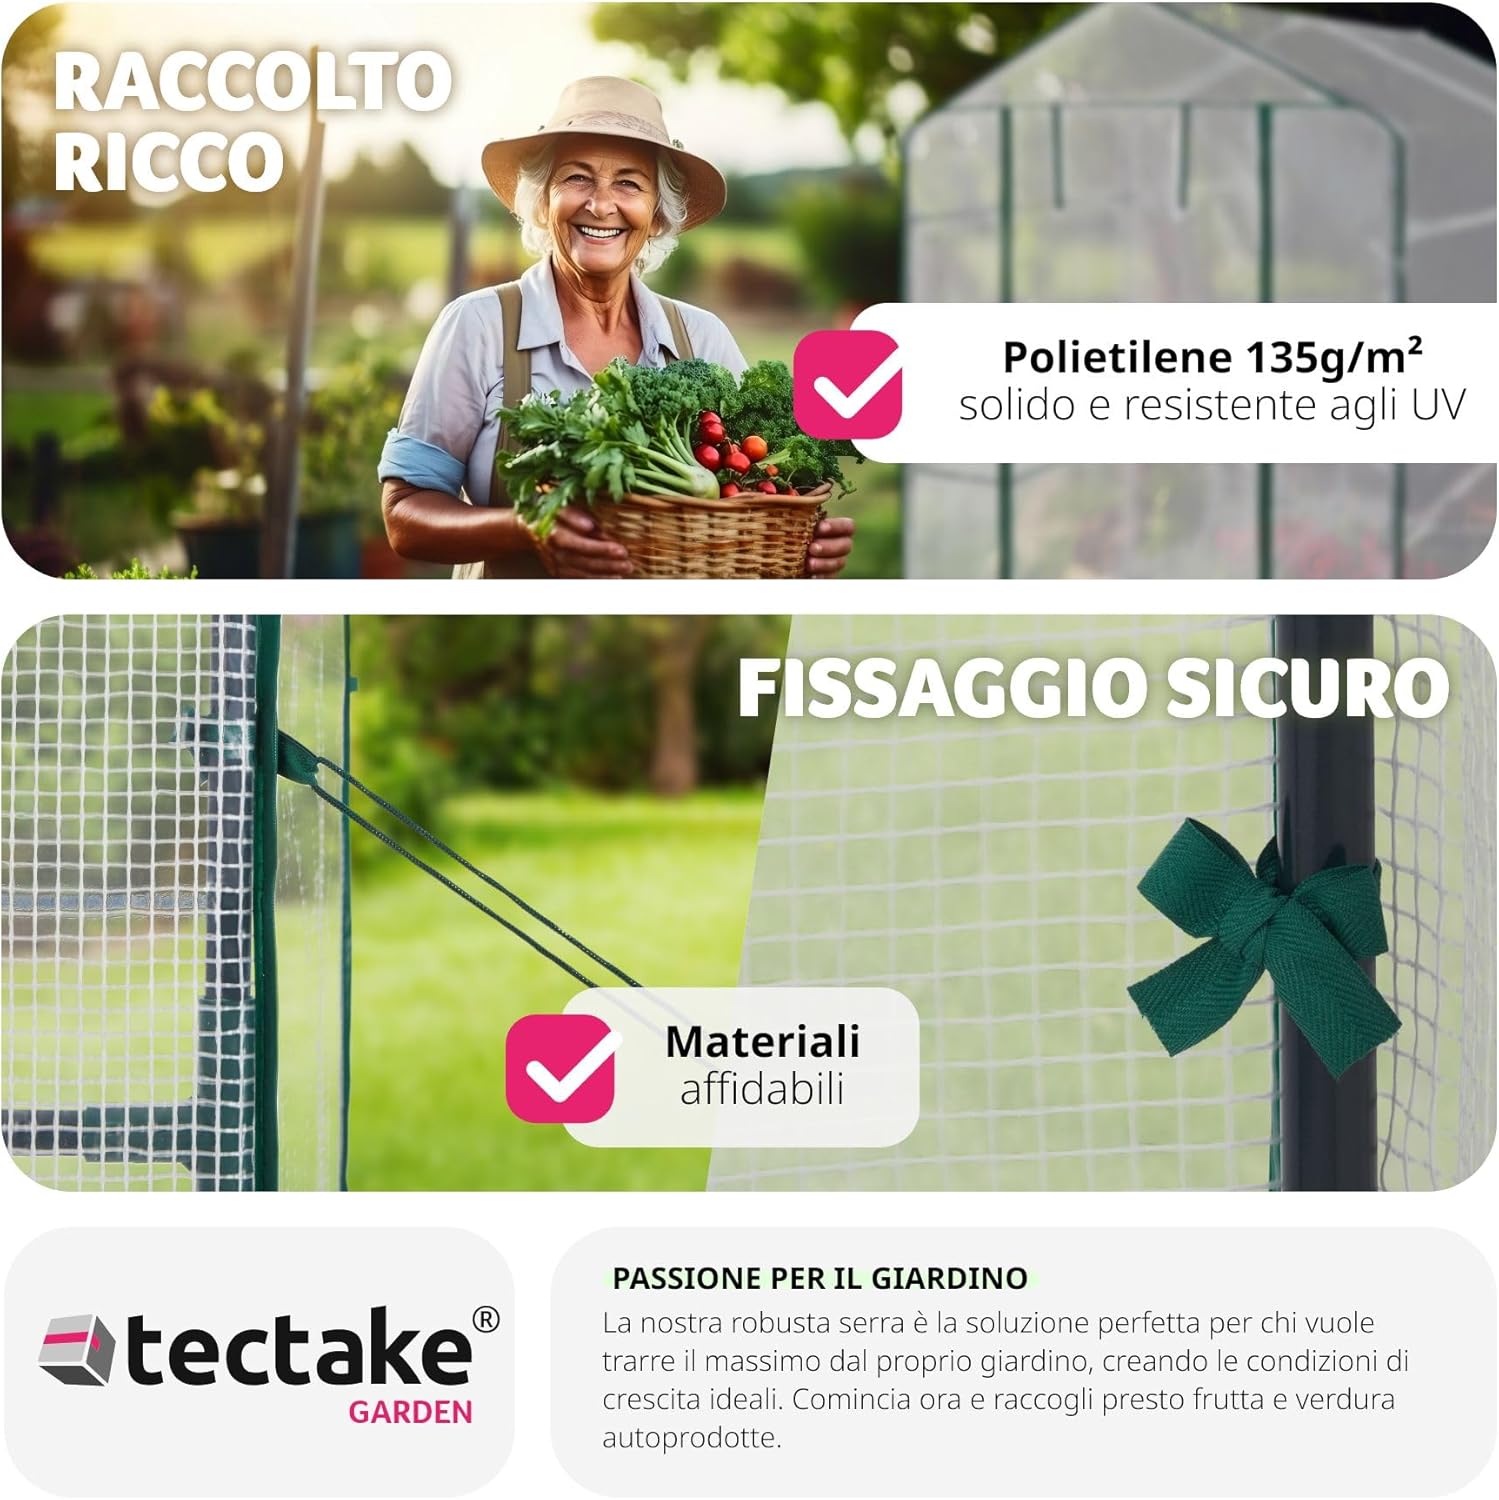
Figure 4: Example of secure fastening points for the polyethylene cover.
4. Operating Instructions
To maximize the benefits of your TecTake Garden Greenhouse, consider the following operational guidelines:
4.1 Temperature and Ventilation Management
- Prevent Overheating: On sunny days, especially as temperatures rise, the greenhouse interior can become very hot. To prevent plants from suffering, partially or fully open the access door to allow for air circulation.
- Air Circulation: While the greenhouse has one door, consider additional ventilation methods if internal temperatures consistently exceed optimal levels for your plants.
- Monitoring: Use a thermometer inside the greenhouse to monitor temperatures and adjust ventilation as needed.
4.2 Plant Placement and Care
- Utilize Shelves: The four metal grids provide ample space for organizing plants. Place smaller or lighter pots on the upper shelves and heavier items on the lower shelves or directly on the ground.
- Watering: Ensure plants receive adequate water, as the greenhouse environment can reduce natural rainfall access.
- Light Exposure: Position plants according to their light requirements, utilizing the different levels and areas within the greenhouse.

Figure 5: Greenhouse in use, demonstrating plant placement and garden integration.
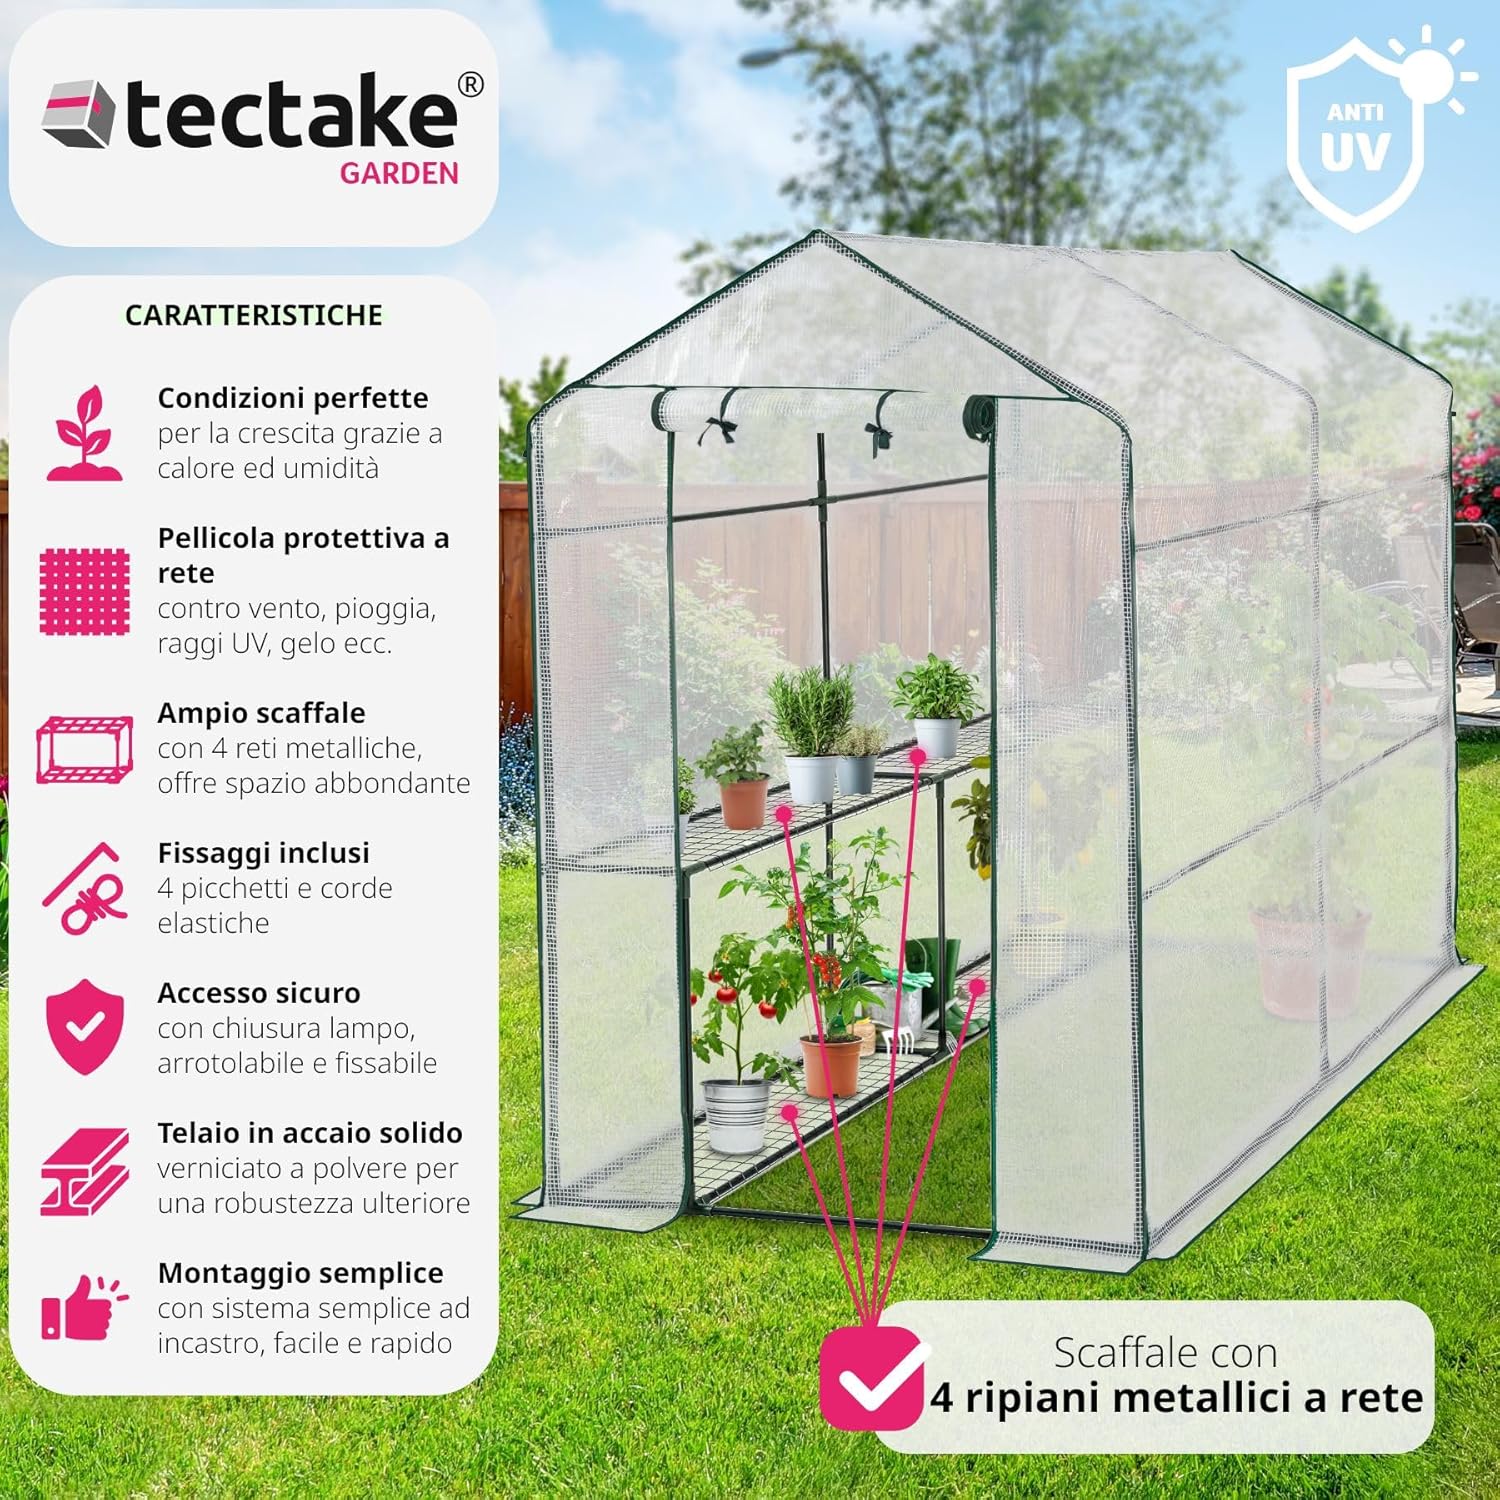
Figure 6: Close-up of the internal metal shelves, suitable for various potted plants.
5. Maintenance
Regular maintenance will extend the life and effectiveness of your greenhouse.
- Cleaning the Cover: Periodically clean the polyethylene cover with mild soap and water to remove dirt and debris, ensuring maximum light penetration. Avoid abrasive cleaners.
- Frame Inspection: Regularly check the steel frame and connectors for any signs of damage, rust, or loosening. Tighten connections as needed.
- Anchoring Check: After strong winds or heavy rain, inspect the ground pegs and tensioning ropes to ensure the greenhouse remains securely anchored. Re-secure if necessary.
- Shelf Condition: Inspect the metal grids for any bending or damage, especially if heavy pots are used.
- Zipper Maintenance: Keep the door zipper clean and lubricated for smooth operation.
6. Troubleshooting
Here are solutions to common issues you might encounter with your greenhouse:
| Problem | Possible Cause | Solution |
|---|---|---|
| Greenhouse unstable in wind | Insufficient anchoring; very strong winds. | Ensure all 4 pegs and tensioning ropes are firmly secured. Consider placing heavy objects inside the base or using additional anchoring methods in extremely windy areas. |
| Plants suffering from excessive heat | Inadequate ventilation on sunny days. | Open the access door fully or partially during warm periods to allow air circulation. Monitor internal temperature with a thermometer. |
| Shelves bending under weight | Overloading shelves with heavy pots. | Distribute weight evenly. Place heavier pots directly on the ground or reinforce shelves if consistently using heavy items. |
| Difficulty with zipper operation | Dirt or lack of lubrication. | Clean the zipper teeth and apply a silicone-based lubricant if necessary. |
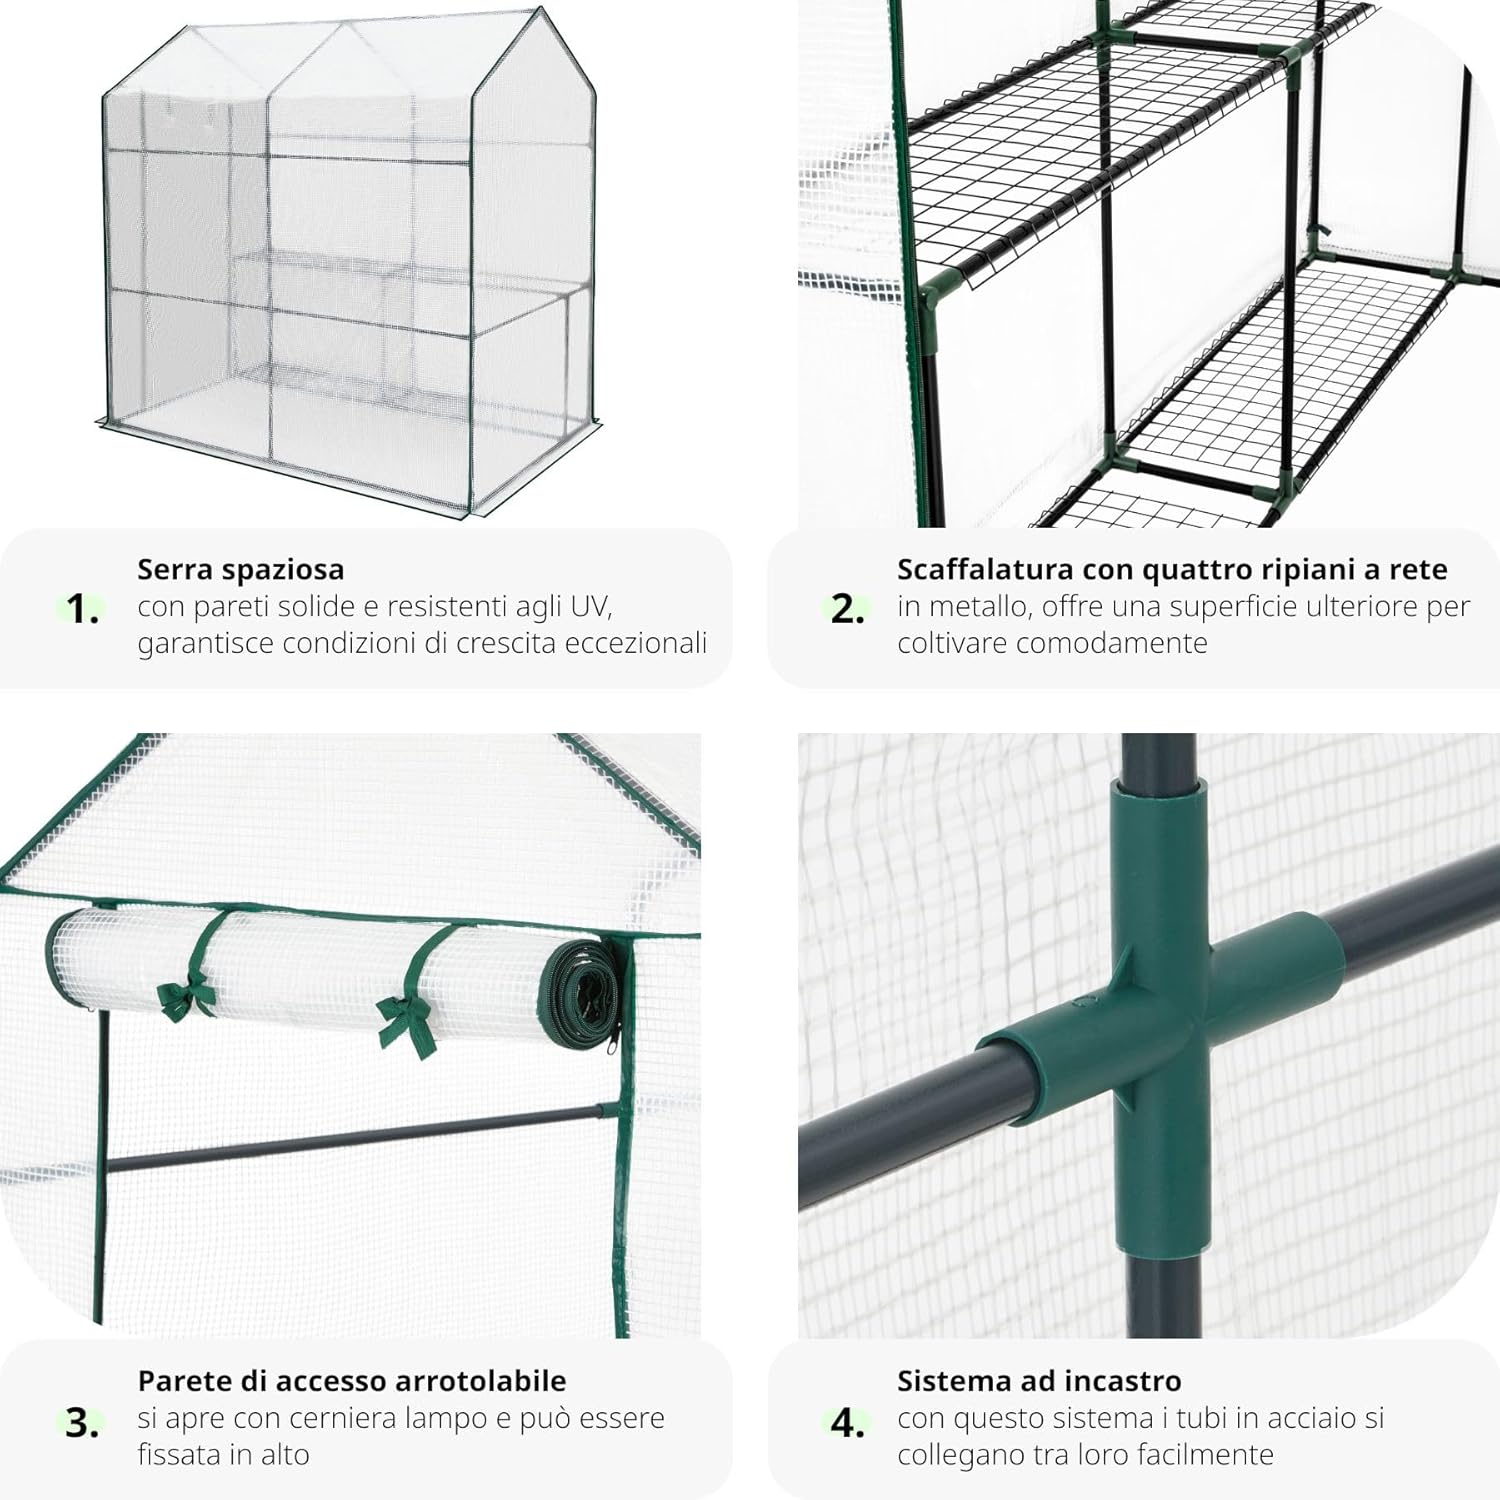
Figure 7: The greenhouse is designed to protect against UV rays, rain, wind, and frost.
7. Specifications
| Feature | Detail |
|---|---|
| Brand | TecTake |
| Model Number | 401861p |
| Product Dimensions (L x W x H) | 186 x 120 x 190 cm |
| Weight | Approximately 7.66 kg |
| Frame Material | Steel Alloy |
| Cover Material | Polyethylene (PE) |
| Number of Doors | 1 |
| Number of Air Vents | 1 (via door) |
| Special Feature | Robust steel frame, UV protection, 4 metal grids for additional planting space. |
| Usage | Outdoor |
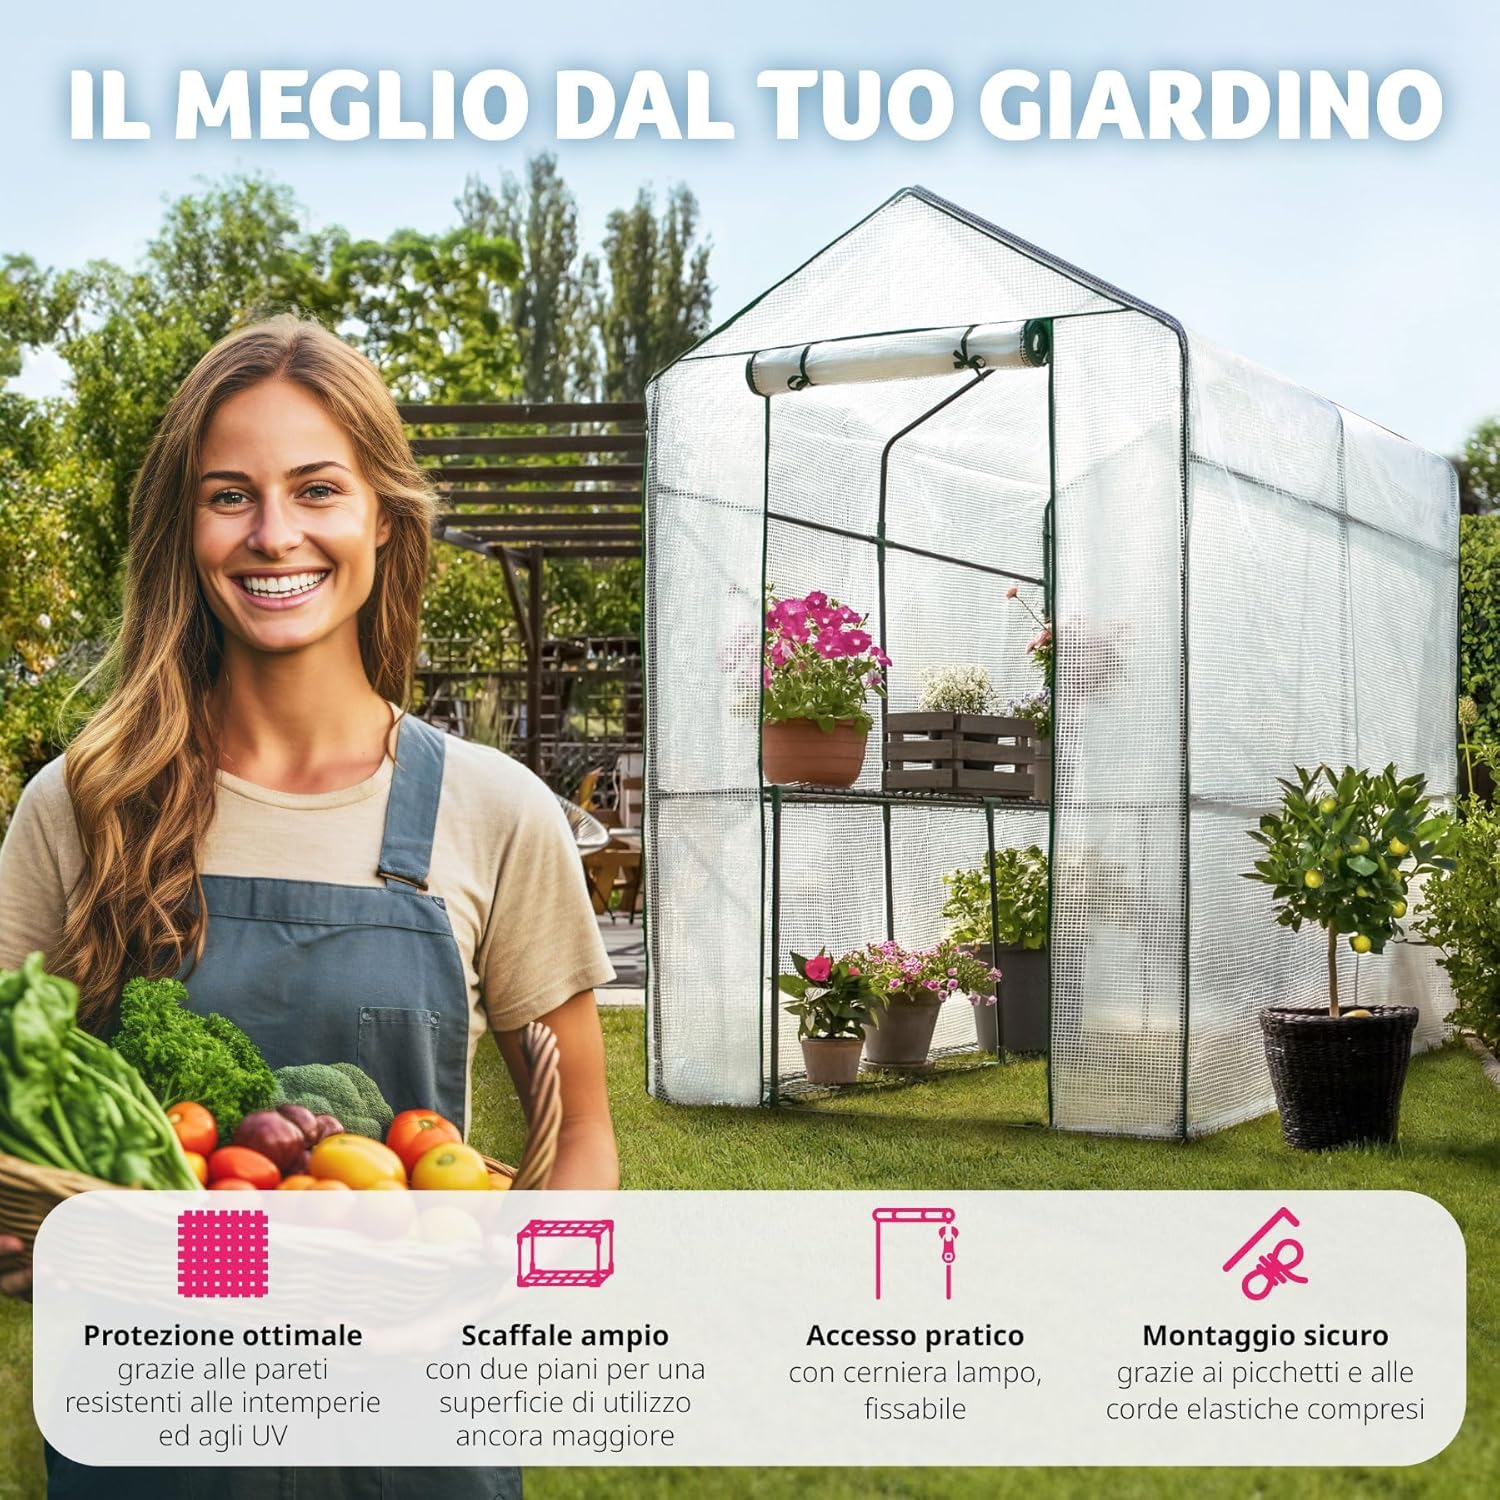
Figure 8: Detailed dimensions of the TecTake Garden Greenhouse.
8. Warranty and Support
Specific warranty details for your TecTake Garden Greenhouse may vary by region and retailer. Please refer to your purchase documentation or contact your point of sale for precise warranty information.
8.1 Customer Support
For technical assistance, missing parts, or any other inquiries, please contact TecTake customer service or the retailer from whom you purchased the product. Have your model number (401861p) and purchase date ready for faster service.
You can often find contact information on the manufacturer's official website or through your retailer's support channels.


