
Fluance RT80
Fluance RT80 Classic High Fidelity Vinyl Turntable
User Instruction Manual
Introduction
Welcome to the user manual for your new Fluance RT80 Classic High Fidelity Vinyl Turntable. This manual provides detailed instructions for setting up, operating, maintaining, and troubleshooting your turntable to ensure optimal performance and longevity. Please read this manual thoroughly before using your turntable.
What's Included
Your Fluance RT80 turntable package includes the following components:
- RT80 Turntable Plinth
- Dust Cover
- 2x Dust Cover Hinges
- Headshell with Audio Technica AT91 Cartridge
- Counterweight
- Aluminum Platter
- Rubber Belt
- 45 Adapter
- Felt Slip Mat
- 3ft RCA Cable With Ground Wire
- 5ft 100V - 240V (50/60Hz) AC Power Adapter
- Quick Start Guide
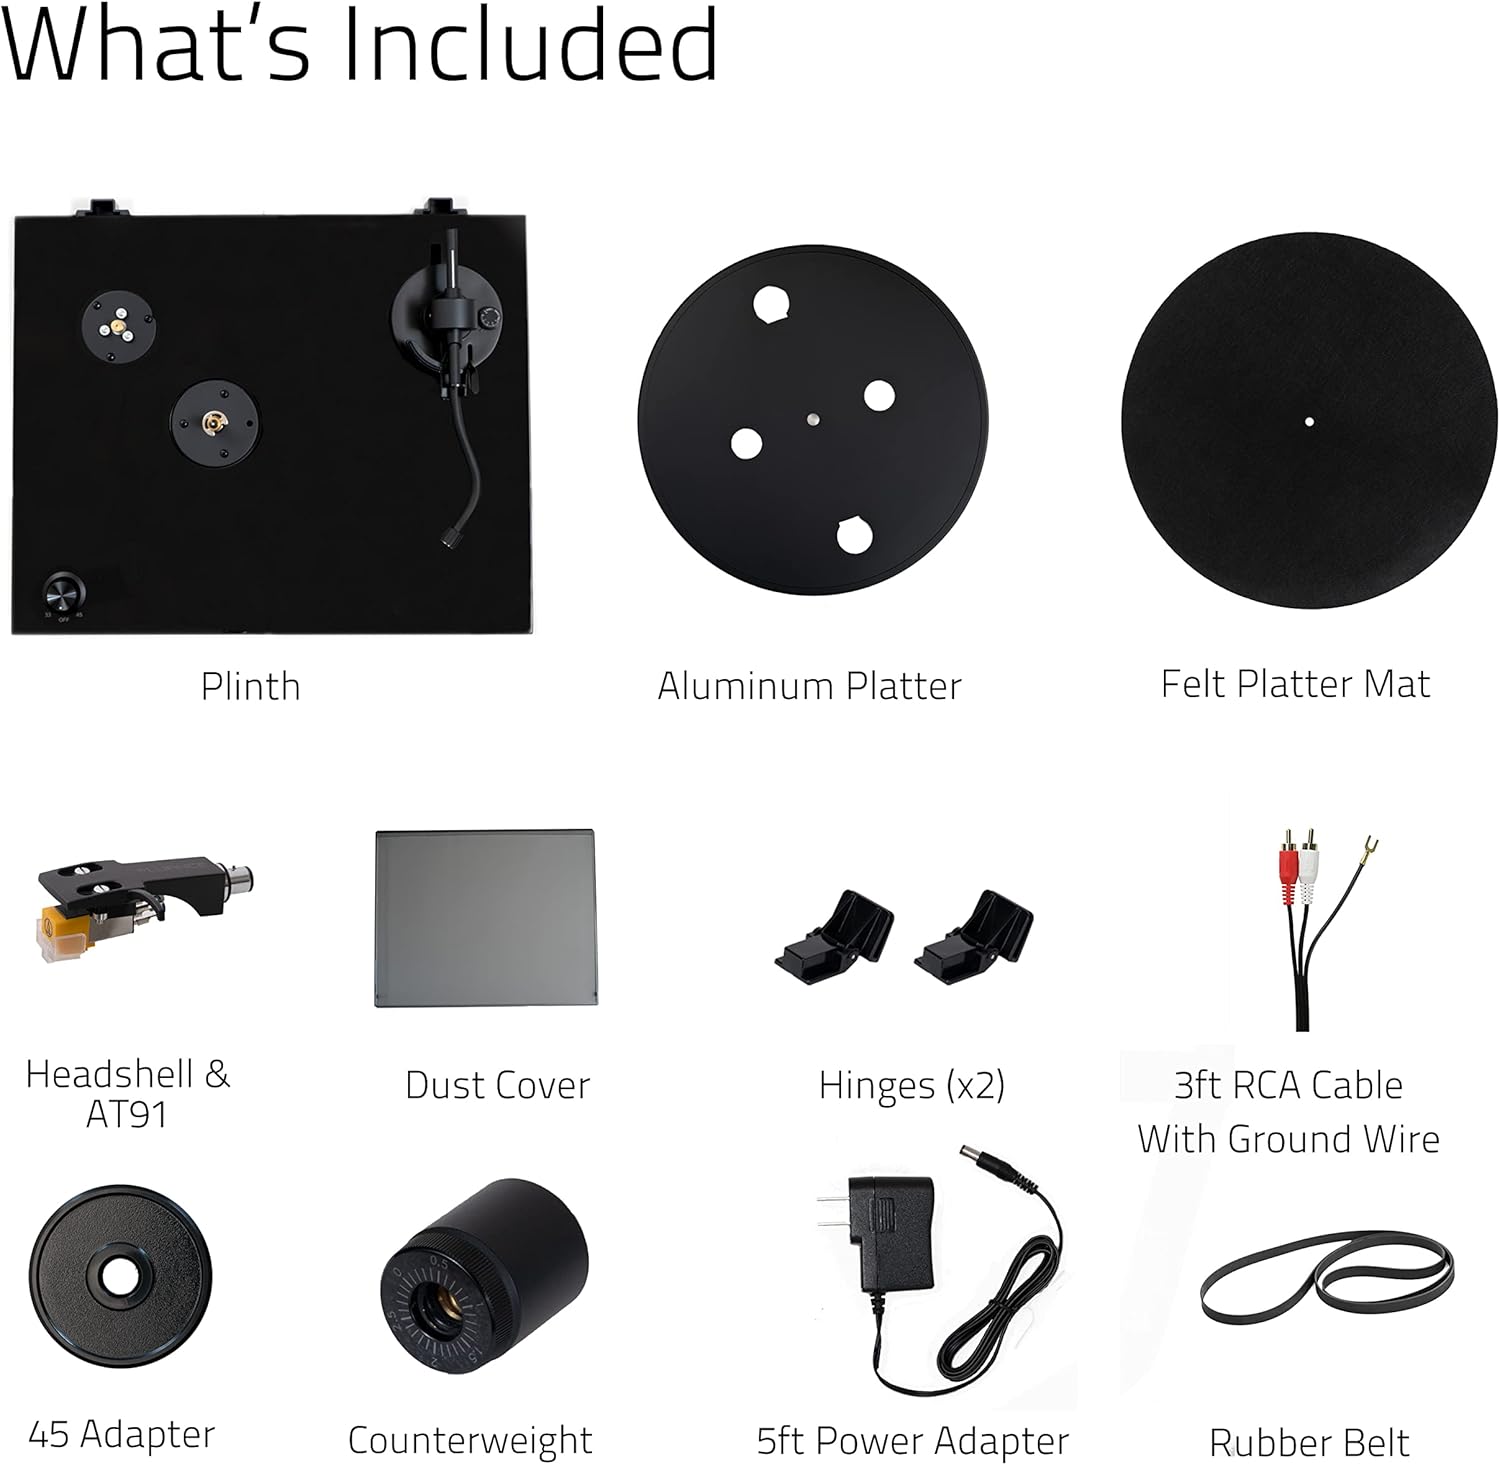
Image: All components included in the Fluance RT80 turntable package, laid out for easy identification.
Important Safety Information
Please read and follow all safety instructions carefully to prevent damage to the unit and ensure your safety.
- Do not expose the unit to rain or moisture.
- Do not place objects filled with liquids, such as vases, on the unit.
- Do not block any ventilation openings.
- Do not install near any heat sources such as radiators, heat registers, stoves, or other apparatus (including amplifiers) that produce heat.
- Protect the power cord from being walked on or pinched.
- Only use attachments/accessories specified by the manufacturer.
- Unplug this apparatus during lightning storms or when unused for long periods of time.
- Refer all servicing to qualified service personnel.
Setup Guide
Follow these steps to properly set up your Fluance RT80 turntable.
1. Unpacking and Placement
Carefully remove all components from the packaging. Place the turntable on a stable, level surface away from direct sunlight, heat sources, and excessive vibration.
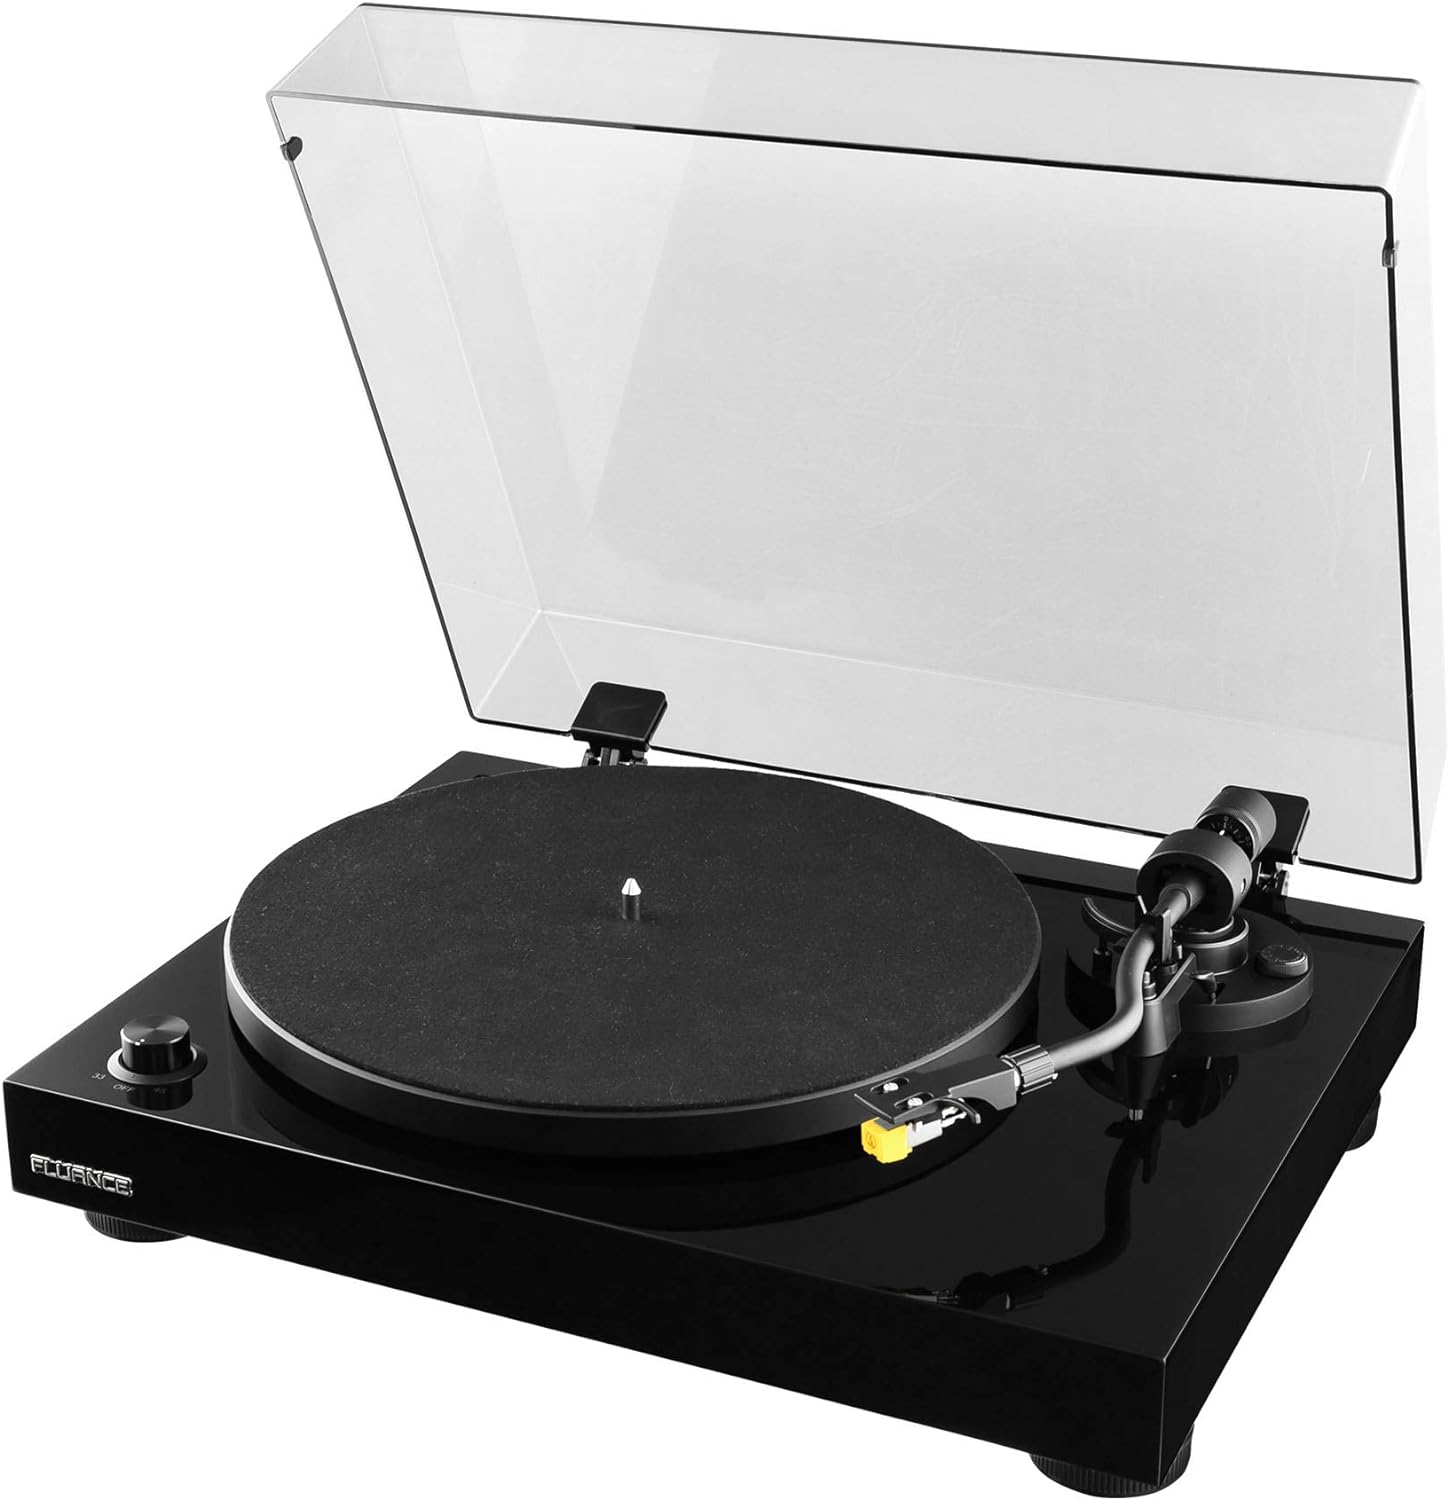
Image: The Fluance RT80 turntable in its assembled state, ready for use.
2. Platter and Belt Installation
- Place the aluminum platter onto the center spindle.
- Locate the rubber drive belt. Carefully stretch the belt around the inner rim of the platter and hook it onto the motor pulley. Ensure the belt is not twisted.
- Place the felt slip mat on top of the platter.
3. Counterweight and Tonearm Balance
The Audio Technica AT91 cartridge is pre-installed on the headshell. You will need to balance the tonearm.
- Gently slide the counterweight onto the rear of the tonearm with the numbers facing forward.
- Remove the stylus protector from the cartridge.
- While holding the tonearm lift, carefully release the tonearm clamp.
- Adjust the counterweight by rotating it until the tonearm is perfectly balanced and floats horizontally.
- Once balanced, hold the counterweight steady and rotate the numbered ring to '0' (zero).
- Rotate the entire counterweight counter-clockwise to the recommended tracking force of 2.0 grams (2 on the scale).

Image: A detailed view of the Audio Technica AT91 cartridge, highlighting its position on the tonearm.
4. Anti-Skate Adjustment
Set the anti-skate dial to the same value as your tracking force, which is 2.0 for the AT91 cartridge.
5. Dust Cover Installation
Insert the two dust cover hinges into the slots at the rear of the turntable plinth, then attach the dust cover to the hinges.

Image: The Fluance RT80 turntable with its protective dust cover in the open position.
6. Connections
Connect the RCA cables from the turntable to your amplifier or powered speakers. Ensure the ground wire is connected to the ground terminal on your amplifier if available.
Connect the power adapter to the DC 12V input on the turntable and then plug it into a wall outlet.

Image: The rear connection panel of the turntable, illustrating the RCA outputs, ground terminal, and power input.

Image: The back of the turntable, displaying the various connection ports and switches.
7. Preamp Switch
The RT80 has a built-in Texas Instruments preamp. Use the switch on the rear panel to select between PHONO (BYPASS) if connecting to an amplifier with a dedicated phono input, or LINE if connecting to a standard auxiliary input on an amplifier or powered speakers.
Operating Instructions
Playing a Record
- Place a record on the felt slip mat.
- Select the appropriate speed (33 1/3 RPM or 45 RPM) using the speed selector knob. Use the 45 adapter for 7-inch singles if needed.
- Lift the tonearm using the cueing lever.
- Position the tonearm over the desired starting groove of the record.
- Gently lower the cueing lever to allow the stylus to descend onto the record.
- At the end of the record, the auto-stop feature will engage, and the platter will stop spinning.
- Lift the tonearm using the cueing lever and return it to the tonearm rest. Secure it with the tonearm clamp.
Auto-Stop Function
The RT80 features an auto-stop function that automatically stops the platter rotation when the tonearm reaches the end of a record. This helps prevent unnecessary wear on the stylus and record. The auto-stop function can be toggled ON/OFF via a switch on the rear panel.
Record Care
- Always handle records by their edges to avoid transferring oils from your skin.
- Store records vertically in their sleeves to prevent warping.
- Clean records regularly with a carbon fiber brush or a record cleaning solution to remove dust and static.
Maintenance
Cleaning the Turntable
- Wipe the dust cover and plinth with a soft, dry, lint-free cloth.
- Do not use harsh chemicals or abrasive cleaners.
- For the platter and tonearm, use a slightly damp cloth if necessary, then dry immediately.
Stylus Care
- Clean the stylus regularly using a soft brush designed for stylus cleaning, brushing from back to front.
- A dirty stylus can damage your records and degrade sound quality.
- Replace the stylus after approximately 300-500 hours of playback, or if you notice a decrease in sound quality or increased distortion.
Belt Replacement
The rubber drive belt may stretch or degrade over time. If you notice inconsistent speed or a decrease in playback quality, the belt may need to be replaced. Contact Fluance support for replacement belts.
Troubleshooting
| Problem | Possible Cause | Solution |
|---|---|---|
| No sound or very low sound. |
|
|
| Distorted sound or skipping. |
|
|
| Platter not spinning or spinning too slowly/quickly. |
|
|
| Humming noise. |
|
|
Specifications
| Feature | Detail |
|---|---|
| Model Name | RT80 |
| Brand | Fluance |
| Product Dimensions | 13.75 x 16.5 x 5.5 inches |
| Item Weight | 9.9 pounds |
| Material | MDF Wood |
| Color | Piano Black |
| Cartridge | Audio Technica AT91 |
| Drive Type | Belt Drive |
| Built-in Preamp | Yes (Texas Instruments) |
| Speeds | 33 1/3, 45 RPM |
| Connectivity Technology | Wired (RCA) |
| Country of Origin | Taiwan |
Warranty and Support
Your Fluance RT80 turntable comes with a 2 Year Manufacturer's Warranty, ensuring peace of mind regarding your purchase. Fluance also offers Lifetime Customer Support.
For technical assistance, warranty claims, or general inquiries, please visit the official Fluance website or contact their customer support directly. You can also refer to the User Guide (PDF) or Installation Manual (PDF) provided by Fluance for additional information.
Related documentsRT80


Ask a question about this manual
Ask about setup, troubleshooting, compatibility, parts, safety, or missing instructions. Manuals+ will review the question and use this page’s manual context to help answer it.