Introduction
The Interphone Tour Dual Pack is a high-performance Bluetooth intercom system designed for motorcycle riders. It enables communication between up to four riders over a distance of 1.5 km, offers extended battery life, and supports fast charging. This device is compatible with all helmet types and Bluetooth-enabled smartphones, allowing for calls, music playback, and GPS navigation. This manual provides detailed instructions for installation, operation, maintenance, and troubleshooting to ensure optimal performance and user experience.
Package Contents

Figure 1: Included components of the Interphone Tour Dual Pack.
The Interphone Tour Dual Pack includes the following items:
- 2 Control Units
- 2 Complete Audio Kits (speakers)
- 2 Microphones for full-face helmets
- 2 Microphones for jet or modular helmets
- 2 Sets of Sponge Covers (for microphones)
- 2 Sets of Spacers (for speakers)
- 2 Charging and Data Cables
- 2 Adhesive Bases (for mounting)
- 2 Clip Bases (for mounting)
- Quick Start Guide and Warranty Information
Setup and Installation
Proper installation ensures optimal audio quality and secure attachment of the intercom unit to your helmet.
Mounting the Intercom Unit

Figure 2: Interphone Tour unit securely mounted on a helmet.
Choose between the adhesive base or the clip base for mounting. The adhesive base provides a permanent attachment, while the clip base allows for easier removal. Ensure the mounting location on the helmet is clean and dry before installation.
- Select Mounting Base: Decide whether to use the adhesive base or the clip base.
- Positioning: Identify a flat, suitable area on the left side of your helmet, near the bottom edge, where the unit will not obstruct vision or movement.
- Install Base:
- Adhesive Base: Peel off the protective film and firmly press the base onto the helmet surface for at least 30 seconds. Allow 24 hours for the adhesive to cure before attaching the intercom unit.
- Clip Base: Slide the clip base between the helmet shell and the inner padding. Ensure it is securely fastened and does not move.
- Attach Intercom Unit: Slide the Interphone Tour control unit onto the installed base until it clicks into place.
Installing Speakers and Microphones
The audio kit includes speakers and two types of microphones to suit different helmet designs.
- Speaker Placement: Locate the ear pockets inside your helmet. Attach the speakers using the provided adhesive pads, ensuring they are centered over your ears for optimal sound. Use spacers if needed to bring the speakers closer to your ears.
- Microphone Selection:
- Full-Face Helmet Microphone: This is a flexible boom microphone. Attach it to the inside of the helmet, positioning the microphone capsule directly in front of your mouth, ensuring it does not touch your lips.
- Jet/Modular Helmet Microphone: This is a wired microphone designed for open-face or modular helmets. Secure it inside the helmet, ensuring it is close to your mouth and protected from wind noise.
- Cable Management: Route all cables neatly under the helmet padding to prevent discomfort and ensure they are not snagged. Connect the speaker and microphone cables to the corresponding ports on the intercom unit.
Operating Instructions
The Interphone Tour features intuitive controls for various functions.

Figure 3: Front view of two Interphone Tour units, highlighting the control buttons.
Basic Functions
- Power On/Off: Press and hold the Power/Intercom button (usually the large central button with a phone icon or power symbol) for approximately 3 seconds.
- Volume Control: Use the Music and FM buttons (or up/down arrows) to adjust the volume.
- Bluetooth Pairing:
- Ensure the Interphone Tour is off.
- Press and hold the Power/Intercom button until the LED indicator flashes rapidly (pairing mode).
- On your smartphone or GPS device, search for Bluetooth devices and select "Interphone Tour".
- Once paired, the LED will change to a steady blue light.
Intercom Communication
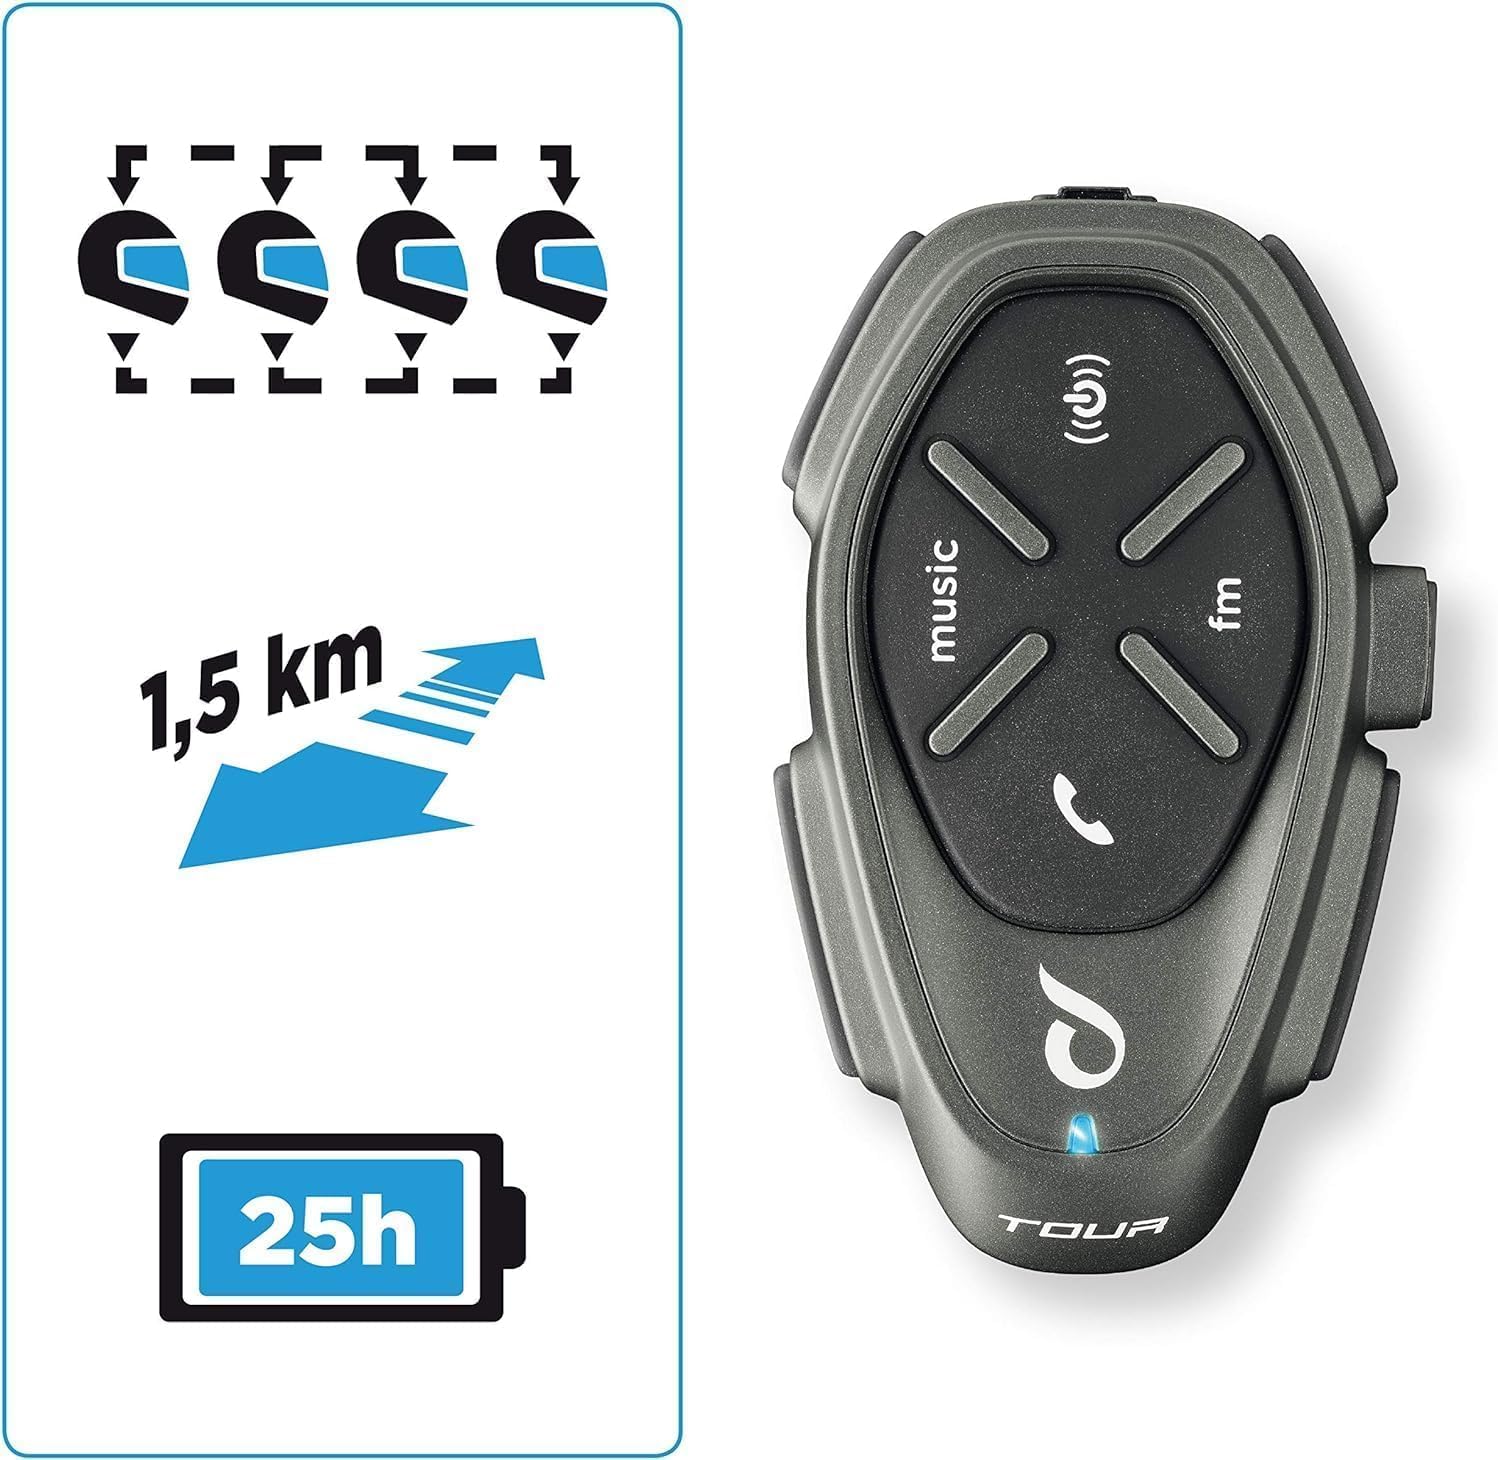
Figure 4: Key features including multi-rider communication and range.
The Interphone Tour supports communication for up to 4 riders over a distance of 1.5 km.
- Initiating Intercom: Briefly press the Power/Intercom button to start an intercom conversation with a paired unit.
- Multi-Rider Intercom: Follow the specific pairing instructions in the quick start guide for multi-unit connections (e.g., 3-way or 4-way intercom).
- Anycom Function: The Anycom feature allows communication with other intercom devices, regardless of brand. Refer to the full manual for detailed Anycom pairing procedures.
Media and Navigation

Figure 5: Connectivity options including music, phone calls, and FM radio.
- Music Playback: Once paired with your smartphone, use the Music button to play/pause music. Use volume buttons to adjust. Music sharing between rider and passenger is supported.
- FM Radio: Press the FM button to activate the built-in FM radio. Use the music/FM buttons to scan for stations.
- GPS Navigation: When paired with a Bluetooth-enabled GPS device, voice instructions will be transmitted directly to your helmet speakers.
- Phone Calls:
- Answer Call: Briefly press the Phone button (or central button).
- End Call: Briefly press the Phone button.
- Voice Dialing: If supported by your phone, long-press the Phone button to activate voice assistant.
Battery and Charging
The Interphone Tour boasts a battery life of over 20 hours and features fast charging technology.
- Charging: Connect the provided USB charging cable to the intercom unit and a compatible USB power source. The LED indicator will show charging status.
- Fast Charge: Utilize the fast charge feature for quick power replenishment.
- Battery Life: A fully charged unit provides approximately 25 hours of talk time.
Waterproof Design
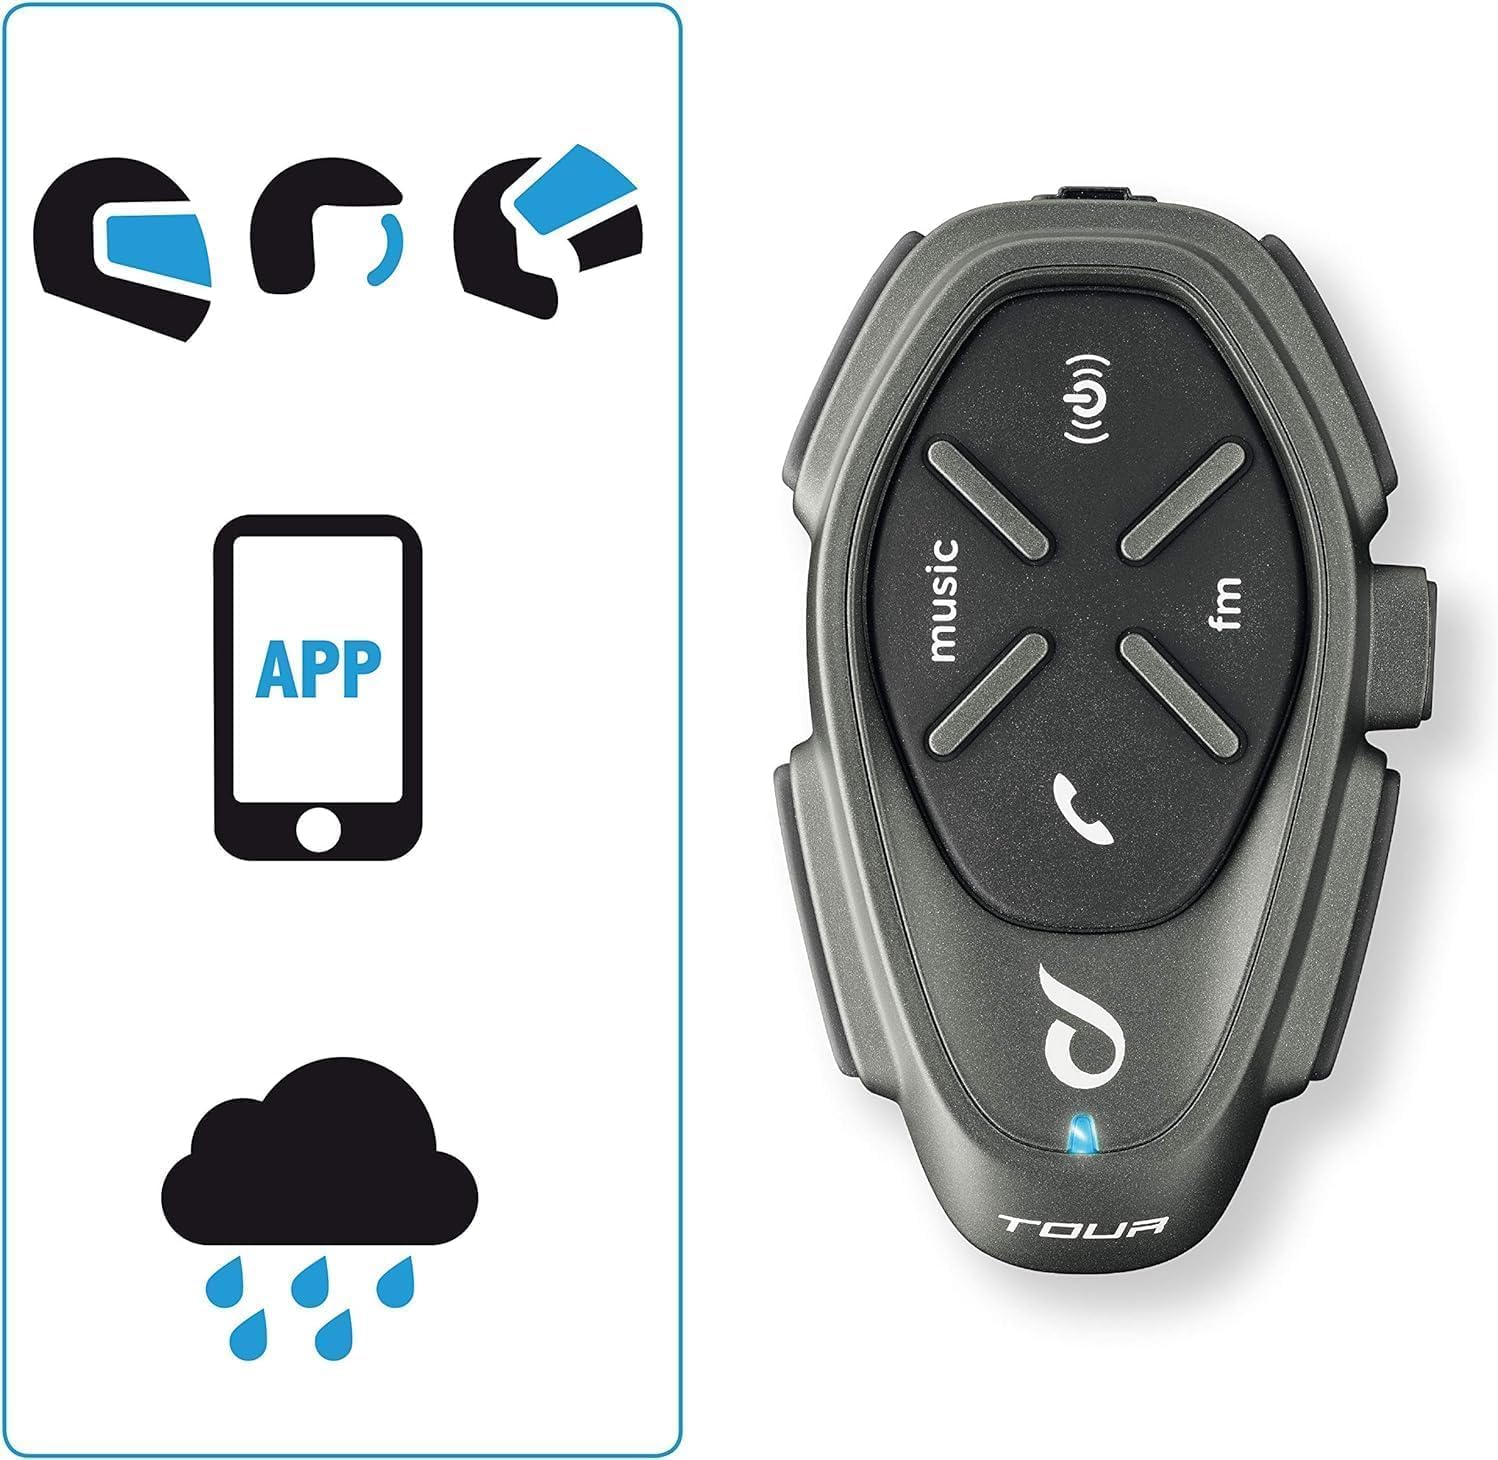
Figure 6: The intercom is compatible with various helmet types and is waterproof.
The Interphone Tour is designed to be fully waterproof, ensuring reliable operation in various weather conditions.
Maintenance
To ensure the longevity and optimal performance of your Interphone Tour, follow these maintenance guidelines:
- Cleaning: Use a soft, damp cloth to clean the exterior of the intercom unit. Avoid using abrasive cleaners or solvents, as they may damage the finish or internal components.
- Storage: When not in use for extended periods, store the unit in a cool, dry place. Ensure the battery is partially charged (around 50%) before storage to prolong its lifespan.
- Cable Care: Handle cables gently to prevent damage. Avoid sharp bends or excessive pulling.
- Water Exposure: While waterproof, it is recommended to wipe the unit dry after exposure to heavy rain to prevent water spots or mineral buildup.
Troubleshooting
This section addresses common issues you might encounter with your Interphone Tour.
| Problem | Possible Cause | Solution |
|---|---|---|
| Unit does not power on. | Low or depleted battery. | Charge the unit using the provided cable. Ensure the charging indicator lights up. |
| Cannot pair with smartphone/GPS. | Unit not in pairing mode; Bluetooth off on device; interference. | Ensure the Interphone Tour is in pairing mode (rapid flashing LED). Check Bluetooth settings on your device. Move away from other electronic devices. |
| Intercom communication is poor or drops. | Out of range; obstacles; low battery. | Ensure units are within 1.5 km range and have a clear line of sight. Charge units. Re-pair if necessary. |
| No sound from speakers. | Speakers not connected; volume too low; faulty speakers. | Check speaker connections to the unit. Increase volume. Test with another audio source if possible. |
| Microphone not picking up voice. | Microphone not connected; incorrect microphone type; faulty microphone. | Ensure microphone is securely connected. Verify correct microphone type for your helmet. Check microphone position. |
If the problem persists, consult the full user manual or contact Interphone customer support.
Specifications
| Feature | Detail |
|---|---|
| Model Name | INTERPHOTOURTP |
| Brand | Interphone |
| Connectivity Technology | Bluetooth |
| Intercom Range | Up to 1.5 km (for 4 riders) |
| Battery Life | Approx. 25 hours talk time (over 20 hours) |
| Charging | Fast Charge technology |
| Water Resistance Level | Waterproof |
| Compatible Devices | Bluetooth devices (smartphones, GPS) |
| Control Type | Noise Control, Touch Control, Volume Control, Voice Control |
| Special Features | Anycom (inter-brand compatibility), Music Sharing, Noise Cancellation |
| Frequency Range | 20 Hz - 20,000 Hz |
| Material | Plastic |
| Battery Composition | Lithium-ion (1 Lithium-polymer included) |
| Form Factor | Earbuds (Auricolari) |
| Impedance | 25 ohms |
| Noise Isolation | Active Noise Suppression |
Warranty and Support
The Interphone Tour comes with a manufacturer's warranty and support resources.
- Manufacturer's Warranty: The product is covered by a 2-year manufacturer's warranty. Please retain your proof of purchase for warranty claims.
- Spare Parts Availability: Information regarding spare parts availability is not provided.
- Software Updates: Information regarding guaranteed software updates is not provided.
- Customer Support: For further assistance, technical support, or warranty claims, please refer to the contact information provided in your Quick Start Guide or visit the official Interphone website.


