
1. Safety Instructions
Always observe basic safety precautions when using power tools to reduce the risk of fire, electric shock, and personal injury. Read all instructions carefully before operating this impact wrench.
- Wear Eye Protection: Always wear safety goggles or safety glasses with side shields.
- Wear Hearing Protection: Prolonged exposure to noise from power tools can cause hearing damage.
- Wear Hand Protection: Use appropriate gloves to protect hands from vibration and potential pinch points.
- Secure Workpiece: Always secure the workpiece in a vise or with clamps. Do not hold the workpiece by hand.
- Maintain a Firm Grip: Hold the tool firmly with both hands to control torque reaction.
- Use Correct Sockets: Only use impact-rated sockets that are in good condition and correctly sized for the fastener.
- Check Air Supply: Ensure the air supply is clean, dry, and at the correct pressure.
- Disconnect Air Supply: Always disconnect the air supply before changing accessories, performing maintenance, or when the tool is not in use.
- Keep Work Area Clean: Cluttered work areas invite accidents.
- Avoid Accidental Starting: Ensure the trigger is in the OFF position before connecting to the air supply.
- Do Not Overreach: Maintain proper footing and balance at all times.
- Inspect Tool Before Use: Check for damaged parts, misalignment, or any other condition that may affect its operation.
2. Product Overview
The YATO YT-09571 is a robust 3/4-inch pneumatic impact wrench designed for heavy-duty fastening and loosening applications. It delivers a powerful torque of 1630 Newton-meters, making it suitable for automotive, industrial, and construction tasks.
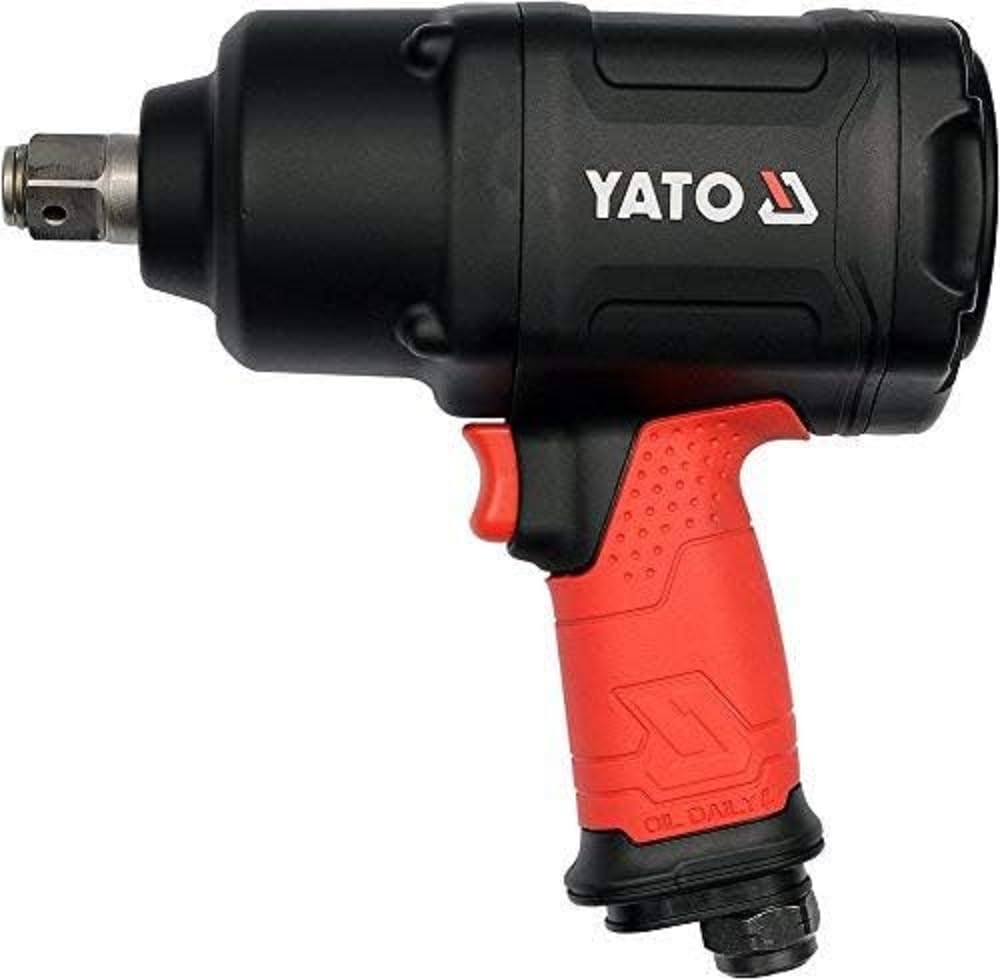
Figure 1: YATO YT-09571 Impact Wrench. This image displays the overall design of the impact wrench, highlighting its ergonomic handle and robust housing. The 3/4-inch square drive anvil is visible at the front, ready for socket attachment.
Key features include a durable construction, a comfortable grip, and a powerful impact mechanism for efficient operation. The tool operates on compressed air, requiring a suitable air compressor and air line setup.
3. Setup
3.1 Unpacking
Carefully remove the impact wrench and all accessories from the packaging. Inspect the tool for any signs of damage that may have occurred during shipping. Do not operate a damaged tool.
3.2 Air Supply Connection
- Ensure your air compressor is capable of providing the required air pressure and volume (refer to specifications).
- Install an air filter/regulator/lubricator (FRL unit) in the air line, as close to the tool as possible. This ensures clean, regulated, and lubricated air, which is crucial for the tool's longevity.
- Apply thread sealant tape to the male threads of the air inlet fitting.
- Attach the air inlet fitting to the tool's air inlet port.
- Connect the air hose from the FRL unit to the air inlet fitting on the tool.
- Set the air pressure regulator on the FRL unit to the recommended operating pressure (typically 6.2 bar / 90 PSI).
- Ensure all connections are secure and leak-free.
3.3 Attaching Sockets
This impact wrench uses a 3/4-inch square drive. Only use impact-rated sockets.
- Disconnect the air supply before attaching or removing sockets.
- Align the square hole of the impact socket with the square drive anvil of the wrench.
- Push the socket firmly onto the anvil until it locks securely. Some anvils may have a detent pin or ring for retention.
- To remove, pull back the detent ring (if present) or simply pull the socket off the anvil.
4. Operation
4.1 Starting and Stopping
To start the tool, depress the trigger. To stop, release the trigger.
4.2 Forward/Reverse Direction
The impact wrench is equipped with a directional selector switch, usually located near the trigger or at the rear of the tool. Move the switch to the desired position for forward (tightening) or reverse (loosening) rotation.
- Forward (Tightening): Typically indicated by an "F" or an arrow pointing clockwise.
- Reverse (Loosening): Typically indicated by an "R" or an arrow pointing counter-clockwise.
Always ensure the tool has come to a complete stop before changing the direction of rotation.
4.3 Torque Adjustment
This impact wrench may feature a power regulator to adjust the output torque. This is usually a dial or lever with multiple settings. Start with a lower setting and increase as needed. For critical applications requiring precise torque, always use a calibrated torque wrench for final tightening.
4.4 General Operating Tips
- Apply steady, firm pressure to the tool. Do not force it.
- Allow the tool to impact for a few seconds to achieve full torque.
- For stubborn fasteners, apply penetrating oil and allow it to soak before attempting removal.
- Avoid prolonged free-running of the tool, as this can cause unnecessary wear.
5. Maintenance
Regular maintenance ensures optimal performance and extends the lifespan of your impact wrench. Always disconnect the air supply before performing any maintenance.
5.1 Lubrication
- If an in-line lubricator is not used, add 5-10 drops of pneumatic tool oil into the air inlet before each use.
- For heavy use, lubricate more frequently.
- Use only high-quality pneumatic tool oil.
5.2 Cleaning
- Keep the tool clean and free of debris. Wipe down the exterior with a clean cloth.
- Do not use harsh solvents or abrasive cleaners.
- Periodically clean the air inlet screen to prevent blockages.
5.3 Storage
Store the impact wrench in a clean, dry place, away from direct sunlight and extreme temperatures. Disconnect it from the air supply and ensure it is clean before storage.
6. Troubleshooting
| Problem | Possible Cause | Solution |
|---|---|---|
| Tool does not operate or operates weakly. | Low air pressure; Insufficient air volume; Clogged air filter; Lack of lubrication; Worn internal parts. | Check air compressor pressure and capacity; Clean or replace air filter; Add pneumatic tool oil; Contact service center. |
| Excessive air leakage. | Loose fittings; Damaged O-rings or seals. | Tighten fittings; Replace damaged O-rings or seals. |
| Tool runs but does not impact. | Impact mechanism jammed or worn; Low air pressure. | Check air pressure; Contact service center for inspection of impact mechanism. |
| Tool overheats. | Continuous heavy use; Lack of lubrication. | Allow tool to cool; Ensure proper lubrication. |
7. Specifications
| Feature | Value |
|---|---|
| Model Number | YT-09571 |
| Brand | Yato |
| Drive Size | 3/4 inch (Square drive) |
| Maximum Torque | 1630 Newton-meters |
| Operating Mode | Mechanical (Pneumatic) |
| Product Dimensions (L x W x H) | 50 x 50 x 28 cm |
| Item Weight | 3.88 Kilograms |
| Material | (Housing) Carton |
| Finish Type | Powder Coated |
| Color | Black |
| Power Source | Compressed Air (Pneumatic) |
Note: The "Material" specification of "Carton" likely refers to the packaging material, not the tool's construction. The "Power Source" has been corrected to reflect the tool's pneumatic operation.
8. Warranty & Support
For warranty information, technical support, or service inquiries, please refer to the warranty card included with your product or visit the official YATO website. Keep your purchase receipt as proof of purchase for warranty claims.
Manufacturer: Yato
Contact: Please visit www.yato.com for contact details and support resources.


