
MENABO 000085900000
MENABO Tiger Roof Bars Instruction Manual
Model: 000085900000
1. Introduction
This manual provides essential information for the proper installation, operation, and maintenance of your MENABO Tiger Roof Bars. Please read this manual thoroughly before installation and retain it for future reference.
The MENABO Tiger Roof Bars are designed for vehicles equipped with integrated roof rails, offering a secure and reliable solution for transporting various loads. They are constructed from anodised aluminium for durability and ease of use.
2. Safety Information
Always adhere to the following safety guidelines to prevent injury or damage to your vehicle and the roof bars:
- Do not exceed the maximum load capacity of 75 kg (165 lbs) for the roof bars. Always check your vehicle's manufacturer specifications for its maximum roof load capacity, and use the lower of the two values.
- Ensure all components are securely fastened before driving. Periodically check fasteners during long journeys.
- Distribute the load evenly across the roof bars.
- Be aware of increased vehicle height and potential changes in handling due to the added load.
- Avoid automatic car washes with roof bars installed.
- Do not modify the roof bars or their components.
3. Package Contents
Verify that all components are present before beginning installation:
- MENABO Tiger Roof Bars (2 units)
- Mounting components (specific brackets and fasteners for integrated rails)
- Instruction Manual (this document)

Figure 3.1: Overview of the MENABO Tiger Roof Bars, showing the two anodised aluminium bars and their mounting feet.
4. Setup and Installation
The MENABO Tiger Roof Bars are designed for quick and easy assembly, as they come pre-assembled. Follow these steps for installation on vehicles with integrated roof rails:
- Prepare the Vehicle: Ensure your vehicle's roof rails are clean and free from debris.
- Position the Bars: Carefully place the first roof bar onto the integrated roof rails. The mounting feet should align with the rail's profile.
- Adjust Spacing: Position the front and rear bars according to the recommended spacing for your vehicle or the item you intend to carry. Ensure they are parallel.
- Secure the Mounting Feet: Using the provided mounting components, secure each foot to the integrated roof rail. Tighten all fasteners firmly but do not overtighten. Refer to the specific diagrams for your vehicle type if available.
- Verify Security: After tightening, gently pull and push on each roof bar to ensure it is securely attached and does not move.

Figure 4.1: MENABO Tiger Roof Bars correctly installed on a vehicle with integrated roof rails.
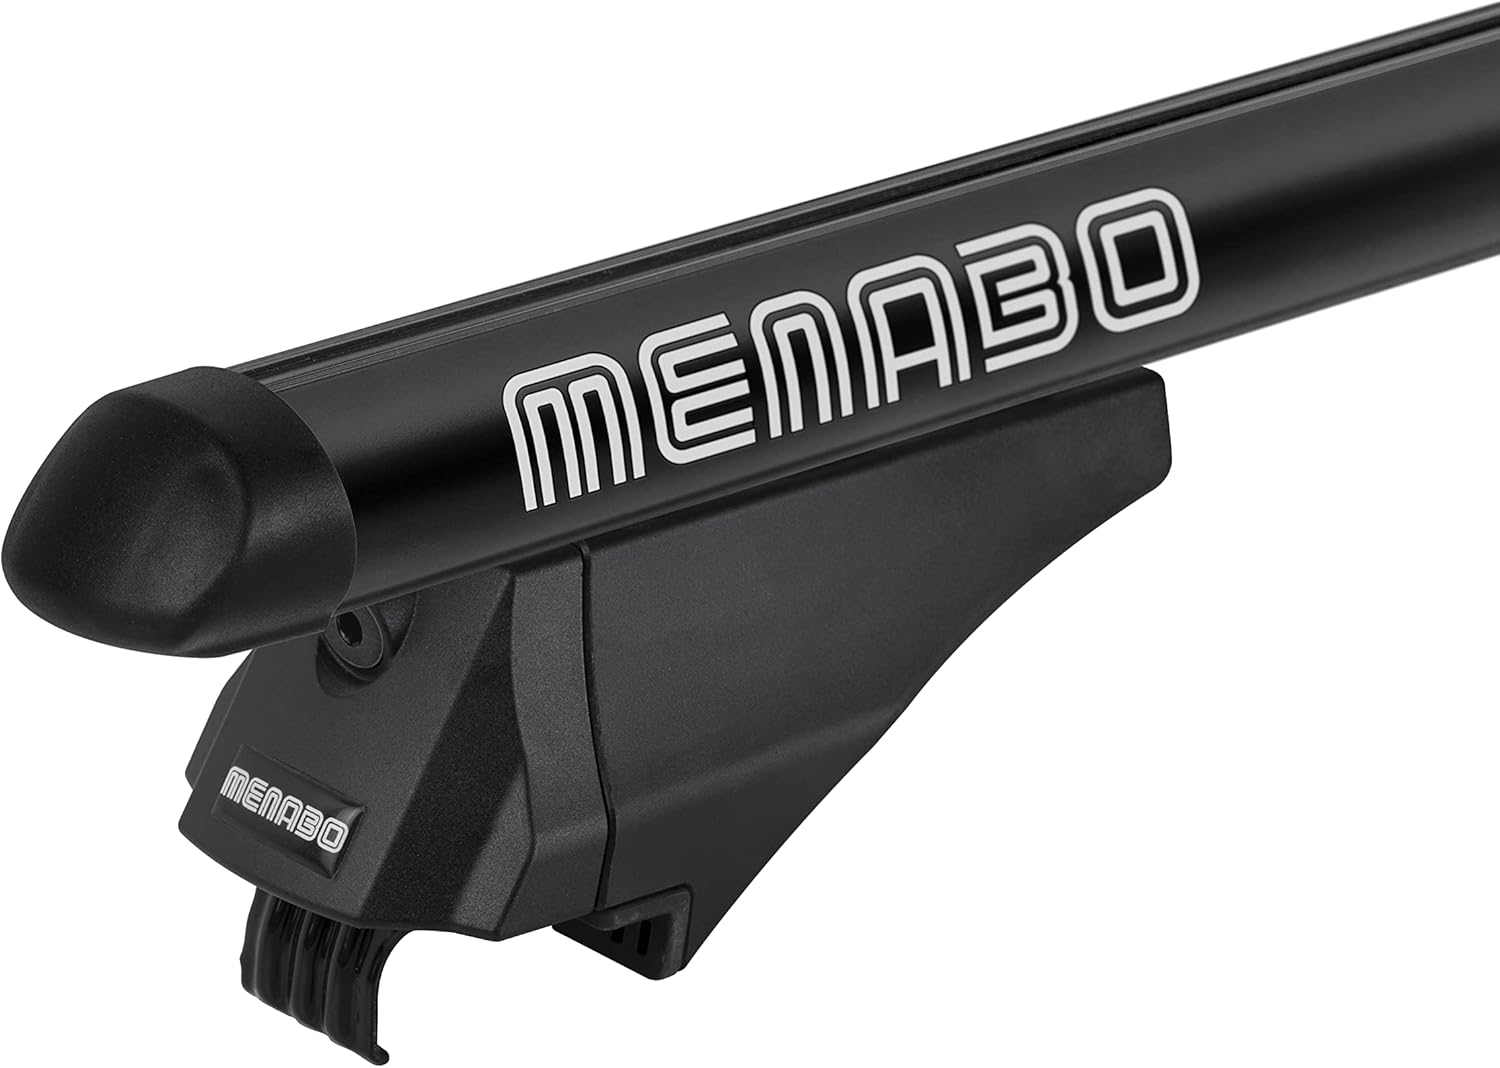
Figure 4.2: Detailed view of the mounting foot mechanism, showing how it clamps onto the integrated roof rail.
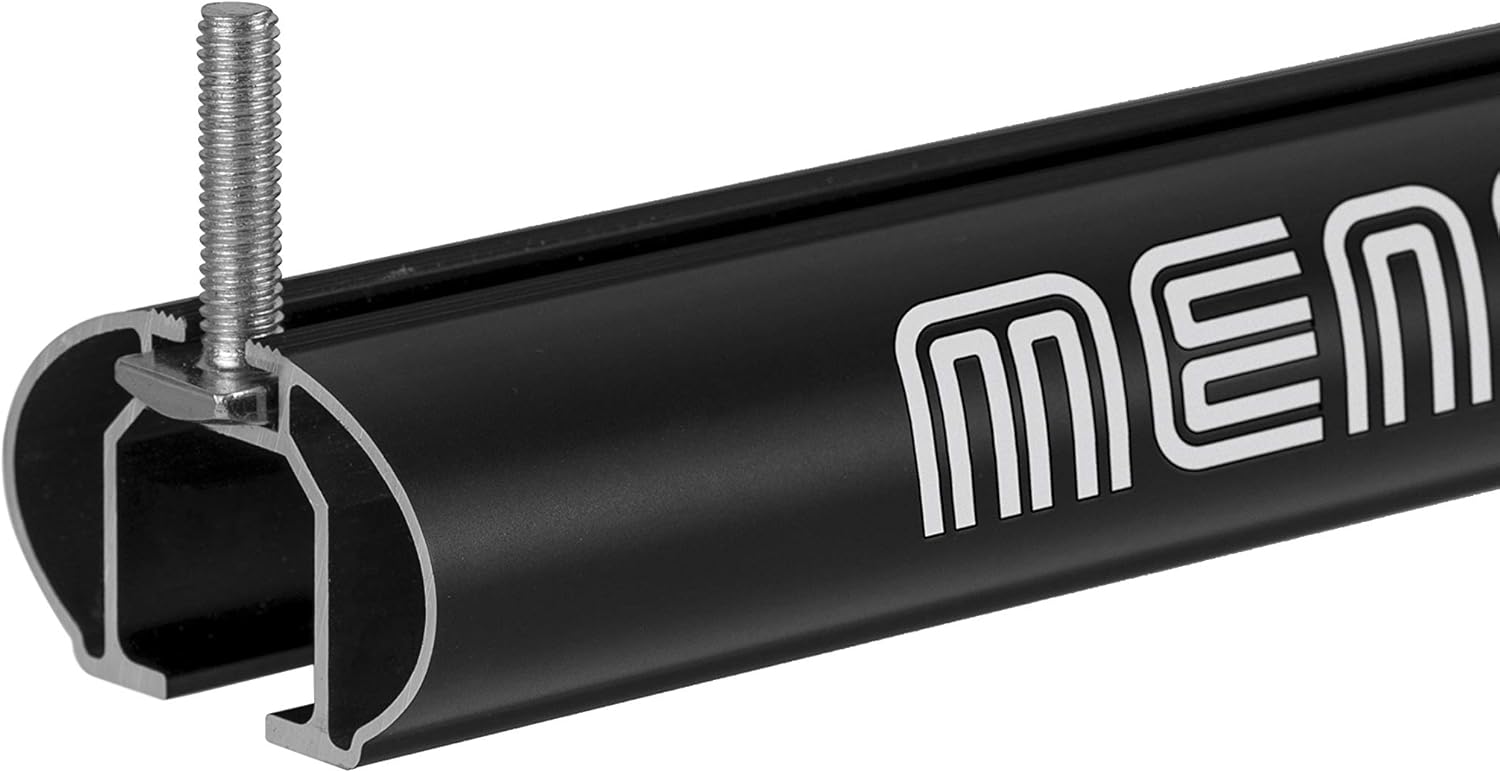
Figure 4.3: Close-up of the T-slot channel on the roof bar, used for attaching accessories. Note the bolt mechanism for securing the feet.
5. Operating Instructions
Once installed, the MENABO Tiger Roof Bars provide a stable platform for carrying various items. Observe the following operational guidelines:
- Load Distribution: Always distribute the weight of your cargo as evenly as possible across both roof bars.
- Secure Cargo: Use appropriate straps, nets, or specialized carriers (e.g., bike racks, ski carriers, cargo boxes) to secure your load to the roof bars. Ensure there is no movement of the cargo during transit.
- Driving Speed: Adjust your driving speed according to the load and road conditions. High speeds with heavy or bulky loads can affect vehicle stability and fuel efficiency.
- Height Clearance: Be mindful of the increased height of your vehicle when entering garages, carports, or low-clearance areas.
6. Maintenance
Regular maintenance will ensure the longevity and safe operation of your MENABO Tiger Roof Bars:
- Cleaning: Clean the roof bars regularly with mild soap and water. Avoid abrasive cleaners or solvents that could damage the anodised finish.
- Fastener Check: Periodically inspect all bolts and fasteners for tightness, especially after long trips or carrying heavy loads. Re-tighten if necessary.
- Storage: If not in use for extended periods, it is recommended to remove the roof bars and store them in a dry, protected area to prevent wear and tear from environmental exposure.
- Damage Inspection: Before each use, inspect the bars and mounting components for any signs of damage, cracks, or deformation. Do not use damaged components.
7. Troubleshooting
This section addresses common issues you might encounter:
| Problem | Possible Cause | Solution |
|---|---|---|
| Roof bars feel loose after installation. | Fasteners not tightened sufficiently. | Re-tighten all mounting fasteners according to installation instructions. Ensure proper alignment. |
| Whistling noise during driving. | Airflow over gaps or improperly sealed components. | Check for any gaps around the mounting feet or the bar's T-slot. Ensure all end caps are securely in place. Adjust bar position slightly if possible. |
| Cargo shifts during transit. | Cargo not properly secured or load capacity exceeded. | Always use appropriate tie-downs and ensure cargo is firmly secured. Do not exceed the maximum load capacity. |
8. Specifications
| Feature | Detail |
|---|---|
| Brand | MENABO |
| Model Number | 000085900000 |
| Product Name | Tiger Roof Bars Black Single |
| Material | Anodised Aluminium |
| Color | Black |
| Dimensions (L x W x H) | 47.28 x 3.98 x 5.94 inches (120 x 10.1 x 15.1 cm) |
| Item Weight | 7.94 pounds (3.6 kg) |
| Maximum Load Capacity | 75 kg (165 lbs) |
| Mounting Type | For vehicles with integrated rails / roof racks |
| OEM Part Number | 85900000 |
| GTIN | 08003168024699 |
| Manufacturer | MENABO |
9. Warranty and Support
For warranty information and customer support, please refer to the official MENABO website or contact your authorized dealer. Keep your proof of purchase for any warranty claims.
Manufacturer: MENABO
Date First Available: May 20, 2016
Related documents000085900000

Ask a question about this manual
Ask about setup, troubleshooting, compatibility, parts, safety, or missing instructions. Manuals+ will review the question and use this page’s manual context to help answer it.