
1. Introduction
Thank you for purchasing the EXCELVAN WH1175 LCD Wireless Weather Station. This device provides accurate indoor and outdoor temperature, humidity, dew point, and barometric pressure readings, along with weather trend forecasting. It features a clear LCD display, a remote sensor for outdoor monitoring, and an alarm function. Please read this manual carefully to ensure proper setup and operation of your weather station.
2. Package Contents
Upon unpacking, please verify that all items listed below are present and in good condition:
- 1 x Main Weather Station Unit
- 1 x Outdoor Remote Sensor
- 1 x User Manual
- Mounting Screws (for remote sensor)

Figure 2.1: All components of the EXCELVAN WH1175 weather station.
3. Product Overview
3.1 Main Unit (Receiver)
The main unit features a large LCD display that shows indoor and outdoor environmental data, time, and weather forecasts. Control buttons are located on the front for easy access to settings and functions.
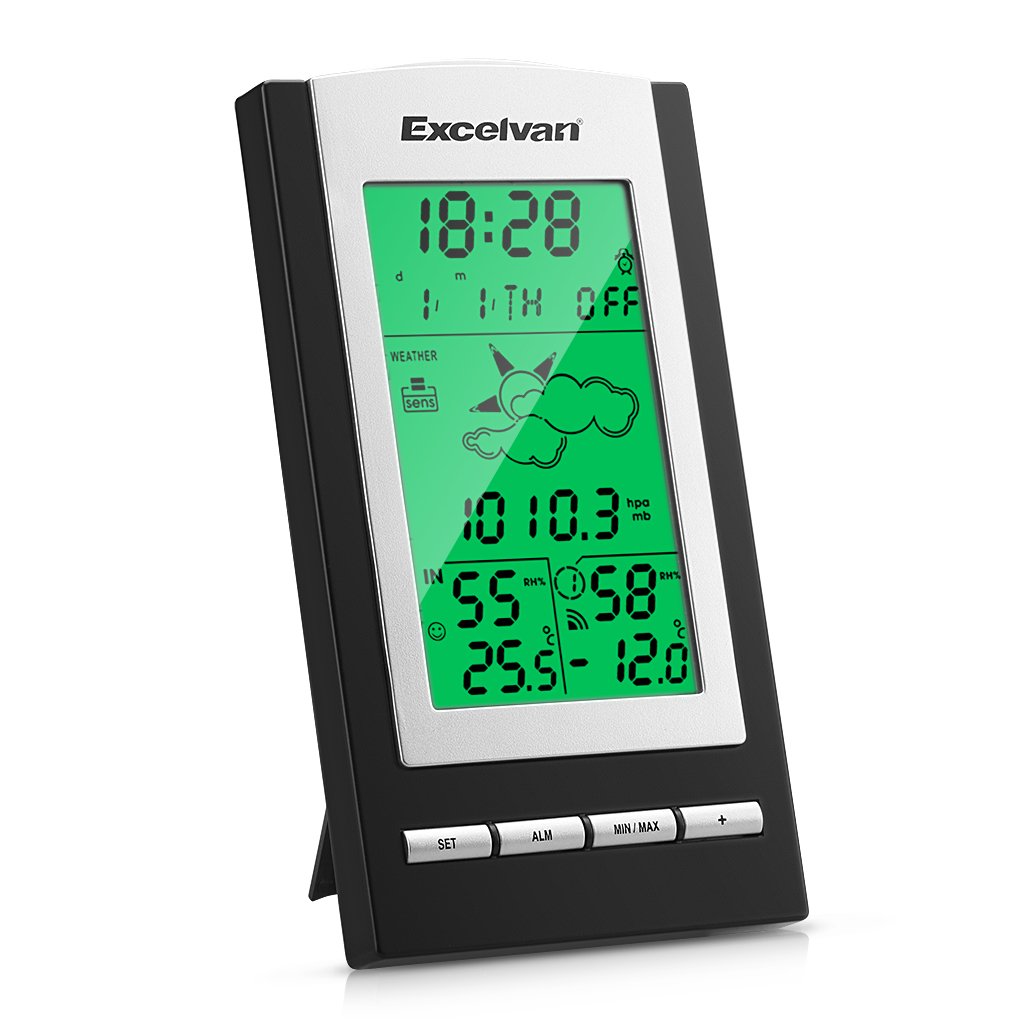
Figure 3.1: Front view of the main weather station unit and remote sensor.

Figure 3.2: Detail of the main unit's control buttons.
The rear of the main unit includes a battery compartment and a fold-out stand for tabletop placement, as well as a keyhole for wall mounting.

Figure 3.3: Rear view of the main unit.
3.2 Remote Sensor (Transmitter)
The remote sensor wirelessly transmits outdoor temperature and humidity data to the main unit. It is designed with IPX3 waterproofing for outdoor use and includes a battery compartment.
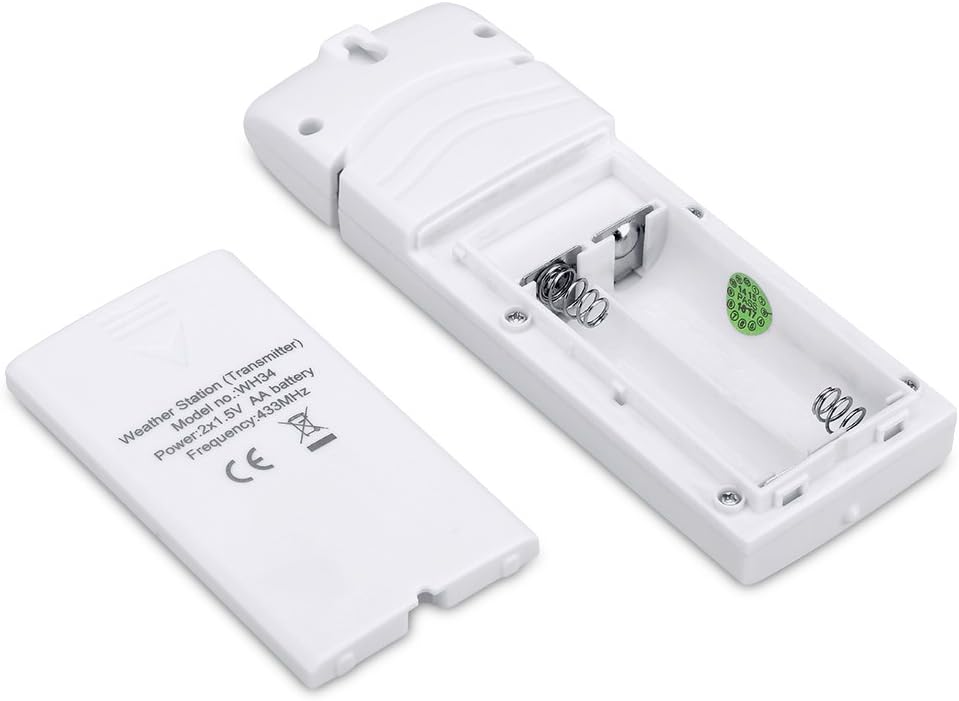
Figure 3.4: Remote sensor with battery compartment open.
4. Installation
4.1 Battery Installation
- Main Unit: Open the battery compartment cover on the back of the main unit. Insert 3 x 1.5V AA batteries (not included), ensuring correct polarity (+/-). Close the cover.
- Remote Sensor: Open the battery compartment cover on the back of the remote sensor. Insert 2 x 1.5V AAA batteries (not included), ensuring correct polarity (+/-). Close the cover.

Figure 4.1: Battery installation in the main unit.
Figure 4.2: Battery installation in the remote sensor.
4.2 Sensor Placement
The main unit should be placed indoors. The remote sensor is IPX3 waterproof and can be placed outdoors. For optimal performance, place the remote sensor in a shaded area, protected from direct sunlight and precipitation, to ensure accurate temperature and humidity readings. The effective transmission distance between the sensor and the main unit is up to 328 feet (100 meters) in an open field.

Figure 4.3: Example of sensor placement.
5. Initial Setup
After installing batteries in both the main unit and the remote sensor, allow a few minutes for the devices to establish a connection and for the first set of data to appear on the LCD screen. Do not press any buttons on the base station until the initial data is displayed. This ensures proper synchronization between the main unit and the remote sensor.
6. Operation
6.1 Time and Date Setting
Press the 'SET' button to enter time/date setting mode. Use the '+' or 'MIN/MAX' buttons to adjust values. Press 'SET' again to confirm and move to the next setting. The station supports 12/24 hour format and automatic adjustment for Daylight Saving Time (DST).
6.2 Alarm Function
Press the 'ALM' button to view or set the alarm time. In alarm setting mode, use the '+' or 'MIN/MAX' buttons to adjust the alarm time. The alarm duration is 120 seconds.
6.3 Weather Forecast
The weather station displays temperature, dew point, humidity, barometric pressure, and a weather trend icon. The weather forecast is based on changes in atmospheric pressure and is an estimation for the next 12-24 hours.
6.4 Backlight
The backlight will illuminate for approximately 2 seconds before automatically turning off. To activate the backlight for 10 seconds, press the light button located on the top of the main unit.
7. Specifications
| Category | Specification |
|---|---|
| Brand | EXCELVAN |
| Model | WH1175 |
| Display Type | LCD |
| Sensor Transmission Distance | Up to 328 feet (100 meters) in open field |
| Transmission Frequency | 433 MHz |
| Outdoor Temperature Range | -40 ℃ to +60 ℃ (-40 ℉ to +140 ℉) |
| Indoor Temperature Range | -10 ℃ to +60 ℃ (14 ℉ to +140 ℉) |
| Temperature Resolution | 0.1 ℃ |
| Humidity Range | 10% ~ 99% RH |
| Humidity Resolution | 1% |
| Air Pressure Range | 300hPa - 1100hPa |
| Air Pressure Resolution/Accuracy | 0.1hPa / ±3hPa (below 800hPa-1100hPa) |
| Thermo-hygrometer Sensor Interval | 60 seconds |
| Pressure/Temperature Measurement Interval | 60 seconds |
| Alarm Duration | 120 seconds |
| Main Station Power Supply | 3 x 1.5V AA batteries (not included) |
| Remote Sensor Power Supply | 2 x 1.5V AAA batteries (not included) |
| Main Station Dimensions | 160 x 150 x 35 mm |
| Remote Sensor Dimensions | 91 x 70 x 32.5 mm |
| Product Weight | 400 g |
| UPC | 768390022957 |
8. Troubleshooting
If you encounter issues with your EXCELVAN WH1175 weather station, please consider the following common solutions:
- No Display / Faint Display: Check battery polarity and ensure batteries are fresh. Replace if necessary.
- No Outdoor Data: Ensure the remote sensor is within range (max 328 feet/100m in open field) and not obstructed by thick walls or metal objects. Re-sync the sensor by removing and reinserting batteries in both units, starting with the main unit.
- Inaccurate Readings: Ensure the remote sensor is placed in a shaded, well-ventilated area, away from direct sunlight or heat sources, and protected from rain.
- Weather Forecast Not Changing: The weather forecast is based on barometric pressure changes over time. Significant changes may take several hours to register. Ensure the unit has been operating continuously for at least 24 hours for accurate forecasting.
If problems persist, please contact customer support for further assistance.
9. Warranty and Support
The EXCELVAN WH1175 LCD Wireless Weather Station comes with a 2-year warranty from the date of purchase. This warranty covers manufacturing defects and malfunctions under normal use. It does not cover damage caused by misuse, accidents, unauthorized modifications, or improper installation.
For warranty claims, technical support, or any questions regarding your product, please refer to the contact information provided with your purchase or visit the official EXCELVAN website.

