
Introduction
Thank you for choosing the KRUPS XS600010 Cappuccino Accessory and Stainless Steel Milk Pot. This accessory is designed to enhance your coffee experience by providing perfectly frothed milk for cappuccinos, lattes, and other milk-based beverages. This manual provides essential information for the safe and effective use, setup, operation, and maintenance of your new accessory.
Safety Instructions
- Read all instructions before using the accessory.
- Keep this manual for future reference.
- Do not immerse the electrical components of your espresso machine or the frothing attachment in water or other liquids.
- Always ensure the accessory is properly assembled and connected before use.
- Use only cold milk for frothing.
- Exercise caution when handling hot milk and steam.
- Keep out of reach of children.
- Clean the accessory thoroughly after each use to prevent milk residue buildup.
Product Overview
The KRUPS XS600010 Cappuccino Accessory consists of a stainless steel milk pot and a frothing attachment with a connecting tube.
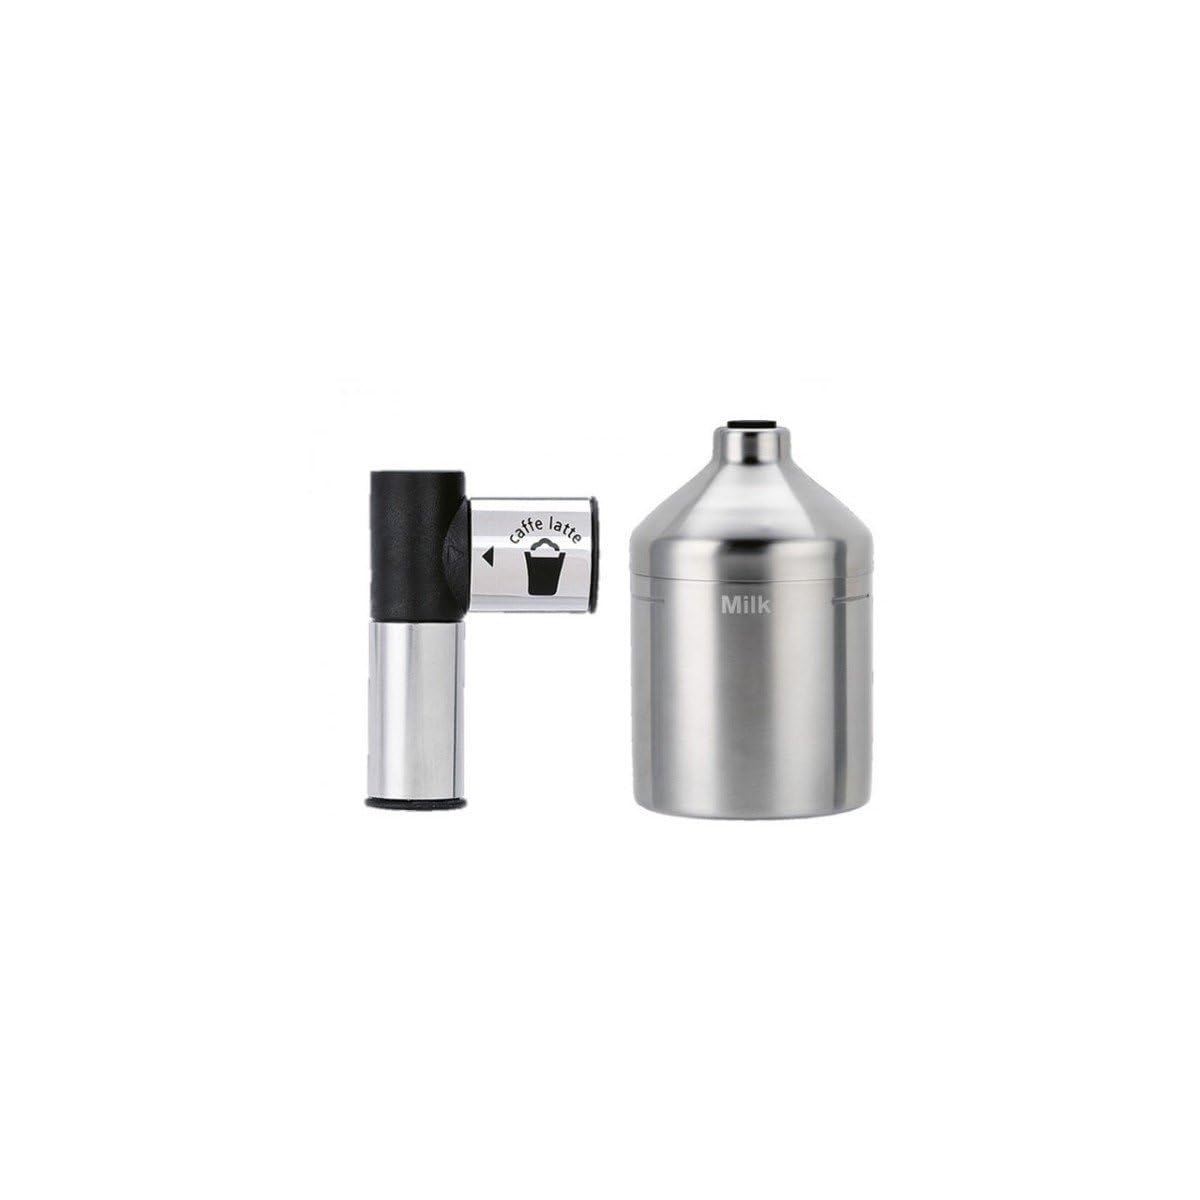
This image displays the KRUPS XS600010 Cappuccino Accessory. It consists of a brushed stainless steel milk pot, a clear silicone tube, and a black and silver frothing attachment. The frothing attachment has a dial or lever for adjusting settings and connects to the tube, which then leads into the milk pot. The pot itself has a sleek, modern design with a slightly tapered top.
Components:
- Stainless Steel Milk Pot: Designed to hold milk for frothing.
- Frothing Attachment: Connects to your espresso machine's steam outlet or dedicated port.
- Connecting Tube: Links the frothing attachment to the milk pot.
Setup
- Unpack: Carefully remove all components from the packaging.
- Initial Cleaning: Wash the stainless steel milk pot and the connecting tube with warm, soapy water. Rinse thoroughly and dry.
- Connect Tube to Pot: Insert one end of the clear connecting tube firmly into the designated opening on the lid of the stainless steel milk pot.
- Connect Tube to Frothing Attachment: Insert the other end of the clear connecting tube firmly into the frothing attachment.
- Attach to Espresso Machine: Connect the frothing attachment to the appropriate port on your compatible KRUPS espresso machine. Refer to your espresso machine's manual for specific instructions on attaching external frothing accessories. This accessory is compatible with models such as XS600010, XP7200, XP7220, XP7230, XP7250, EA8200FR700, EA8250FR700, and other compatible KRUPS espresso machines.
Operating Instructions
- Fill Milk Pot: Pour cold milk into the stainless steel milk pot. Do not exceed the maximum fill line indicated on the pot.
- Position: Ensure the frothing attachment and milk pot are securely connected and positioned correctly according to your espresso machine's instructions.
- Select Function: On your KRUPS espresso machine, select the desired milk frothing or cappuccino function.
- Start Frothing: Activate the frothing process on your espresso machine. The accessory will draw milk from the pot and froth it.
- Serve: Once frothing is complete, carefully remove the frothed milk and pour it into your coffee.
- Clean Immediately: After each use, clean the accessory as described in the Maintenance and Cleaning section to prevent milk residue from drying.
Maintenance and Cleaning
Regular cleaning is crucial for optimal performance and hygiene. The stainless steel material ensures durability and resistance to corrosion and acids, making cleaning straightforward.
- Disassemble: Carefully detach the frothing attachment from your espresso machine, then separate the connecting tube from both the frothing attachment and the milk pot.
- Wash Components: Wash the stainless steel milk pot, the connecting tube, and the frothing attachment (if detachable and washable) with warm, soapy water. Use a soft brush for the tube and frothing attachment to remove any milk residue.
- Rinse: Rinse all components thoroughly under running water to remove all soap residue.
- Dry: Allow all parts to air dry completely before reassembling or storing.
- Descaling (if applicable): Refer to your espresso machine's manual for descaling procedures, as some frothing systems may require periodic descaling.
Troubleshooting
- No Froth or Weak Froth:
- Ensure the milk pot is filled with cold milk.
- Check that all connections (tube to pot, tube to frother, frother to machine) are secure and airtight.
- Clean the frothing attachment and tube thoroughly, as blockages can reduce frothing performance.
- Verify your espresso machine's steam function is working correctly.
- Milk Not Drawing:
- Ensure the tube is fully submerged in the milk within the pot.
- Check for any kinks or blockages in the connecting tube.
- Leaks:
- Ensure all connections are tight and properly seated.
- Inspect the tube and frothing attachment for any cracks or damage.
Specifications
| Model Name | XS600010 |
| Model Number | 9280281 |
| Brand | KRUPS |
| Material | Stainless Steel |
| Color | Silver, Black |
| Special Feature | Rustproof |
| Included Components | Stainless steel milk reservoir |
| Item Weight | 405 Grams |
| Compatibility | XS600010, XP7200, XP7220, KPXP7220FR, XP7230, XP7250, XP7250FR, EA8200FR700, EA8250FR700, EA80381070H, EA6935FR700, EA8010DE70A, EA8050PE700, EA8080PE700, and other compatible KRUPS espresso machines. |
Warranty and Support
This KRUPS product is covered by a manufacturer's warranty. Please refer to the warranty card included with your original espresso machine or visit the official KRUPS website for detailed warranty terms and conditions.
For technical assistance, troubleshooting, or spare parts, please contact KRUPS customer support. Contact information can typically be found on the KRUPS official website or in your espresso machine's user manual.
Online Support: www.krups.com
