
1. Product Overview
This manual provides essential information for the installation, operation, and maintenance of your Power Stop L1378 Rear Left Stock Replacement Brake Caliper. This caliper is designed to be a direct bolt-on replacement for original equipment manufacturer (OEM) brakes, requiring no modifications for compatible vehicles.
1.1 Product Description
The Power Stop L1378 brake caliper is a remanufactured unit, 100% pressure tested and inspected to ensure performance and reliability. It includes all necessary hardware for installation, such as seals, caliper guide pins, dust boots, bleeder screws, brake pad attachment hardware, and mounting brackets.
1.2 Vehicle Compatibility
This brake caliper is specifically designed for the following vehicle models:
- Mazda Miata: 1990, 1991, 1992, 1993
Always verify compatibility using your vehicle's specific information before installation.
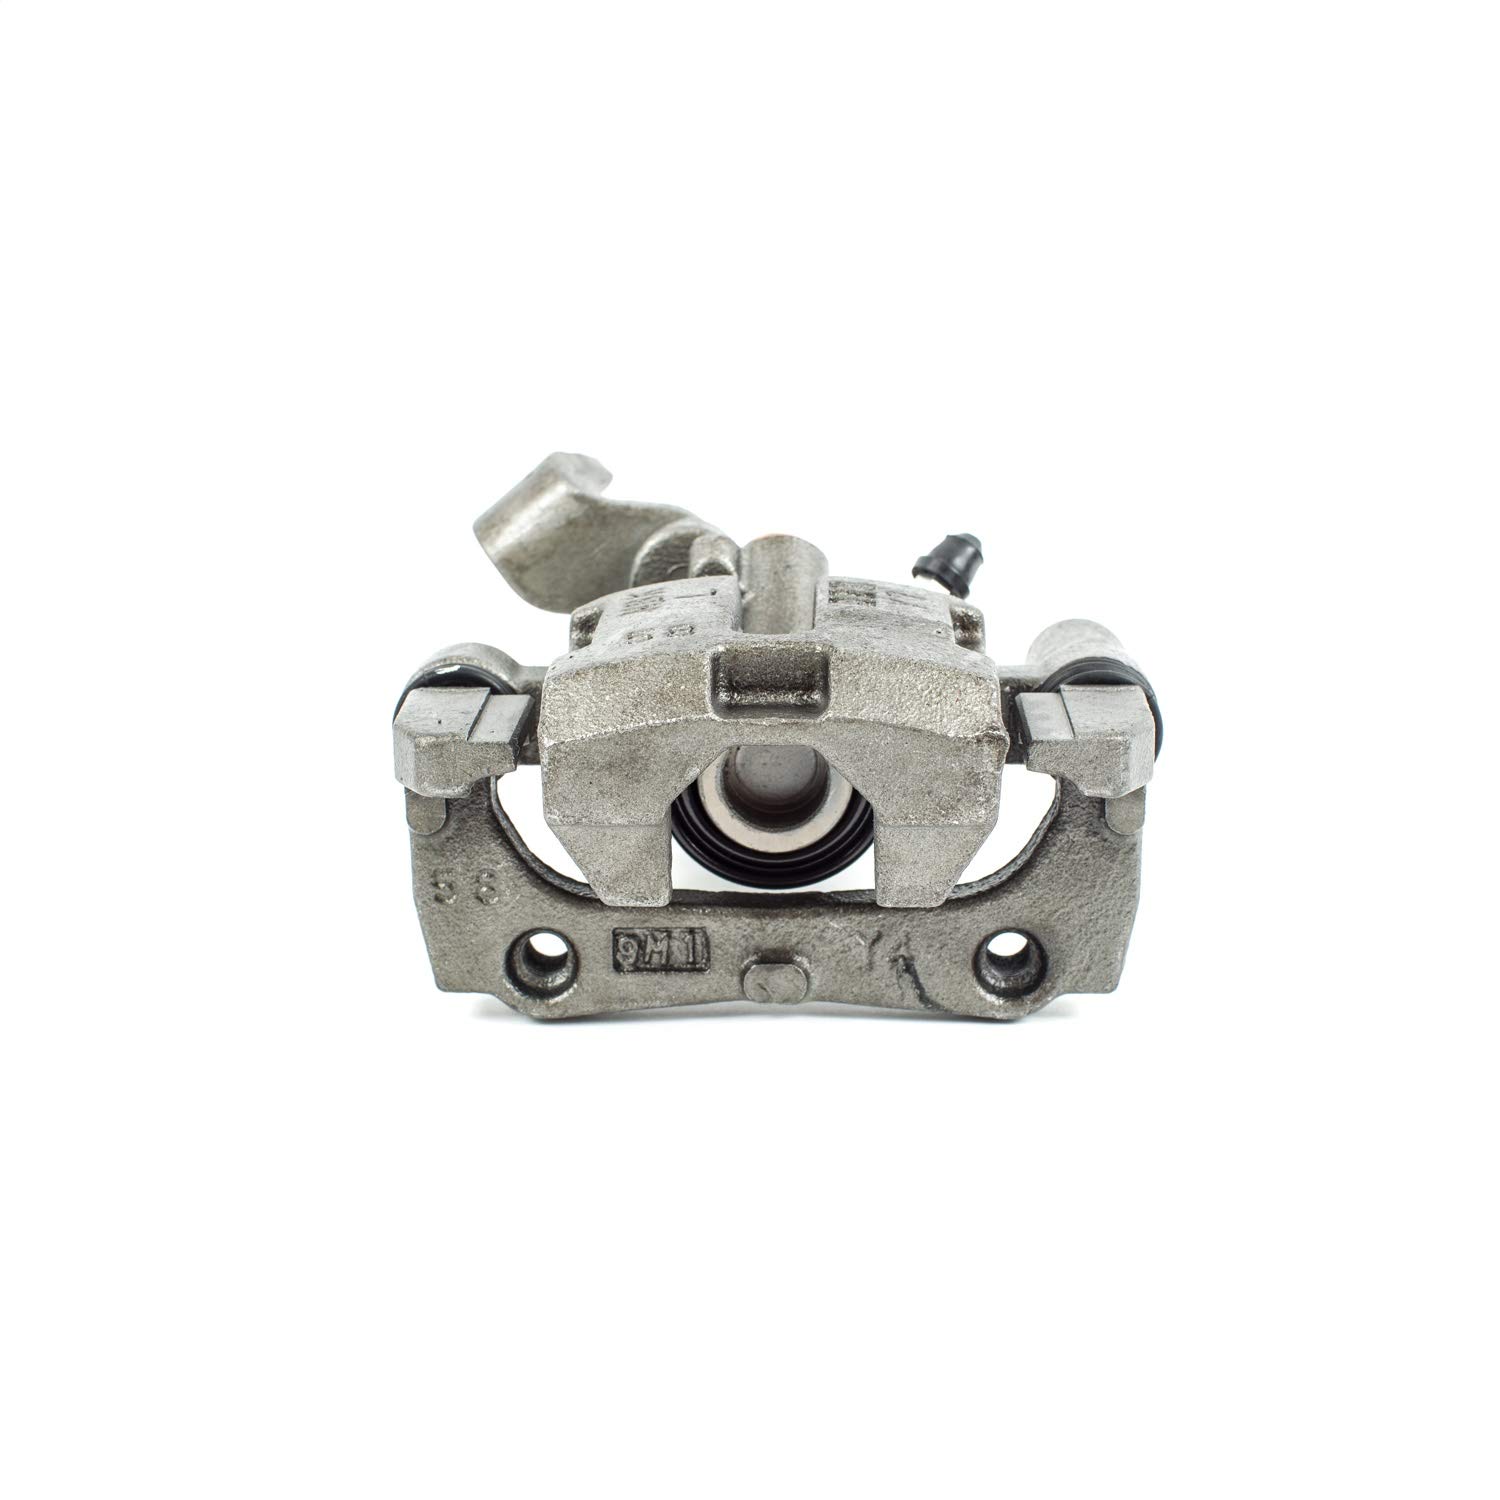
Figure 1: Front view of the Power Stop L1378 Rear Left Brake Caliper, showing the main housing and piston.
2. Installation Guide
Installation of brake components requires mechanical expertise and specialized tools. If you are not confident in your ability to perform this installation safely, it is recommended to seek assistance from a qualified automotive technician.
2.1 Safety Precautions
- Always wear appropriate personal protective equipment (PPE), including safety glasses and gloves.
- Ensure the vehicle is securely supported on jack stands on a level surface. Never rely solely on a jack.
- Allow the brake system to cool down before beginning work.
- Avoid contact with brake fluid, as it can damage paint and irritate skin.
2.2 Required Tools and Materials
- Socket/Wrench Set
- Torque Wrench
- Brake Fluid (compatible with your vehicle)
- Brake Cleaner
- Bleeder Wrench
- Drain Pan
- C-clamp or Caliper Piston Compressor
2.3 Installation Steps
- Prepare the Vehicle: Park the vehicle on a level surface, engage the parking brake, and block the wheels. Loosen the lug nuts on the wheel where the caliper will be replaced. Raise the vehicle and secure it with jack stands. Remove the wheel.
- Remove Old Caliper: Place a drain pan under the caliper. Disconnect the brake line from the old caliper. Be prepared for brake fluid to leak. Remove the caliper mounting bolts and carefully detach the old caliper from the rotor.
- Install New Caliper: Ensure the new Power Stop L1378 caliper is clean and free of debris. Attach the new caliper to the mounting bracket using the provided hardware. Connect the brake line to the new caliper, ensuring a tight seal.
- Install Brake Pads (if applicable): If new brake pads are being installed, follow the manufacturer's instructions for proper placement within the caliper.
- Bleed the Brake System: This is a critical step. With the brake line connected, bleed the brake system to remove any air that entered during the caliper replacement. Follow your vehicle's service manual for the correct bleeding procedure. This typically involves having an assistant pump the brake pedal while you open and close the bleeder screw.
- Final Checks: Reinstall the wheel and torque the lug nuts to the manufacturer's specifications. Lower the vehicle. Pump the brake pedal several times to ensure a firm pedal feel before driving. Check for any brake fluid leaks.

Figure 2: Illustration of a brake caliper installation process, showing hands working on the brake assembly.
3. Operation
After installing new brake calipers, it is important to perform a proper break-in procedure to ensure optimal performance and longevity of the brake system. This process helps to seat the brake pads correctly against the rotor surface.
3.1 Brake System Function
The brake caliper is a crucial component of your vehicle's disc brake system. When the brake pedal is pressed, hydraulic pressure from the master cylinder forces the caliper piston(s) to clamp the brake pads against the rotor, creating friction that slows or stops the vehicle.
3.2 Break-In Procedure (Bedding-In)
For best results, follow these steps for bedding-in new brake components:
- Find a safe, open area where you can accelerate and brake without interruption.
- Perform 5-6 moderate stops from 40 mph down to 10 mph. Allow 30 seconds between stops for cooling.
- Perform 2-3 hard stops from 50 mph down to 10 mph. Allow 30 seconds between stops for cooling.
- Drive for 5-10 minutes without heavy braking to allow the system to cool down completely.
Avoid sudden, hard braking or prolonged braking immediately after installation, as this can overheat the components and lead to glazing.
4. Maintenance
Regular inspection and maintenance of your brake system are essential for safety and performance. The Power Stop L1378 caliper is designed for durability, but its surrounding components require attention.
4.1 Routine Inspections
- Brake Fluid Level: Check the brake fluid level in the master cylinder reservoir regularly. Low fluid can indicate a leak or worn brake pads.
- Brake Pad Wear: Inspect brake pads for wear during tire rotations or at least every 10,000-15,000 miles. Replace pads before they reach minimum thickness.
- Rotor Condition: Check rotors for excessive wear, scoring, or warping.
- Caliper Condition: Inspect the caliper for leaks, damaged dust boots, or seized guide pins. Ensure the caliper moves freely.
- Brake Lines: Check brake lines and hoses for cracks, bulges, or leaks.
4.2 Fluid Replacement
Brake fluid absorbs moisture over time, which can reduce braking performance and lead to corrosion. Consult your vehicle's service manual for recommended brake fluid flush intervals, typically every 2-3 years or 30,000 miles.
5. Troubleshooting
If you experience any issues with your brake system, consult this section for common problems and potential solutions. Always prioritize safety and have your vehicle inspected by a professional if you are unsure about a repair.
5.1 Common Brake Issues
- Squealing/Grinding Noise: Often indicates worn brake pads, but can also be caused by improper installation, debris, or glazed rotors.
- Vibration During Braking: Typically points to warped brake rotors.
- Soft or Spongy Brake Pedal: Usually indicates air in the brake lines, low brake fluid, or a faulty master cylinder. Re-bleeding the system is often the first step.
- Vehicle Pulls to One Side: Can be caused by a seized caliper, uneven brake pad wear, or a contaminated brake pad on one side.
- Hard Brake Pedal: May indicate an issue with the brake booster or a blockage in the vacuum lines.
5.2 When to Seek Professional Help
If troubleshooting steps do not resolve the issue, or if you experience any significant change in braking performance, immediately consult a certified automotive technician. Brake system issues can compromise vehicle safety.
6. Specifications
Key specifications for the Power Stop L1378 Rear Left Brake Caliper:
| Feature | Specification |
|---|---|
| Brand | Power Stop |
| Model Number | L1378 |
| Item Weight | 5.6 pounds |
| Product Dimensions | 8.8 x 6.4 x 4.6 inches |
| Position | Rear Left |
| Included Components | Caliper, Hardware (seals, guide pins, dust boots, bleeder screws, attachment hardware, mounting brackets) |

Figure 3: Side view of the Power Stop L1378 Rear Left Brake Caliper, highlighting its compact design.
7. Warranty Information
The Power Stop L1378 Rear Left Brake Caliper comes with a manufacturer's warranty. Please refer to the specific terms and conditions below:
- Warranty Period: 90 days or 3,000 miles, whichever comes first.
- This warranty covers defects in materials and workmanship under normal use.
- Proof of purchase is required for all warranty claims.
For detailed warranty information or to initiate a claim, please contact Power Stop customer support.
8. Customer Support
For further assistance, technical questions, or warranty inquiries regarding your Power Stop L1378 Brake Caliper, please contact Power Stop customer support through their official website or the retailer where the product was purchased.
When contacting support, please have your product model number (L1378) and purchase information readily available.

