
GoolRC 2435
GoolRC 2435 4800KV Brushless Motor and 25A ESC Instruction Manual
For 1/16 and 1/18 RC Car/Truck Models
Introduction
This manual provides essential information for the proper installation, operation, and maintenance of your GoolRC 2435 4800KV 4P Sensorless Brushless Motor and 25A Brushless Electronic Speed Controller (ESC). Please read this manual thoroughly before use to ensure optimal performance and longevity of your RC components.
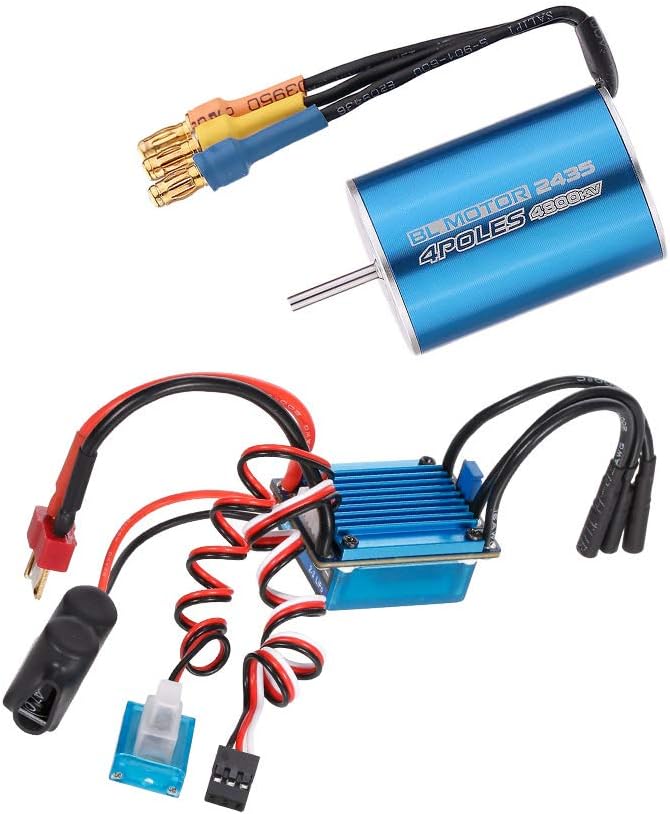
Image: GoolRC 2435 4800KV Brushless Motor and 25A ESC combo package.
Safety Information
Always observe the following safety precautions to prevent injury or damage to your equipment:
- Keep all electrical components away from water and moisture unless explicitly stated as waterproof.
- Ensure all connections are secure and properly insulated to prevent short circuits.
- Use only compatible batteries (2S Lipo / 4-6 Cell NiMh) as specified in the product specifications.
- Avoid touching the motor during or immediately after operation, as it can become very hot.
- Always disconnect the battery from the ESC when not in use.
- Operate RC vehicles in open areas, away from people, pets, and obstacles.
Product Features
Motor Features:
- 4 poles 12 slot Hi-torque motor design.
- CNC machined 6061 T6 billet aluminum heatsink can.
- High purity copper windings for maximized efficiency.
- High RPM ABEC5 oversized bearings.
- Universal fit for 1/16 and 1/18 brushless cars with multi-mounting system for M2.5 screws.
- Precision balanced rotor for smoothness and maximum RPM.
- Stator with Super Thin (0.35mm) laminations.
- Removable/replaceable design.
- Precision engineered for maximum energy conversion.
Electronic Speed Controller (ESC) Features:
- Compatible with sensorless brushless motors.
- High anti-interference capability.
- Super smooth and accurate throttle linearity.
- Fast response to throttle input.
- Multiple protection features: low voltage cut-off protection, over-heat protection, and throttle signal loss protection.
Specifications
Motor Specifications:
| Parameter | Value |
|---|---|
| RPM | 4800KV |
| Max Current | 24A |
| Max Watts | 300W |
| Can Size | 2435 |
| Sensored | No |
| Can Diameter | 24mm |
| Can Length | 35mm |
| Shaft Diameter | 2mm |
| Shaft Length | 12mm |
| Bullet Connector | 3.5mm |
| Weight | 58.3g / 2.1oz |
| Max Voltage | 7.4V (2S Lipo) |
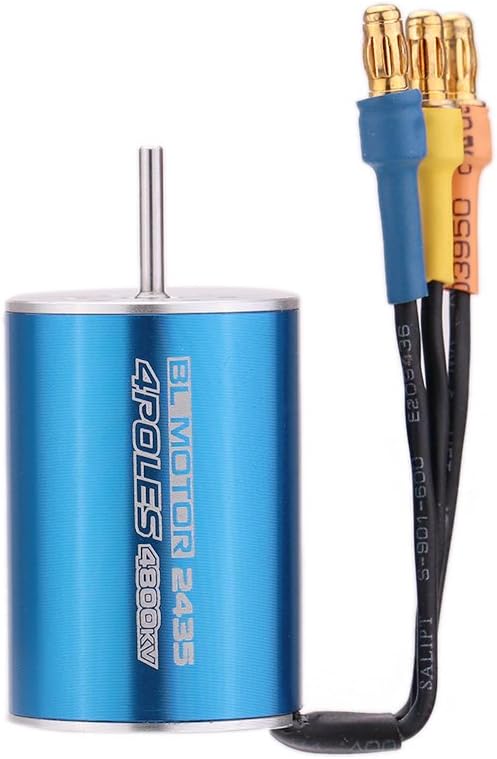
Image: The GoolRC 2435 4800KV 4P Sensorless Brushless Motor.

Image: Technical diagram showing the dimensions of the GoolRC 2435 motor.
ESC Specifications:
| Parameter | Value |
|---|---|
| Continuous Current | 25A |
| Burst Current | 90A/10sec |
| Battery Compatibility | 2 Cell Lipo / 4-6 Cell NiMh |
| BEC Output | 5V/1A |
| Power Supply Plugs | T Male |
| Motor Plugs | Female 3.5mm Bullet Connector |
| Size | 40*27*15mm |
| Weight | 29g / 1oz |
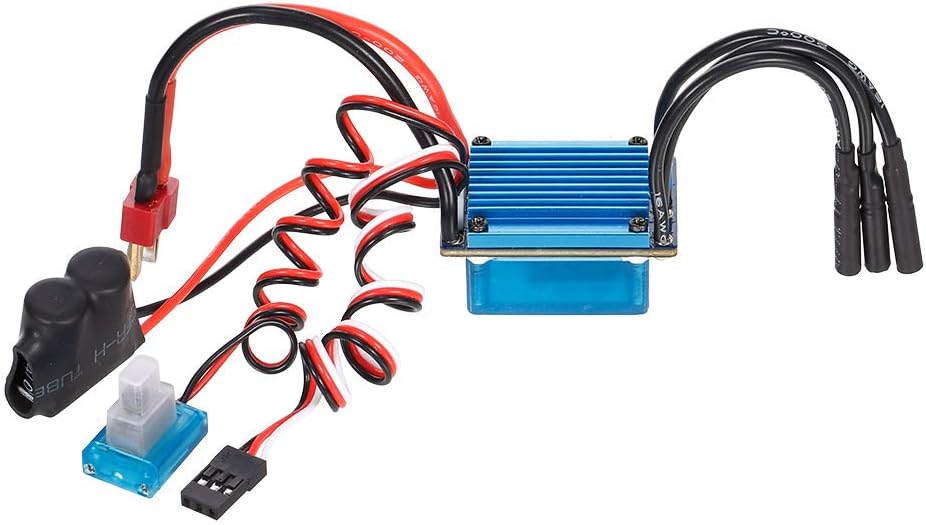
Image: The GoolRC 25A Brushless Electronic Speed Controller.

Image: Diagram illustrating the various connection points on the GoolRC 25A ESC, including power, motor, and receiver connections.
Setup
1. Motor Installation:
- Ensure your RC vehicle is powered off and the battery is disconnected.
- Mount the GoolRC 2435 motor securely into your 1/16 or 1/18 scale RC car/truck chassis using M2.5 screws. Verify that the motor is firmly attached to prevent movement during operation.
- Install the appropriate pinion gear onto the motor shaft. Ensure proper gear mesh between the pinion and spur gear to prevent premature wear and damage.
2. ESC Placement:
- Find a suitable location within your RC chassis for the 25A ESC, ensuring it is protected from impacts and has adequate airflow for cooling.
- Secure the ESC using double-sided tape or other appropriate mounting methods.
3. Wiring Connections:
- Motor to ESC: Connect the three 3.5mm bullet connectors from the motor to the corresponding female bullet connectors on the ESC. The order of connection may affect motor rotation direction; this can be adjusted later if needed.
- ESC to Receiver: Plug the ESC's signal cable (usually a 3-wire servo connector) into the throttle channel (typically channel 2) of your RC receiver.
- Battery to ESC: Connect your 2S Lipo or 4-6 Cell NiMh battery to the T-Male power supply plug on the ESC. Ensure correct polarity.
4. ESC Calibration:
Perform ESC calibration with your radio transmitter to ensure proper throttle response. Refer to your radio system's manual for specific calibration procedures, as these can vary. Generally, the process involves:
- Turn on your transmitter and set the throttle trim to neutral.
- Hold the ESC's setup button (if available) or follow the power-on sequence specified by the ESC to enter calibration mode.
- Set full throttle, then full brake, then neutral throttle on your transmitter as prompted by the ESC's indicator lights/beeps.
- Once calibrated, the ESC will confirm with a series of beeps or a solid light.
Operating
Basic Operation:
- Ensure all connections are secure and the battery is fully charged.
- Turn on your radio transmitter first.
- Connect the battery to the ESC. The ESC will initialize and emit a series of beeps.
- Once initialized, the system is ready for operation. Use your transmitter's throttle control to operate the vehicle.
- To power off, disconnect the battery from the ESC first, then turn off your transmitter.
Usage Guidelines:
- This motor and ESC combo is designed for 1/16 and 1/18 scale RC cars and trucks.
- Monitor motor and ESC temperatures during extended use. Excessive heat can damage components. Consider adding a motor heatsink if overheating is a recurring issue.
- Adjust gearing as necessary for your specific vehicle and driving conditions to optimize performance and manage heat.
Maintenance
Regular maintenance helps prolong the life of your GoolRC motor and ESC:
- Cleaning: After each use, especially in dusty or dirty conditions, clean the motor and ESC with a soft brush or compressed air to remove debris.
- Connection Checks: Periodically inspect all wiring and connectors for signs of wear, corrosion, or loose connections. Re-solder or replace as needed.
- Motor Bearings: The motor features high RPM ABEC5 oversized bearings. While durable, extreme conditions may require inspection or replacement over time. Listen for unusual noises from the motor.
- ESC Heatsink: Ensure the ESC heatsink remains free of obstructions to allow for efficient heat dissipation.
Troubleshooting
If you encounter issues with your GoolRC motor and ESC, refer to the following common problems and solutions:
| Problem | Possible Cause | Solution |
|---|---|---|
| Motor not spinning or inconsistent operation | Loose motor/ESC connections, incorrect ESC calibration, low battery voltage, damaged motor/ESC. | Check all wiring connections. Re-calibrate the ESC. Ensure battery is fully charged. Inspect motor and ESC for visible damage. |
| Motor/ESC overheating | Incorrect gearing (too high), excessive load, insufficient airflow, prolonged high-stress operation. | Reduce pinion gear size or increase spur gear size. Avoid continuous high-stress operation. Ensure ESC heatsink is clear. Consider a motor heatsink. |
| Lack of throttle response | ESC not calibrated, throttle signal loss, receiver not powered, transmitter issues. | Re-calibrate ESC. Check receiver connection and power. Verify transmitter battery and settings. |
| Motor cogging at low speeds | Common with sensorless brushless systems, especially at very low RPM. | This is often inherent to sensorless systems. Ensure proper ESC calibration and consider smoother throttle input. |
If problems persist after attempting these solutions, contact GoolRC customer support for further assistance.
Warranty and Support
This product is covered by standard manufacturer warranties. For specific warranty details, claims, or technical support, please refer to the official GoolRC website or contact your retailer. Keep your proof of purchase for warranty purposes.
Ask a question about this manual
Ask about setup, troubleshooting, compatibility, parts, safety, or missing instructions. Manuals+ will review the question and use this page’s manual context to help answer it.