Introduction
This manual provides detailed instructions for the safe installation, operation, and maintenance of your CANARM IVL587A01BN Rue Single Light Vanity Fixture. Please read all instructions carefully before beginning installation and retain this manual for future reference.
The CANARM IVL587A01BN is a single-light vanity fixture featuring a brushed nickel finish and a flat opal glass shade. It is designed for wall-mount, flush installation in damp locations, making it suitable for bathrooms and other areas with moisture.
Safety Information
- WARNING: To avoid electric shock, ensure power is turned off at the main circuit breaker or fuse box before installation, servicing, or changing bulbs.
- All electrical connections must be in accordance with local codes, ordinances, or the National Electric Code (NEC). If you are unfamiliar with proper electrical wiring connections, consult a qualified electrician.
- Use only the bulb type and wattage specified in this manual. Exceeding the maximum wattage may cause overheating and damage to the fixture.
- Do not install this fixture in areas where it will be directly exposed to water spray or submersion. It is rated for damp locations only.
- Wear safety glasses and appropriate protective gear during installation.
- Handle glass components with care to prevent breakage and injury.
Package Contents
Verify that all components listed below are included in your package:
- Vanity Light Fixture (1)
- Flat Opal Glass Shade (1)
- Mounting Hardware Kit (1)
- Instruction Manual (1)
Tools Required
The following tools are typically required for installation (not included):
- Phillips Head Screwdriver
- Flat Head Screwdriver
- Wire Strippers
- Pliers
- Electrical Tape
- Safety Glasses
- Ladder (if installation height requires)
Setup and Installation
Follow these steps to properly install your vanity light fixture:
- Turn Off Power: Locate the circuit breaker or fuse box that controls the power to the fixture location. Turn off the power completely before proceeding.
- Unpack and Inspect: Carefully remove all components from the packaging. Inspect the fixture and glass shade for any damage. If any parts are damaged or missing, do not proceed with installation and contact customer support.
- Prepare Mounting: Attach the mounting bracket (included in hardware kit) to the electrical junction box in the wall using the provided screws. Ensure the bracket is securely fastened.
- Make Electrical Connections: Using the Easy Connect push-in connection system, connect the fixture's wires to the corresponding household wires. Connect the black (live) wire from the fixture to the black (live) wire from the junction box. Connect the white (neutral) wire from the fixture to the white (neutral) wire from the junction box. Connect the green or bare copper (ground) wire from the fixture to the green or bare copper (ground) wire from the junction box. Ensure all connections are secure.
- Mount Fixture: Carefully align the fixture base with the mounting bracket and secure it using the provided screws. Ensure the fixture is flush against the wall and stable.
- Install Glass Shade: Gently place the flat opal glass shade onto the fixture according to the design. Secure it with any retaining rings or screws provided in the hardware kit, being careful not to overtighten.
- Install Bulb: Screw one (1) Max 60W Type A incandescent bulb or equivalent LED/CFL bulb (not included) into the socket. Do not exceed the maximum wattage rating.
- Restore Power: Once installation is complete and all connections are secure, restore power at the main circuit breaker or fuse box. Test the fixture to ensure proper operation.
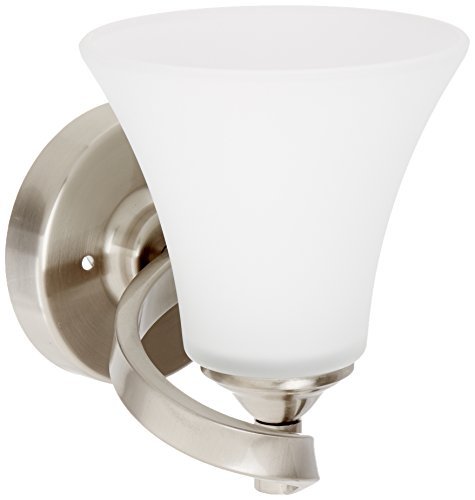
Figure 1: Assembled CANARM IVL587A01BN Rue Single Light Vanity Fixture.
Operating Instructions
The CANARM IVL587A01BN Rue Single Light Vanity Fixture is operated by a standard wall switch (not included) connected to the electrical circuit. Ensure the correct bulb type and wattage are installed for optimal performance and safety.
- Bulb Type: This fixture requires one (1) Max 60W Type A incandescent bulb or an equivalent LED/CFL bulb.
- Bulb Replacement: Always turn off power at the circuit breaker and allow the bulb to cool completely before attempting to replace it. Unscrew the old bulb and screw in the new bulb, ensuring it is securely seated.
Maintenance
Regular cleaning and proper care will help maintain the appearance and functionality of your fixture.
- Cleaning: Turn off power to the fixture before cleaning. Use a soft, dry, or slightly damp cloth to wipe down the metal finish and glass shade. Do not use abrasive cleaners, solvents, or polishes, as these can damage the finish and glass.
- Inspection: Periodically inspect the fixture for any loose wiring, damaged components, or signs of wear. If any issues are found, turn off power and consult a qualified electrician or contact customer support.
Troubleshooting
If you experience issues with your fixture, refer to the following common problems and solutions:
- Light Does Not Turn On:
- Ensure power is on at the circuit breaker.
- Check that the bulb is securely screwed into the socket and is not burnt out.
- Verify all electrical connections are secure and correctly wired.
- Light Flickers:
- Ensure the bulb is fully tightened.
- If using a dimmer switch, ensure the bulb is compatible with the dimmer.
- Check for loose wiring connections.
- Glass Shade is Loose:
- Gently tighten any retaining rings or screws that secure the glass shade. Do not overtighten.
Specifications
| Feature | Detail |
|---|---|
| Brand | Canarm |
| Model Number | IVL587A01BN |
| Dimensions (W x H x D) | 19.05 cm x 17.3 cm x 19.05 cm (approx. 7.5 in x 6.8 in x 7.5 in) |
| Weight | Approximately 0.28 kg (0.62 lbs) |
| Finish | Brushed Nickel |
| Shade Material | Flat Opal Glass |
| Power Source | Corded Electric |
| Voltage | 120 Volts |
| Max Wattage | 60 Watts |
| Bulb Type | 1 x Type A (Incandescent, LED, or CFL equivalent) |
| Installation Type | Wall Mount, Flush Mount |
| Location Rating | Damp Location Rated |
| Country of Origin | China |
Warranty
This CANARM IVL587A01BN Rue Single Light Vanity Fixture is covered by a 1-Year Manufacturer's Warranty from the original date of purchase. This warranty covers defects in materials and workmanship under normal use and service. It does not cover damage resulting from improper installation, accident, misuse, abuse, or unauthorized modifications.
Please retain your proof of purchase for warranty claims.
Support
For technical assistance, replacement parts, or warranty inquiries, please contact Canarm customer support. Refer to the original product packaging or the official Canarm website for the most current contact information.
Canarm is committed to providing quality products and support.


