
Introduction
This manual provides essential information for the proper use, maintenance, and care of your Stanley 1-1/8" x 24" SKIL736 drill bit, designed for use with Stanley HD45 Hydraulic Roto Hammers. Adhering to these instructions will ensure optimal performance and extend the lifespan of your product.
Product Overview
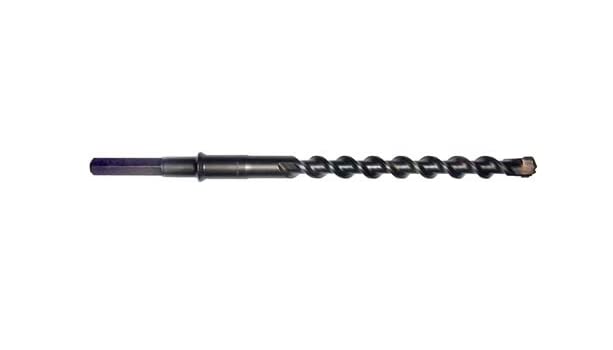
Image: A black, helical drill bit with a hexagonal shank on the left and a carbide tip on the right. The bit measures 1-1/8 inches in diameter and 24 inches in length, designed for heavy-duty drilling applications.
The Stanley SKIL736 drill bit is a robust accessory for hydraulic roto hammers, specifically engineered for demanding drilling tasks.
Key Features:
- Quantity Per Package: 1 drill bit
- Overall Length: 24 inches
- Drilling Depth: 18 inches
- Size: 1-1/8 inches diameter
- Manufacturing: All products are made in the USA.
Specifications
| Brand | STANLEY |
| Model (Bit) | SKIL736 |
| Compatible Hammer Models | Stanley HD45, HD20 |
| ASIN | B01BU9SFEM |
| Unit Count | 1 Count |
| Manufacturer | Stanley |
| Date First Available | February 16, 2016 |
Setup
- Safety First: Always wear appropriate personal protective equipment (PPE), including safety glasses, gloves, and hearing protection, before handling tools or operating machinery.
- Inspect the Bit: Before each use, inspect the drill bit for any signs of damage, wear, or cracks. Do not use a damaged bit.
- Prepare the Hammer: Ensure your Stanley HD45 (or compatible) Hydraulic Roto Hammer is clean and in good working order. Refer to your hammer's instruction manual for specific preparation steps.
- Insert the Bit: Insert the hexagonal shank of the drill bit firmly into the chuck of the hydraulic roto hammer. Ensure it is fully seated and locked into place according to the hammer's operating instructions. A properly seated bit will prevent slippage and ensure efficient power transfer.
- Secure the Workpiece: Ensure the material you intend to drill is securely fastened to prevent movement during operation.
Operating Instructions
- Start the Hammer: Activate the hydraulic roto hammer according to its manufacturer's instructions.
- Position the Bit: Place the tip of the drill bit firmly against the surface to be drilled. Apply steady, even pressure.
- Begin Drilling: Initiate drilling. Allow the bit and hammer to do the work; excessive force can lead to premature wear or damage to the bit and hammer.
- Maintain Drilling Depth: The bit is designed for a drilling depth of up to 18 inches. Monitor your depth to avoid over-drilling.
- Clear Debris: Periodically withdraw the bit slightly to allow debris to clear from the hole, especially when drilling deep holes. This helps prevent clogging and overheating.
- Finish Drilling: Once the desired depth is reached, withdraw the bit slowly and steadily from the hole while the hammer is still operating, then deactivate the hammer.
Note: Always refer to your specific hydraulic roto hammer's operating manual for detailed safety precautions and operational procedures.
Maintenance
- Cleaning: After each use, clean the drill bit thoroughly to remove all debris, dust, and residue. Use a stiff brush or compressed air.
- Lubrication: Apply a light coat of rust-preventative oil to the bit, especially the shank and flutes, before storage to prevent corrosion.
- Storage: Store the drill bit in a dry, cool place, away from moisture and corrosive materials. Protect the carbide tip from impact.
- Inspection: Regularly inspect the bit for signs of wear, dullness, or damage. A dull bit can reduce efficiency and put undue strain on the hammer.
Troubleshooting
| Problem | Possible Cause | Solution |
|---|---|---|
| Bit not drilling efficiently | Dull or worn tip; improper pressure; debris in hole. | Inspect tip for wear, replace if necessary; apply steady, even pressure; clear debris from hole. |
| Bit getting stuck in material | Insufficient debris removal; excessive force; incorrect bit for material. | Withdraw bit periodically to clear debris; reduce force; ensure bit is suitable for the material. |
| Excessive vibration or noise | Bit not properly seated; damaged bit; hammer issue. | Re-seat bit firmly; inspect bit for damage and replace if needed; consult hammer manual for troubleshooting. |
Warranty and Support
For information regarding product warranty, returns, or technical support, please refer to the official Stanley website or contact their customer service department. Keep your purchase receipt as proof of purchase.
Manufacturer: Stanley
Website: www.stanleytools.com (Note: This is a general link and may not lead directly to product support.)