Introduction
This manual provides comprehensive instructions for the National Geographic PRO Series Metal Detector. Please read this manual thoroughly before operating the device to ensure proper use and longevity.
The National Geographic PRO Series Metal Detector is designed for discovering buried metallic objects such as coins, jewelry, and other treasures. Its lightweight and collapsible design makes it suitable for various outdoor environments.
Product Features
- Lightweight and Collapsible Design: Weighs just 2.3 lbs and folds to 22 inches for easy transport.
- Adjustable Length: Extends from 22 inches to 51 inches, suitable for both children and adults.
- Large Waterproof 10-inch Search Coil: Provides extensive ground coverage and allows for use in shallow water.
- Multiple Detection Modes: Features 3 distinct modes to filter out unwanted metals and pinpoint targets.
- Deep Detection Capability: Detects objects up to 12 inches deep.
- LCD Display: Easy-to-understand display shows target identification and battery status.
Setup
Unpacking and Assembly
Carefully remove all components from the packaging. Ensure all parts are present: main unit with control panel, adjustable shaft, and search coil.
- Extend the Shaft: Locate the red button on the side of the main unit. Press and hold this button while extending the shaft to the desired length. The shaft can extend up to 51 inches.
- Secure the Arm Cuff: Adjust the arm cuff for a comfortable fit on your forearm.
- Install Batteries: The detector requires 4 AA batteries. Open the battery compartment on the control panel and insert the batteries, observing polarity. Close the compartment securely.
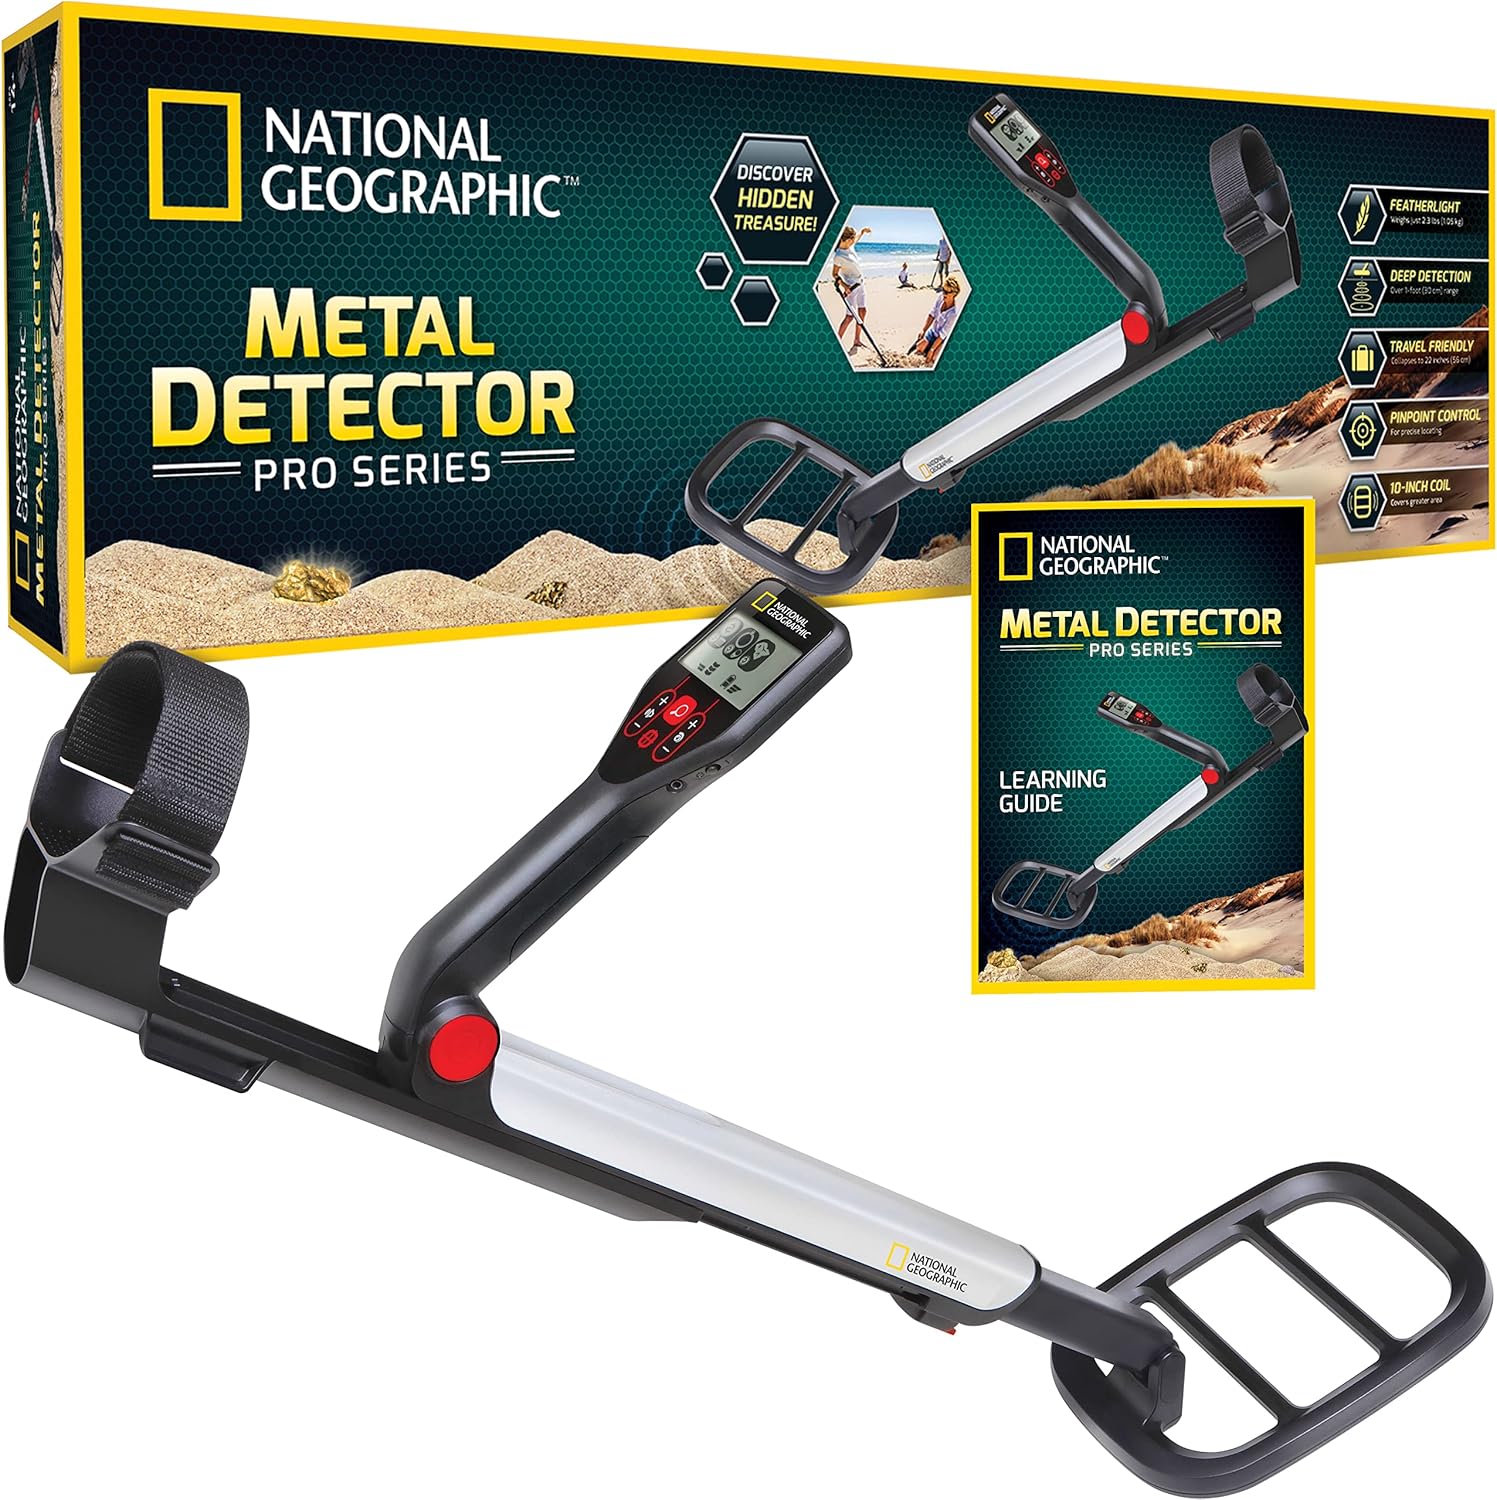
Image: The National Geographic PRO Series Metal Detector, showing its compact form in the box and its fully assembled state. This illustrates the product's portability and readiness for use.

Image: A hand balancing the metal detector, emphasizing its ultra-lightweight design at 2.3 lbs. This highlights the ease of handling during extended use.

Image: Two individuals, an adult and a child, operating the metal detector, demonstrating its adjustable length from 22 to 51 inches to fit various user heights.
Operating Instructions
Powering On and Basic Operation
Press the power button on the control panel to turn on the detector. The LCD screen will illuminate.
Understanding the Display
The LCD display provides crucial information about detected objects.
- Target Identification Icons: Icons represent different types of metals (e.g., iron, aluminum, rings, coins).
- Depth Indicator: Shows the approximate depth of the detected object.
- Battery Indicator: Displays the current battery level.

Image: The control panel and LCD screen of the metal detector, illustrating the three detection modes: Iron, Aluminum/Rings, and Coins. This feature allows users to discriminate between different types of metals.
Detection Modes
The detector features 3 detection modes to help differentiate between target types:
- All-Metal Mode: Detects all types of metal.
- Discrimination Mode: Allows the user to filter out certain types of metal (e.g., iron) to focus on more valuable targets. Use the mode selection button to cycle through options.
- Pinpoint Mode: Once a target is detected, press the pinpoint button to narrow down the exact location of the object for precise digging.
Sensitivity Adjustment
Use the '+' and '-' buttons to adjust the sensitivity level. Higher sensitivity increases detection depth but may also increase false signals in highly mineralized ground.
Audio Tones
The detector produces different audio tones to indicate the type of metal detected:
- Low Tone: Typically indicates iron targets.
- Mid Tone: Indicates metal targets.
- High Tone: Indicates silver/copper targets.

Image: A cross-section diagram illustrating the metal detector's deep detection capability, showing the search coil emitting signals to locate objects up to 12 inches deep in the ground.

Image: The metal detector in use, with a graphic highlighting its 20% larger search coil, which allows for more efficient ground coverage during searches.
Field Use
Hold the detector with the search coil parallel to the ground, about 1-2 inches above the surface. Sweep the coil slowly from side to side in overlapping motions.
Maintenance
- Cleaning: After each use, wipe down the search coil and shaft with a damp cloth. Avoid using abrasive cleaners.
- Storage: Store the detector in a dry, cool place. If storing for an extended period, remove the batteries to prevent leakage.
- Battery Replacement: Replace batteries when the low battery indicator appears on the LCD screen.
Troubleshooting
| Problem | Possible Cause | Solution |
|---|---|---|
| No power / Does not turn on | Dead or incorrectly installed batteries. | Check battery polarity; replace with fresh AA batteries. |
| Constant beeping or false signals | High sensitivity setting; highly mineralized ground; nearby electrical interference. | Reduce sensitivity; move to a different location; ensure no large metal objects are nearby. |
| Inaccurate target identification | Multiple targets in close proximity; target too deep; ground mineralization. | Use pinpoint mode; try different sweep angles; adjust sensitivity. |
| Weak or no signal for known metal objects | Low battery; incorrect mode selected; search coil not parallel to ground. | Replace batteries; switch to All-Metal mode; ensure proper sweeping technique. |
Specifications
- Brand: Blue Marble
- Model: NGPRODETECTOR
- Color: Black
- Material: Metal
- Power Source: Battery Powered (4 AA batteries required)
- Item Weight: 2.3 Pounds
- Product Dimensions: 7.5"L x 4.5"W x 22.5"H (collapsed)
- Extended Length: Up to 51 Inches
- International Protection Rating: IP54 (Waterproof 10" coil)
- Operating Frequency: 7 KHz
- Display Type: LCD
- Manufacturer Recommended Age: 14 years and up
- UPC: 851456006753
Warranty and Support
For warranty information and customer support, please refer to the official National Geographic product website or contact Blue Marble customer service.
Additional resources, including user guides and instructions for use, may be available in PDF format.
Online Resources: User Manual (PDF) | User Guide (PDF)


