
1. Introduction
Thank you for purchasing the MonsterShop Retro Jukebox. This manual provides essential information for the safe and efficient operation of your device. Please read it thoroughly before use and retain it for future reference.
The MonsterShop Retro Jukebox combines vintage aesthetics with modern audio features, including a CD player, AM/FM radio, Bluetooth connectivity, USB and SD card playback, and multi-color LED lighting.
2. Safety Information
- Read all instructions before operating the unit.
- Keep the unit away from water or moisture.
- Do not open the casing; there are no user-serviceable parts inside. Refer all servicing to qualified personnel.
- Ensure the power supply matches the voltage requirements (220 Volts).
- Unplug the unit during lightning storms or when unused for long periods.
- Place the unit on a stable, level surface to prevent tipping.
- Avoid blocking ventilation openings.

Image: A safety warning label indicating "CAUTION: RISK OF ELECTRIC SHOCK DO NOT OPEN" and "CLASS 1 LASER PRODUCT". A smartphone is shown connected to the jukebox, demonstrating connectivity options.
3. Package Contents
Please check that all items are present and in good condition:
- MonsterShop Retro Jukebox Unit
- Remote Control
- AUX Cable (RCA to 3.5mm)
- Power Cable
- Instruction Manual (This document)

Image: The remote control and a set of RCA to 3.5mm AUX cables, typically included accessories.
4. Product Overview
Familiarize yourself with the main components and controls of your jukebox.
Front Panel Controls:
- POWER: On/Off switch.
- VOLUME: Adjusts overall sound level.
- TREBLE: Adjusts high-frequency sound.
- TUNING: Selects AM/FM radio stations.
- BASS: Adjusts low-frequency sound.
- LIGHT: Controls LED lighting effects.
- CD/MP3/USB/SD Mode Selector: Switches between playback sources.
- Play/Pause, Stop, Next, Back, F+10, F-10, Program, Repeat: CD/USB/SD playback controls.

Image: Detailed view of the main control panel, showing knobs and buttons for audio and lighting adjustments.
Top Section:
- CD Player Slot: Insert audio CDs.
- USB Port: Connect USB flash drives for MP3 playback.
- SD Card Slot: Insert SD/MMC cards for MP3 playback.
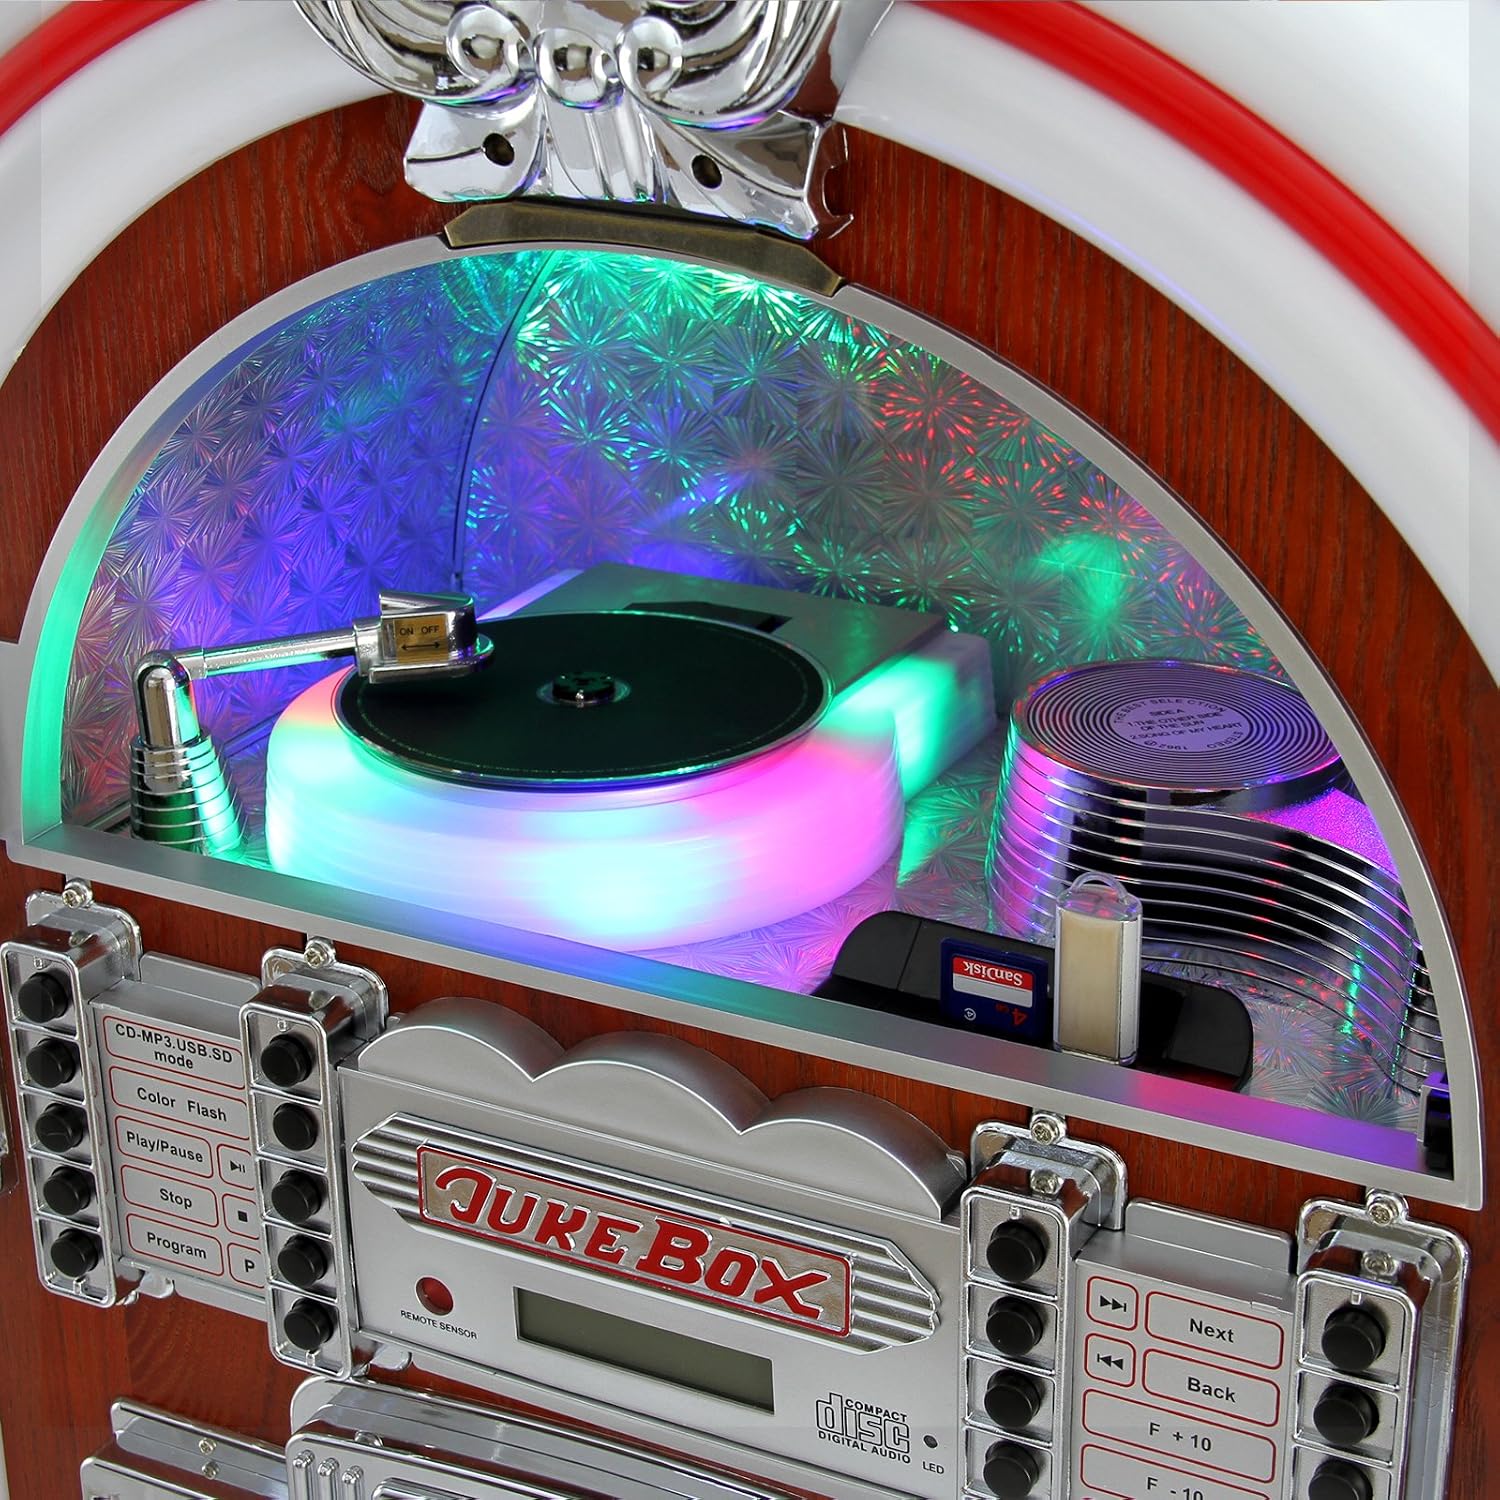
Image: The upper part of the jukebox, highlighting the CD loading area, USB port, and SD card slot.
Side Panel:
- Bluetooth Indicator/Controls: For Bluetooth pairing and basic playback.

Image: A close-up of the Bluetooth panel located on the side of the jukebox, displaying its indicator lights and control buttons.
5. Setup
- Unpacking: Carefully remove the jukebox from its packaging. Retain all packaging materials for future transport or returns.
- Placement: Place the jukebox on a flat, stable surface. Ensure adequate ventilation around the unit. Avoid direct sunlight, heat sources, or areas with high humidity.
- Power Connection: Connect the power cable to the jukebox's power input and then to a standard 220V AC wall outlet.
- Initial Power On: Press the POWER button on the front panel to turn on the unit. The LED lights should illuminate.

Image: The jukebox positioned in a retro-themed environment, demonstrating its aesthetic appeal and typical placement.
6. Operating Instructions
6.1. CD Playback
- Press the "CD/MP3/USB/SD" button to select CD mode.
- Gently insert an audio CD into the CD slot. The unit will automatically load and begin playback.
- Use the Play/Pause, Stop, Next, and Back buttons on the front panel or remote control to manage playback.
6.2. AM/FM Radio
- Press the "CD/MP3/USB/SD" button repeatedly until "RADIO" mode is selected.
- Rotate the TUNING knob to scan for available AM or FM radio stations.
- Adjust the VOLUME, TREBLE, and BASS knobs for desired sound quality.
6.3. Bluetooth Connectivity
- Press the "CD/MP3/USB/SD" button repeatedly until "BT" (Bluetooth) mode is selected. The Bluetooth indicator light on the side panel will flash.
- On your mobile device, enable Bluetooth and search for "MonsterShop Jukebox" or a similar device name.
- Select the jukebox from your device's list to pair. Once paired, the indicator light will become solid.
- You can now stream audio from your device to the jukebox. Use your device or the jukebox's controls for playback.
6.4. USB/SD Card Playback
- Insert a USB flash drive into the USB port or an SD/MMC card into the SD card slot.
- Press the "CD/MP3/USB/SD" button to select "USB" or "SD" mode. The unit will automatically detect and play MP3 files.
- Use the playback controls (Play/Pause, Stop, Next, Back, F+10, F-10) to navigate your music.
6.5. AUX Input
- Connect an external audio device (e.g., smartphone, MP3 player) to the AUX input jacks using the provided AUX cable.
- Press the "CD/MP3/USB/SD" button repeatedly until "AUX" mode is selected.
- Control playback from your external device. Adjust volume using the jukebox's VOLUME knob.
6.6. LED Lighting
- Press the LIGHT button on the front panel or remote control to cycle through different LED color modes and effects.
- The jukebox features 7 selectable LED color hues and various lighting patterns.

Image: The jukebox displaying its vibrant, multi-colored LED lighting effects.

Image: A side perspective of the jukebox, highlighting the illuminated LED strips and chrome accents.
7. Maintenance
- Cleaning: Use a soft, dry cloth to clean the exterior of the jukebox. Do not use abrasive cleaners or solvents.
- Dust: Regularly dust the unit, especially around ventilation areas, to prevent overheating.
- CD Player: If the CD player experiences reading errors, use a specialized CD lens cleaner disc.
- Storage: If storing the unit for an extended period, unplug it from the power outlet and cover it to protect from dust.
8. Troubleshooting
| Problem | Possible Cause | Solution |
|---|---|---|
| No power | Power cable not connected; outlet not active. | Ensure power cable is securely plugged in. Test the outlet with another device. |
| No sound | Volume too low; incorrect input mode; external device volume low. | Increase volume. Select correct input mode (CD, Radio, BT, USB, SD, AUX). Check volume on external device if using AUX/Bluetooth. |
| CD not playing/skipping | CD dirty or scratched; CD inserted incorrectly. | Clean the CD with a soft cloth. Re-insert the CD correctly. Try a different CD. |
| Bluetooth not connecting | Jukebox not in BT mode; device too far; device already paired with another unit. | Ensure jukebox is in BT mode. Move device closer. Disconnect from other Bluetooth devices. |
| Radio static/poor reception | Weak signal; antenna not extended. | Adjust the unit's position. Extend the AM/FM antenna fully. |
9. Specifications
| Feature | Detail |
|---|---|
| Brand | Monster Shop |
| Model Number | 10667 |
| Dimensions (H x W x D) | 105cm x 57cm x 30cm (41.3" x 22.4" x 11.8") |
| Weight | 48.5 pounds (approx. 22 kg) |
| Material | Wood |
| Power Input | 220 Volts AC |
| Power Consumption | 19 Watts |
| Connectivity | Bluetooth, USB, AUX |
| Media Playback | CD Player, SD Card Reader, AM/FM Radio, MP3 (via USB/SD) |
| Special Features | 7-color changing LED lights |

Image: A visual representation of the jukebox with its key dimensions labeled in centimeters and inches.
10. Warranty and Support
Your MonsterShop Retro Jukebox is covered by a 30-day return policy and standard legal guarantees.
For technical assistance, troubleshooting, or warranty claims, please contact Monster Shop's specialized customer support. Refer to your purchase documentation or the Monster Shop website for contact details.
Please have your model number (10667) and purchase date available when contacting support.


