
Introduction
This manual provides essential instructions for the setup, operation, maintenance, and troubleshooting of your HP Flexible Thin Client T520. Please read this document thoroughly before using the device to ensure proper functionality and longevity.
1. Setup
1.1 Unpacking and Contents Verification
Carefully remove all components from the packaging. Verify that the following items are present:
- HP Flexible Thin Client T520 unit
- Power adapter and cable
- Keyboard
- Mouse
- Vertical stand (if included)
- Documentation (this manual)
1.2 Connecting Peripherals
Before powering on the thin client, connect all necessary peripherals.
- Connect Display: Use a DisplayPort or VGA cable to connect your monitor to the corresponding port on the rear of the thin client. The T520 supports up to 3840x2160 resolution via DisplayPort.
- Connect USB Devices: Plug the keyboard and mouse into any available USB ports. The thin client features USB 3.0 (SuperSpeed) ports on the front and USB 2.0 ports on the rear.
- Connect Network: For a wired connection, insert an Ethernet cable into the RJ-45 network port on the rear.
- Connect Audio: If using external speakers or a headset, connect them to the audio output jack. A microphone can be connected to the microphone input jack.
- Connect Power: Insert the power adapter cable into the DC-in port on the rear of the thin client, then plug the power cord into an electrical outlet.
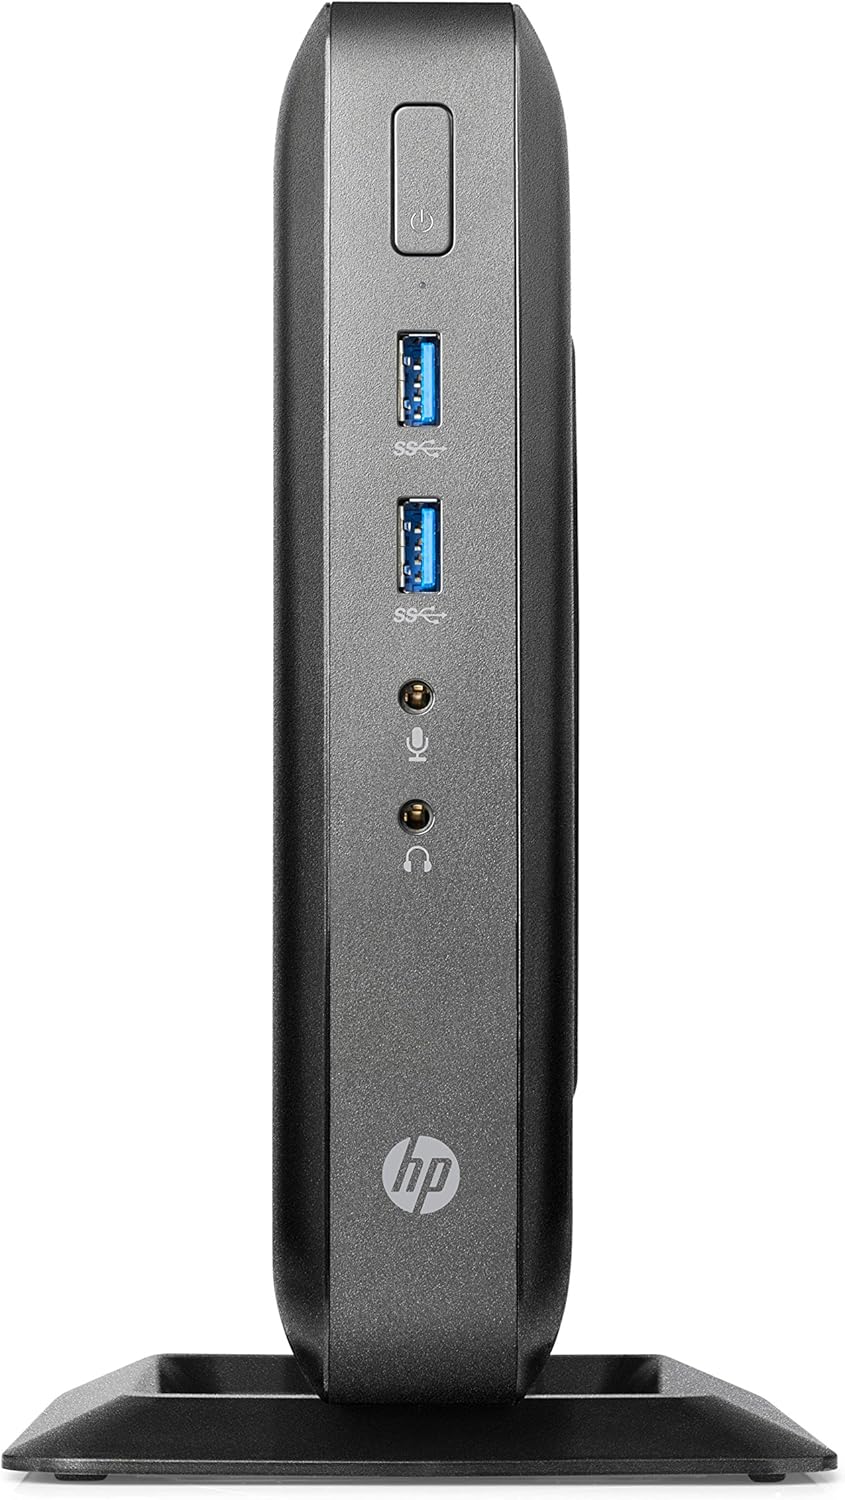
Figure 1: Front panel connections of the HP Flexible Thin Client T520. This view shows the power button, two SuperSpeed USB (USB 3.0) ports, a headphone jack, and a microphone jack.

Figure 2: Rear panel connections of the HP Flexible Thin Client T520. This view includes the Ethernet port, DisplayPort, HDMI port, VGA port, multiple USB 2.0 ports, and the DC power input.
1.3 Initial Power On
After connecting all peripherals and power, press the power button located on the front of the thin client. The device will boot into the Windows Embedded Standard 7E operating system.
2. Operating Instructions
2.1 Powering On and Off
- To Power On: Press the power button on the front panel.
- To Shut Down: From the Windows Embedded Standard 7E desktop, click the Start button, then select Shut Down. Allow the system to power off completely before disconnecting power.
- To Restart: From the Windows Embedded Standard 7E desktop, click the Start button, then select Restart.
2.2 Operating System Overview
The HP Flexible Thin Client T520 runs on Windows Embedded Standard 7E, a specialized operating system designed for thin client environments. It provides a familiar Windows interface for accessing remote desktops, virtual applications, and web-based services.
2.3 Network Connectivity
The thin client is designed for network-centric operations. Ensure a stable wired Ethernet connection for optimal performance. Network settings can be configured through the Windows Control Panel, typically managed by your IT administrator in a corporate environment.
3. Maintenance
3.1 Cleaning the Device
To maintain optimal performance and appearance:
- Ensure the thin client is powered off and disconnected from the power source before cleaning.
- Use a soft, lint-free cloth lightly dampened with water or a mild, non-abrasive cleaning solution.
- Do not spray liquids directly onto the device.
- Avoid using harsh chemicals, solvents, or abrasive materials.
3.2 Software Updates
Regularly check for and apply any available operating system or firmware updates as recommended by HP or your IT department. This ensures security and performance enhancements.
3.3 Storage Management
The T520 features a 16 GB SSD. While primarily used for the operating system and client software, it is advisable to monitor available storage space. Avoid storing large, unnecessary files directly on the thin client's local drive.
4. Troubleshooting
This section addresses common issues you might encounter with your HP Flexible Thin Client T520.
4.1 No Power
- Verify the power cable is securely connected to both the thin client and the electrical outlet.
- Ensure the power outlet is functional by testing it with another device.
- Check the power adapter for any visible damage.
4.2 No Display Output
- Confirm the monitor is powered on and connected correctly to the thin client's DisplayPort or VGA port.
- Ensure the correct input source is selected on your monitor.
- Test with a different monitor or display cable if available.
4.3 Network Connectivity Issues
- Check that the Ethernet cable is securely plugged into both the thin client and the network router/switch.
- Verify network status lights on the Ethernet port are active.
- Consult your network administrator for network configuration assistance.
4.4 Peripheral Devices Not Responding
- Ensure USB devices (keyboard, mouse) are properly connected to the USB ports.
- Try connecting the devices to different USB ports.
- Test the peripherals on another computer to confirm they are functional.
5. Specifications
The following table outlines the key technical specifications for the HP Flexible Thin Client T520 (G9F08AA#ABA):
| Feature | Specification |
|---|---|
| Processor | AMD G-Series GX-212JC 1.2 GHz |
| RAM | 4 GB DDR3 SDRAM |
| Storage | 16 GB SSD |
| Operating System | Windows Embedded Standard 7E |
| Graphics Coprocessor | AMD Embedded G-Series (Integrated) |
| Max Screen Resolution | 3840x2160 (via DisplayPort) |
| Ports (Front) | 2x USB 3.0, Headphone, Microphone |
| Ports (Rear) | Ethernet (RJ-45), DisplayPort, HDMI, VGA, Multiple USB 2.0, DC-in |
| Item Weight | 7.73 pounds |
| Dimensions (Package) | 20 x 12 x 6.9 inches |
6. Warranty and Support
6.1 Manufacturer Warranty
The HP Flexible Thin Client T520 typically comes with a 3-year manufacturer warranty. Please refer to the warranty documentation included with your product or visit the official HP support website for specific terms and conditions.
6.2 Technical Support
For technical assistance, driver downloads, or further troubleshooting, please visit the official HP support website or contact HP customer service. Have your product model (T520) and serial number ready when seeking support.

