
Introduction
The Naturewater 5-stage reverse osmosis system provides a modern and effective method for treating water, delivering pure and soft drinking water or demineralized water suitable for aquariums. This system is designed to remove impurities that can affect water quality and potentially cause health issues.
The reverse osmosis process involves pressing water against a semi-permeable membrane. Only purified water passes through, while dissolved minerals and toxins are efficiently eliminated. This model includes an integrated diaphragm booster pump to increase water pressure, enabling the system to produce up to 180 liters of purified water per day without the need for chemical additives.
Key features of this system include:
- Nature-friendly water treatment method.
- No chemical products required for purification.
- Equipped with a booster pump and manometer for optimal performance.
- Removes up to 99% of foreign bodies, including heavy metals and pesticides.
- Easy to install and operate.
The system operates with a wastewater ratio of approximately 1:3 (1 part pure water to 3 parts wastewater).
Setup Instructions
Proper installation is crucial for the optimal performance of your Naturewater reverse osmosis system. This system is designed for under-sink installation. Refer to the diagram below for a visual guide.
Unpacking and Component Identification
Carefully unpack all components and verify that all parts are present. The package should include the main filter unit, a storage tank, various filters, an RO membrane, a dispensing faucet, tubing, and connection accessories.

Image: Main components of the Naturewater 5-stage reverse osmosis system, including the filter unit, various filter cartridges, and a filter wrench.
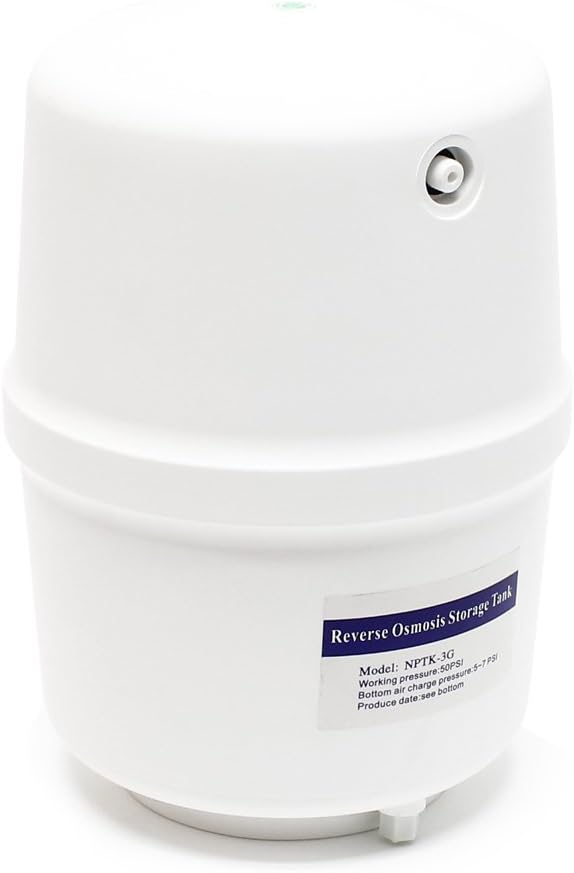
Image: The white pressurized reverse osmosis storage tank, labeled Model NPTK 3G.

Image: The main filter unit showing three pre-filter housings and the top-mounted RO membrane housing with associated plumbing.

Image: A detailed view of the Naturewater RO system, highlighting the booster pump, pressure gauge, and various connections.

Image: The VONTRON ULP1812-50 Reverse Osmosis Membrane Element, certified to NSF/ANSI 58.

Image: Various installation accessories for the RO system, including the dispensing faucet, white tubing, and connection fittings.
Installation Steps
- Water Supply Connection: Turn off the main cold water supply. Install the feed water adapter (usually a T-valve) to your cold water line under the sink. Connect the input water line from the RO system to this adapter.
- Drain Saddle Installation: Install the drain saddle valve onto the drainpipe under your sink. Ensure it is positioned above the P-trap. Connect the wastewater line from the RO system to this drain saddle.
- Faucet Installation: Drill a hole in your countertop or sink for the dispensing faucet. Mount the faucet securely and connect the purified water line from the RO system to the faucet.
- Storage Tank Connection: Place the pressurized holding tank in a suitable location under the sink. Connect the purified water line from the RO system to the inlet valve on the top of the storage tank. Ensure the tank valve is initially closed.
- Filter and Membrane Installation: Ensure all filter cartridges (sediment, carbon block) are correctly inserted into their respective housings. Install the RO membrane into its housing.
- System Flushing: Before first use, flush the system. Turn on the cold water supply. Open the RO faucet and allow water to flow for several minutes to flush out carbon fines and air. Close the RO faucet. Open the storage tank valve. Allow the tank to fill completely (this may take 2-3 hours). Once full, open the RO faucet and drain the tank completely. Repeat this flushing process 2-3 times to ensure all air is removed and filters are properly conditioned.
- Leak Check: After flushing, carefully check all connections for leaks. Tighten any fittings as necessary.

Image: Schematic diagram illustrating the typical under-sink installation of a reverse osmosis system, showing connections to input water, dispensing faucet, drain, and pressurized holding tank.
Operating Instructions
Once installed and flushed, your Naturewater RO system is ready for use.
Daily Operation
- Ensure the cold water supply valve to the RO system is open.
- Ensure the valve on top of the storage tank is open.
- The system will automatically produce purified water and fill the storage tank. Production rate is up to 180 liters per day.
- To dispense purified water, simply open the dedicated RO faucet. The water flow will come from the pressurized storage tank.
- When the tank is empty, the system will automatically begin producing more water to refill it.
Booster Pump and Manometer
The integrated booster pump ensures optimal water pressure for the reverse osmosis process, especially in areas with low incoming water pressure. The manometer displays the system's operating pressure, allowing you to monitor its performance. Consult the specifications for the recommended operating pressure range.
Maintenance
Regular maintenance ensures the longevity and efficiency of your Naturewater RO system. Filter replacement is the primary maintenance task.
Filter Replacement Schedule
| Filter Stage | Type | Recommended Replacement |
|---|---|---|
| Stage 1 | Sediment Filter | Every 3-6 months |
| Stage 2 | Granular Activated Carbon (GAC) Filter | Every 6-12 months |
| Stage 3 | Carbon Block (CTO) Filter | Every 6-12 months |
| Stage 4 | Reverse Osmosis (RO) Membrane | Every 2-3 years (or as needed) |
| Stage 5 | Post-Carbon Filter (Inline) | Every 12 months |
Note: Filter life can vary based on incoming water quality and usage.
Filter Replacement Procedure
- Turn off the cold water supply to the RO system and close the valve on the storage tank.
- Open the RO faucet to relieve pressure in the system.
- Use the provided filter wrench to unscrew the filter housings.
- Remove old filters and dispose of them. Clean the inside of the filter housings with mild soap and water.
- Insert new filters, ensuring they are correctly oriented. Lubricate O-rings with food-grade silicone grease if necessary.
- Screw the filter housings back on by hand, then tighten slightly with the wrench. Do not overtighten.
- For RO membrane replacement, follow specific instructions provided with the new membrane.
- Turn on the cold water supply slowly and check for leaks.
- Flush the system as described in the setup instructions after any filter replacement.
Troubleshooting Guide
This section addresses common issues you might encounter with your Naturewater RO system.
| Problem | Possible Cause | Solution |
|---|---|---|
| No water or very slow flow from faucet |
|
|
| Water has an unusual taste or odor |
|
|
| Constant drain flow (system won't shut off) |
|
|
| Leaks |
|
|
Specifications
| Feature | Detail |
|---|---|
| Model Number | 51079 |
| Brand | Naturewater |
| Product Dimensions (L x W x H) | 44 x 18.6 x 35.8 cm |
| Item Weight | 11.94 Kilograms |
| Material | Polypropylene |
| Special Feature | Reverse Osmosis |
| Capacity | 11.35 Liters (Storage Tank) |
| Included Components | Water filtration system |
| Installation Type | Under Sink |
| Purification Method | Reverse Osmosis |
| Power Source | Manual operation (with booster pump) |
| Minimum Temperature Range | 4 Degrees Celsius |
| Maximum Flow Rate | 8 Liters per hour |
| Operating Pressure Range | Up to 5.5 Bars |
| Upper Rated Temperature | 42 Degrees Celsius |
| Country of Origin | China |
Warranty Information
Specific warranty details for the Naturewater 5-Stage Reverse Osmosis Water Filter System (Model 51079) may vary by region and retailer. Please refer to the warranty card included with your product or contact your point of purchase for precise terms and conditions. Generally, products are covered against manufacturing defects for a limited period from the date of purchase. Consumable items such as filters and membranes are typically not covered under the standard warranty due to their limited lifespan and dependence on water quality and usage.
Customer Support
For technical assistance, replacement parts, or further inquiries regarding your Naturewater 5-Stage Reverse Osmosis Water Filter System, please contact your retailer or the manufacturer directly. When contacting support, please have your product model number (51079) and purchase date available.
You may also visit the official Naturewater brand store for additional product information and resources: Naturewater Brand Store


