
1. Introduction
Thank you for choosing the SPYPOINT FORCE-11D Ultra Compact Trail Camera. This manual provides detailed instructions for setting up, operating, maintaining, and troubleshooting your camera to ensure optimal performance. The FORCE-11D is designed for capturing high-quality images and videos in various outdoor conditions.
Key features of the SPYPOINT FORCE-11D include:
- 11MP photo resolution and HD video recording with sound.
- 42 low glow LEDs for enhanced night imaging with a 100' flash range.
- Ultra-fast 0.07-second trigger speed, one of the fastest on the market.
- Blur Reduction and Infrared Boost technologies for clear images.
- 80' detection distance with a curved motion sensor lens.
- Multi-shot, time-lapse, and continuous camera modes.
- Integrated 2-inch viewing screen for easy setup and photo review.
2. Product Overview
Familiarize yourself with the components of your SPYPOINT FORCE-11D camera.
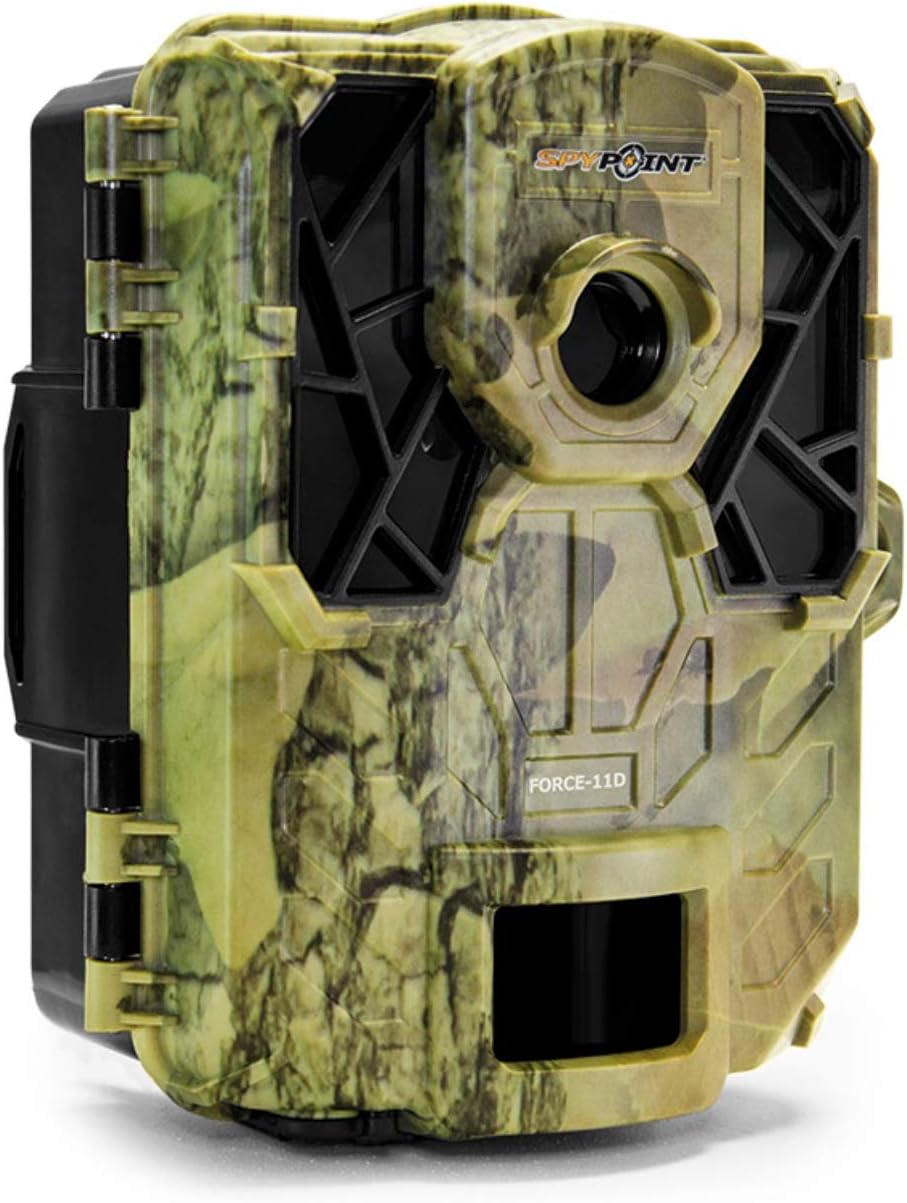
Figure 2.1: Front view of the SPYPOINT FORCE-11D trail camera, showing the camouflage casing, lens, and infrared LEDs.

Figure 2.2: Inside view of the SPYPOINT FORCE-11D trail camera when opened, revealing the control panel, 2-inch viewing screen, battery compartments, and SD card slot.
In the Box:
- SPYPOINT FORCE-11D Trail Camera
- Mounting Bracket
- Quick Start Guide
- Mounting Strap
Items Not Included (Required for Operation):
- 6 AA Batteries (Alkaline or Lithium recommended)
- SD/SDHC Memory Card (up to 32GB, Class 10 recommended)
3. Setup and Installation
3.1. Battery Installation
- Open the camera casing by unlatching the side clips.
- Locate the battery compartments.
- Insert 6 AA batteries, ensuring correct polarity (+/-) as indicated inside the compartment.
- Close the battery compartment cover securely.
3.2. SD Card Installation
- With the camera open, locate the SD card slot, typically near the viewing screen.
- Insert an SD/SDHC memory card (up to 32GB) into the slot until it clicks into place. Ensure the card is inserted in the correct orientation.
- To remove, press the card gently until it springs out.
3.3. Mounting the Camera
- Select a suitable location for your camera, such as a tree or post, ensuring a clear view of the desired area.
- Use the provided mounting strap to secure the camera. Thread the strap through the slots on the back of the camera and around the mounting surface.
- Tighten the strap firmly to prevent camera movement.
- Adjust the camera's angle to optimize the detection area. The curved motion sensor lens improves detection angle and distance.
4. Operating Instructions
4.1. Powering On/Off
- To Power On: Press the OK button. The screen will illuminate.
- To Power Off: Press and hold the OK button for 2 seconds.
4.2. Navigating the Menu
Use the arrow buttons (UP, DOWN, LEFT, RIGHT) to navigate through menu options on the 2-inch viewing screen. Press OK to confirm a selection.
4.3. Setting Camera Modes
The FORCE-11D supports various capture modes:
- Photo Mode: Captures still images (11MP).
- Video Mode: Records HD video with sound.
- Multi-shot Mode: Captures multiple photos per trigger (up to 6 shots).
- Time-Lapse Mode: Captures images at set intervals regardless of motion.
- Continuous Mode: Records continuously for a set duration.
Refer to the on-screen menu for specific settings related to each mode, including resolution, delay, and length.
4.4. Viewing Photos and Videos
The 2-inch viewing screen allows you to review captured media directly on the camera. Navigate to the playback mode using the menu and use the arrow buttons to browse through files.
5. Maintenance
- Cleaning: Use a soft, dry cloth to clean the camera lens and housing. Avoid abrasive cleaners or solvents.
- Battery Replacement: Replace batteries when the low battery indicator appears on the screen or when performance degrades. Always use fresh batteries of the same type.
- SD Card Management: Regularly format your SD card using the camera's menu option to ensure optimal performance and prevent data corruption. Back up important files before formatting.
- Storage: When not in use for extended periods, remove batteries and store the camera in a cool, dry place away from direct sunlight.
6. Troubleshooting
| Problem | Possible Cause | Solution |
|---|---|---|
| Camera not powering on. | Dead or incorrectly installed batteries. | Check battery polarity. Replace with fresh batteries. |
| No photos/videos recorded. | SD card full, corrupted, or not inserted correctly; incorrect settings; no motion detected. | Format or replace SD card. Check camera mode and sensitivity settings. Ensure camera is placed within detection range. |
| Poor night images. | Objects too close/far; IR Boost not enabled; low battery. | Ensure subjects are within 100' flash range. Check IR Boost setting. Replace batteries. |
| Blurry images. | Camera movement; subject movement; lens dirty. | Securely mount the camera. Ensure Blur Reduction is active. Clean the lens. |
7. Specifications
| Feature | Detail |
|---|---|
| Model Name | FORCE-11D |
| Photo Resolution | 11 Megapixels |
| Video Resolution | 720 Pixels (HD) |
| Trigger Speed | 0.07 seconds |
| Flash Range | 100 feet (30 meters) |
| Detection Distance | 80 feet (24 meters) |
| LEDs | 42 low glow LEDs |
| Display Screen | 2-inch viewing screen |
| Memory Card Support | SD/SDHC up to 32GB (not included) |
| Power Source | 6 AA batteries (not included) |
| Dimensions (L x W x H) | 12.7 x 8.3 x 10.2 cm (approx. 5 x 3.25 x 4 inches) |
| Weight | 255 g (approx. 0.56 lbs) |
| Color | Camouflage |
8. Warranty and Support
SPYPOINT offers a 2-year warranty on trail cameras. For complete details regarding warranty coverage and terms, please refer to the official SPYPOINT website or contact customer support.
For technical assistance, troubleshooting beyond this manual, or warranty claims, please contact SPYPOINT customer support through their official channels. Keep your proof of purchase for warranty validation.
Online Resources:
- Official SPYPOINT Website: www.spypoint.com (for complete details and support)


