
Introduction
This manual provides comprehensive instructions for the setup, operation, and maintenance of your Watson W-8681-PRO Professional Wi-Fi Weather Station. This device is designed to provide accurate local weather data, including temperature, humidity, wind speed and direction, rainfall, barometric pressure, and light intensity. It features a color LCD display and Wi-Fi connectivity for online data sharing.
Product Overview
The Watson W-8681-PRO weather station consists of a main display unit, an outdoor sensor array, and an indoor sensor. These components work together wirelessly to collect and display environmental data.
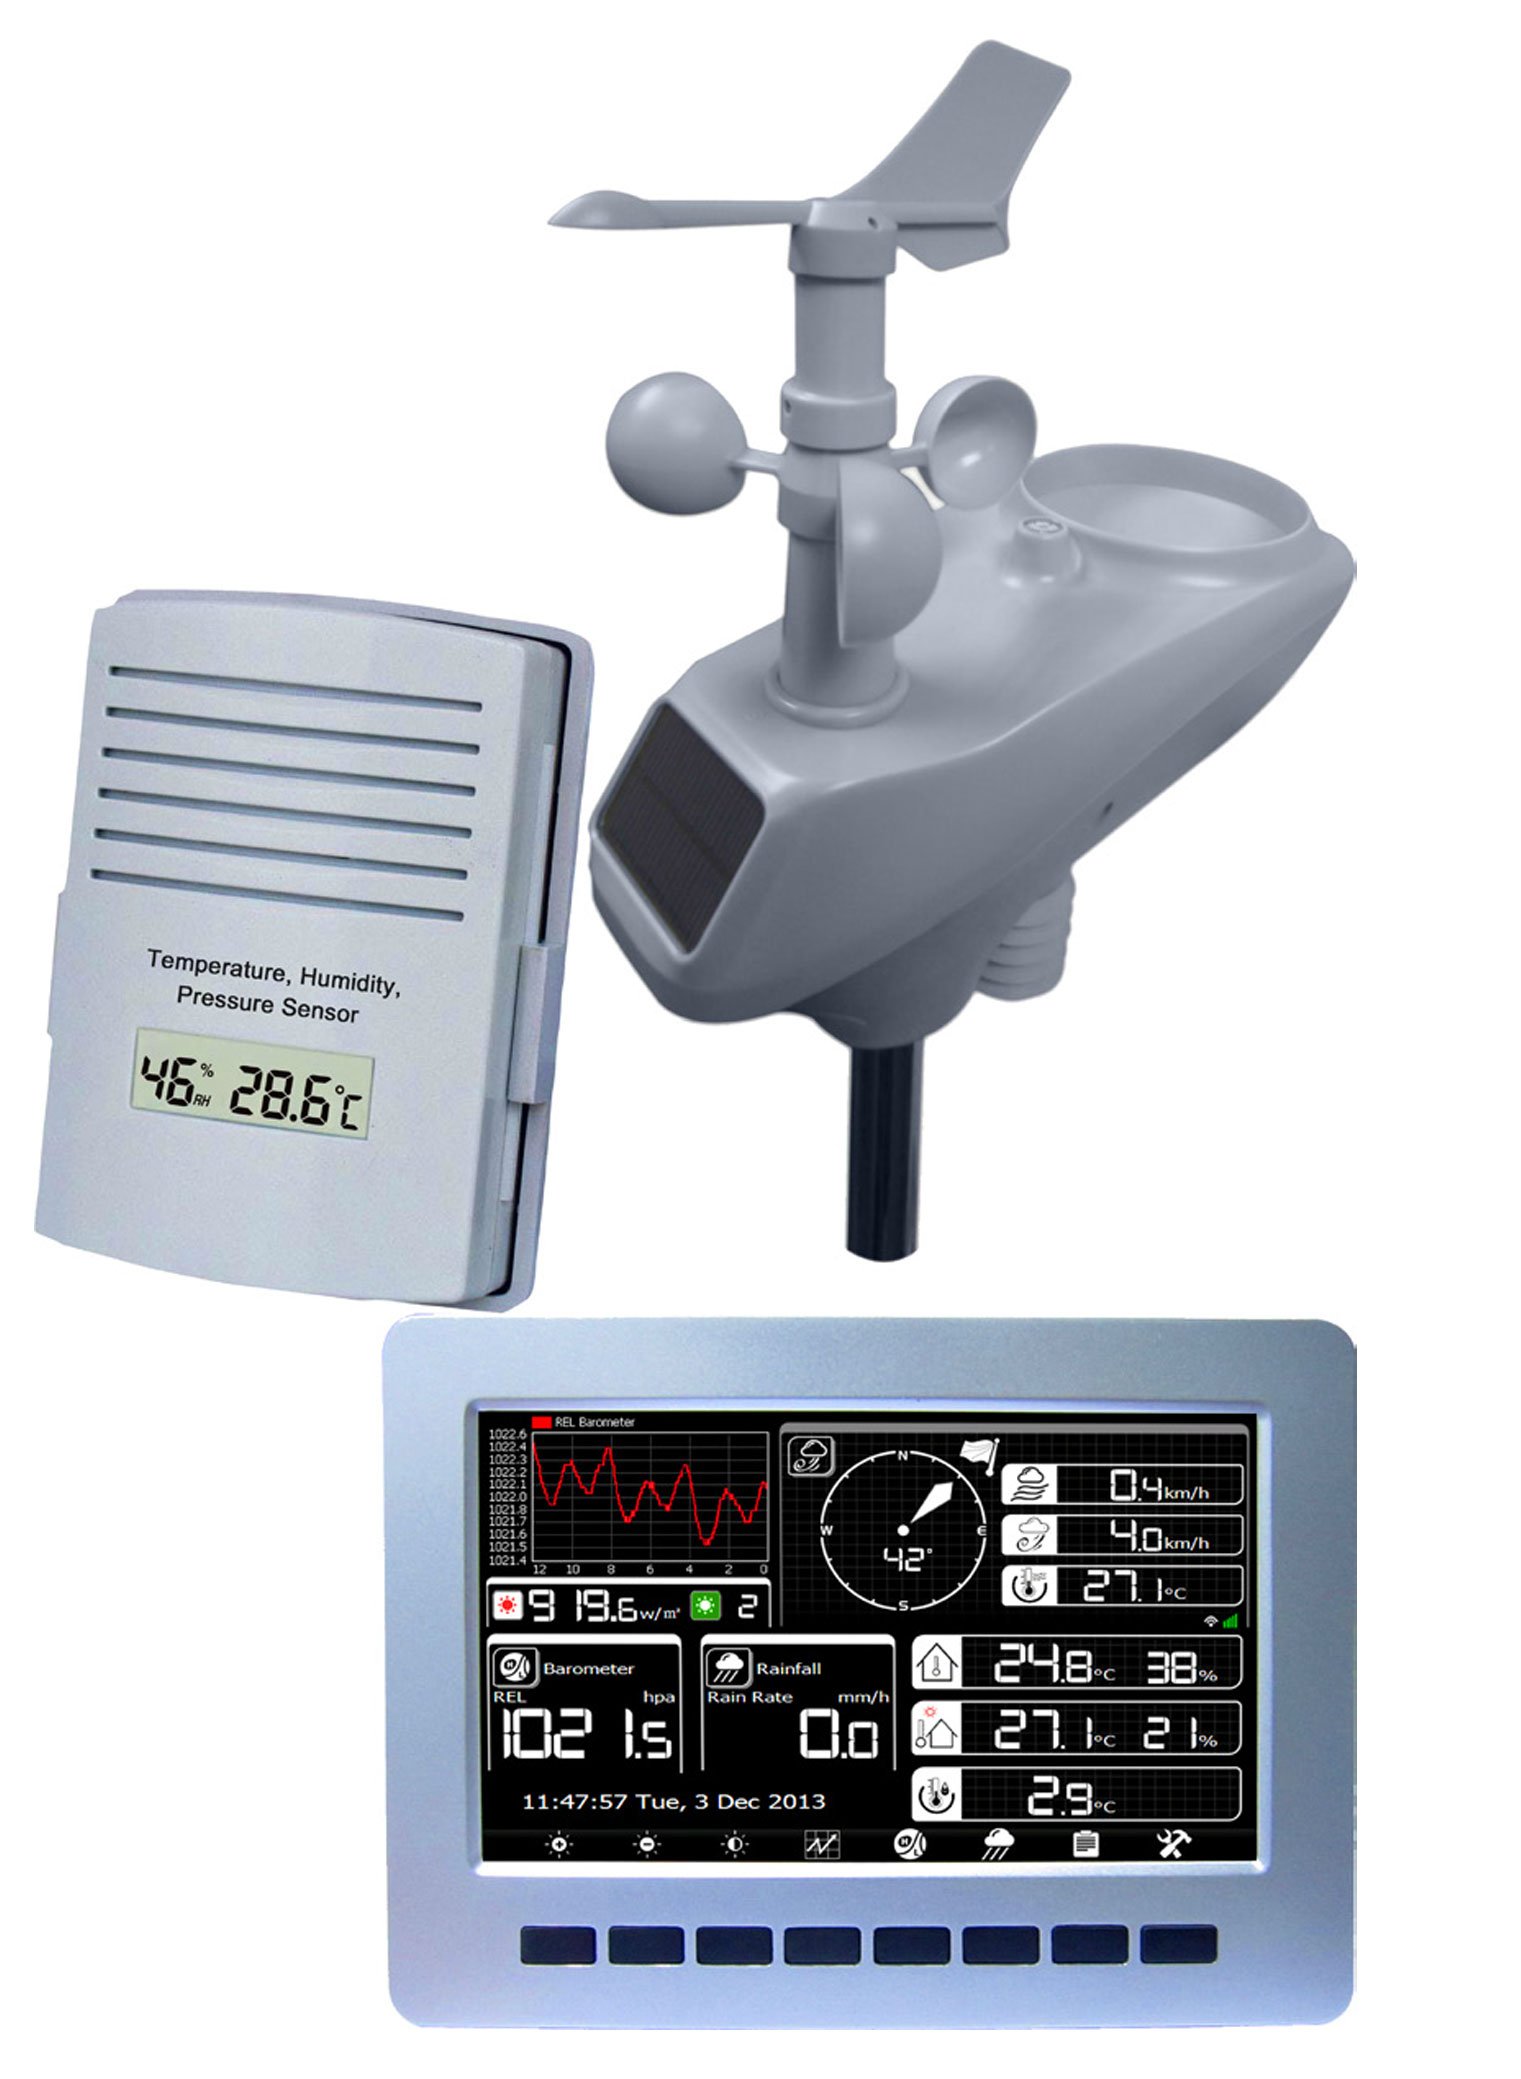
Figure 1: Watson W-8681-PRO Professional Wi-Fi Weather Station, showing the display unit and outdoor sensor array on the product packaging.
Main Components:
- Display Unit: Features a TFT Color LCD for displaying all weather data, time, and system settings. It has 8 control keys for navigation and configuration.
- Outdoor Sensor Array: A robust, wireless unit that measures wind speed, wind direction, rainfall, outdoor temperature, and humidity. It is equipped with a solar panel for recharging its internal batteries.
- Indoor Sensor: Measures indoor temperature and humidity.
Setup
1. Unpacking and Initial Power-Up
- Carefully remove all components from the packaging.
- Connect the power adapter to the main display unit and plug it into an electrical outlet. The display will power on.
- Insert 2 x AAA batteries (not included) into the indoor sensor.
2. Outdoor Sensor Array Installation
The outdoor sensor array should be mounted in an open area, free from obstructions, to ensure accurate readings for wind, rain, and sunlight. The solar panel should face south (in the Northern Hemisphere) for optimal charging.

Figure 2: The Watson W-8681-PRO outdoor sensor array (left) and the main display unit (right). The outdoor unit includes sensors for wind, rain, and a solar panel.
- Assemble the outdoor sensor array according to the included diagrams. Ensure all parts are securely fastened.
- Mount the assembled sensor array on a short mast or pole in your garden or on a suitable structure. Ensure it is stable and level.
- The outdoor sensor array's internal batteries will be charged by its integrated solar panel.
3. Sensor Synchronization
Once powered, the display unit will automatically search for and connect to the outdoor and indoor sensors. This process may take a few minutes. Ensure all units are within the 150-meter transmission range.
4. Wi-Fi Configuration
To upload weather data to the internet, configure the Wi-Fi settings on the display unit. Refer to the display unit's menu for network setup options. The station supports automatic data upload to online weather services or to a micro-SD card.
Operating the Weather Station
Display Unit Functions
The TFT Color LCD provides a clear overview of all collected weather data. Use the 8 control keys to navigate through menus and adjust settings.
- Time and Date: Automatically synchronized via the DCF long-wave atomic standard signal (if receivable in your region).
- Indoor Data: Displays current indoor temperature and humidity.
- Outdoor Data: Shows current outdoor temperature, humidity, wind speed, wind direction, and rainfall data (hourly, daily, weekly, monthly, and total).
- Barometric Pressure: Displays current barometric pressure.
- Lux Meter: Provides solar energy index readings.
- Wind Chill & Dew Point: Calculated and displayed.
- Historical Data: Access past weather records through the menu.
- Units: Switch between imperial and metric units as desired.
- Alarms: Set alarms to be triggered by extreme weather conditions detected by the sensors.
Maintenance
- Battery Replacement: Replace the 2 x AAA batteries in the indoor sensor annually or when the low battery indicator appears. The outdoor sensor array's batteries are recharged by its solar panel.
- Cleaning: Periodically clean the outdoor sensor array, especially the rain collector and wind sensors, to prevent debris buildup that could affect accuracy. Use a soft, damp cloth.
- Connection Check: Ensure all mounting hardware for the outdoor sensor array remains secure, especially after strong winds.
Troubleshooting
| Problem | Possible Cause | Solution |
|---|---|---|
| No outdoor sensor data on display. | Out of range, low battery, interference. | Ensure display and outdoor unit are within 150m. Check outdoor unit for sufficient solar charge (ensure solar panel is clean and facing sun). Relocate units to minimize interference. |
| Incorrect time/date. | Poor DCF signal reception. | Relocate the display unit to an area with better signal reception. Manually set time if automatic synchronization fails consistently. |
| Wi-Fi connection issues. | Incorrect network settings, router issues, signal strength. | Verify Wi-Fi password and network name. Ensure the display unit is within range of your Wi-Fi router. Restart router and display unit. |
| Inaccurate rainfall readings. | Rain collector blocked by debris. | Clean the rain collector funnel and tipping bucket mechanism. |
Specifications
- Model Number: W-8681-PRO
- Display Type: TFT Color LCD
- Connectivity: Wi-Fi, Wireless (sensors)
- Transmission Range: Up to 150 meters (line of sight)
- Power Source (Display): AC Adapter
- Power Source (Indoor Sensor): 2 x AAA Batteries (not included)
- Power Source (Outdoor Sensor Array): Solar panel with rechargeable batteries
- Measurements: Indoor/Outdoor Temperature, Indoor/Outdoor Humidity, Wind Speed, Wind Direction, Rainfall, Barometric Pressure, Lux (Solar Energy Index), Wind Chill, Dew Point
- Special Features: Alarm functions, Data upload to internet/micro-SD, Imperial/Metric units, Historical data display, DCF atomic clock synchronization.
- Material: Plastic, Metal (for mounting)
Warranty and Support
This product comes with a standard manufacturer's warranty. Please refer to your purchase documentation for specific warranty terms and conditions. For technical support, troubleshooting assistance, or warranty claims, please contact your retailer or the manufacturer's customer service department.
Note: Keep your proof of purchase for warranty purposes.