1. Introduction
The Muse M-192 CR is a versatile clock radio designed to provide reliable timekeeping, alarm functions, and FM radio reception. It features a large, easy-to-read digital display, dual alarms, and convenient functions such as snooze, sleep, and NAP. This manual provides detailed instructions for the proper setup, operation, and maintenance of your device.
2. Safety Instructions
- Read all instructions carefully before operating the device.
- Keep the device away from water or moisture.
- Do not block any ventilation openings. Ensure adequate space around the unit for proper airflow.
- Use only the AC adapter supplied with the unit.
- Avoid exposing the device to extreme temperatures, direct sunlight, or high humidity.
- Do not attempt to disassemble or modify the unit. Refer all servicing to qualified personnel.
3. Package Contents
Please check the package for the following items:
- 1 x Muse M-192 CR Clock Radio
- 1 x AC Adapter
- 1 x Instruction Manual (this document)
4. Product Overview
Familiarize yourself with the various parts and controls of your Muse M-192 CR Clock Radio.

Figure 1: Front angled view of the Muse M-192 CR Clock Radio, showcasing its large digital display and control buttons.
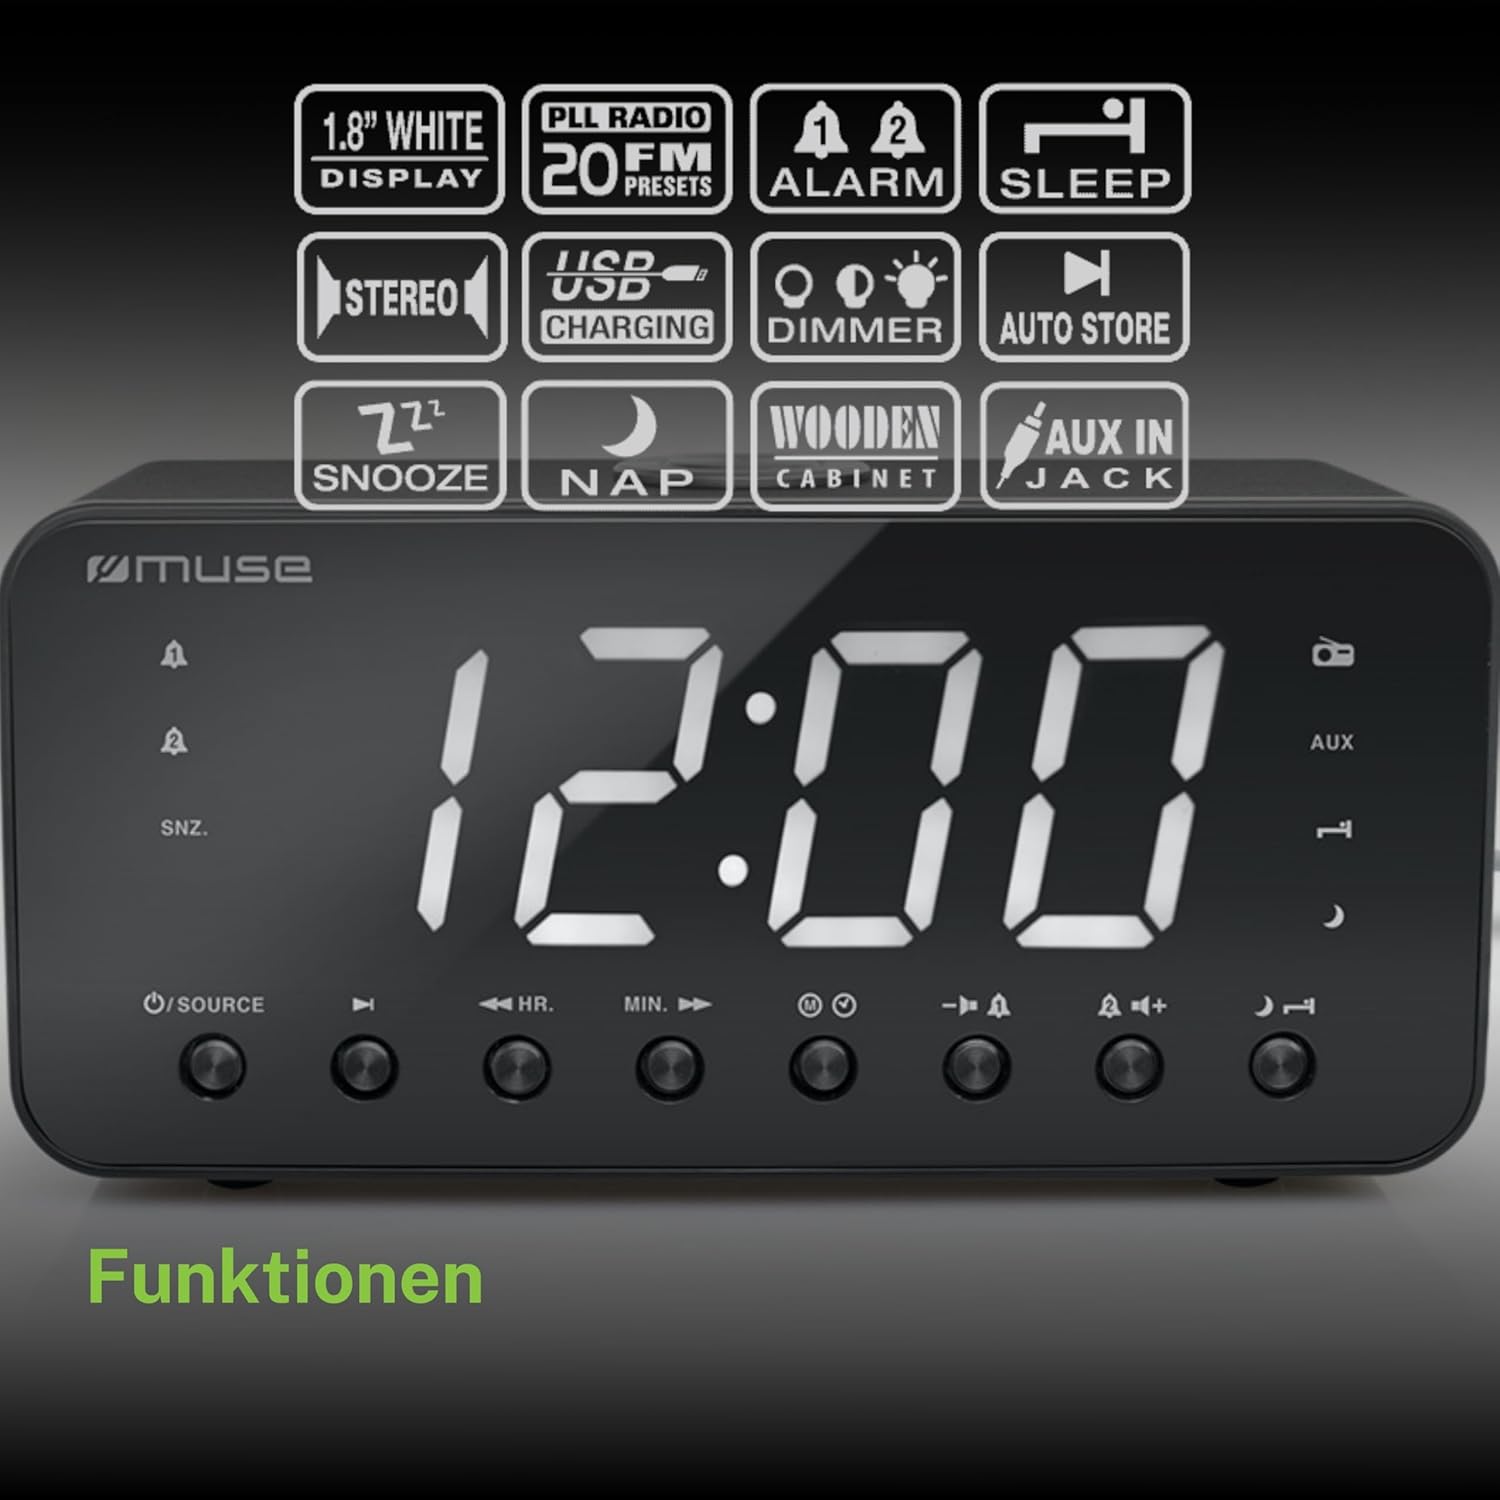
Figure 2: Diagram illustrating the key features and control buttons on the Muse M-192 CR Clock Radio, including the 1.8-inch white display, PLL FM radio with 20 presets, dual alarms, sleep, snooze, NAP functions, USB charging, dimmer, auto store, and AUX input jack.
Front Panel Controls:
- Display: Large 1.8-inch white LED display for time and status.
- SOURCE Button: Selects between FM radio and AUX input.
- HR (Hour) Button: Adjusts hour for time and alarm settings.
- MIN (Minute) Button: Adjusts minute for time and alarm settings.
- ALARM 1 Button: Sets and activates/deactivates Alarm 1.
- ALARM 2 Button: Sets and activates/deactivates Alarm 2.
- SNOOZE/DIMMER Button: Activates snooze during an alarm; adjusts display brightness (High/Low/Off) when not alarming.
- SLEEP Button: Sets the sleep timer for radio playback.
- NAP Button: Sets a short nap alarm.
- Volume Up/Down Buttons: Adjusts audio volume.
Rear Panel Connections:
- AUX IN Jack: Connects external audio devices.
- USB Charging Port: Provides power to charge compatible devices.
- DC IN Jack: Connects the AC adapter for power.
- Battery Compartment: Holds backup batteries.
5. Setup
5.1 Power Connection
- Insert the small plug of the supplied AC adapter into the DC IN jack on the rear of the clock radio.
- Plug the AC adapter into a standard wall outlet. The display will light up.
5.2 Battery Backup Installation
The clock radio requires 2 x 1.5V AAA batteries (not included) for backup power. These batteries maintain the time and alarm settings during a power outage.
- Open the battery compartment cover on the bottom of the unit.
- Insert two AAA batteries, observing the correct polarity (+ and -) as indicated inside the compartment.
- Close the battery compartment cover securely.
Note: Battery backup only preserves settings; the display will not illuminate and alarms will not sound during a power outage if only running on battery backup.
6. Operating Instructions
6.1 Setting the Time
- In standby mode (when the radio is off), press and hold the TIME SET button (if available, otherwise use HR/MIN directly or a dedicated time set button not explicitly listed but implied by HR/MIN). If no dedicated button, proceed to step 2.
- Press the HR button to adjust the hour.
- Press the MIN button to adjust the minute.
- Release the buttons to confirm the time. The time will automatically set after a few seconds of inactivity.
6.2 Setting Alarms (Alarm 1 & Alarm 2)
The Muse M-192 CR features two independent alarms.
- Press and hold the ALARM 1 button until the alarm time flashes on the display.
- Use the HR and MIN buttons to set the desired alarm time.
- Press the ALARM 1 button again to select the alarm source: Buzzer or Radio.
- Press the ALARM 1 button a third time to confirm and activate Alarm 1. An alarm icon will appear on the display.
- Repeat the process for ALARM 2 using the ALARM 2 button.
To deactivate an alarm, press the corresponding ALARM button until its icon disappears from the display.
6.3 Snooze Function
When an alarm sounds, press the SNOOZE/DIMMER button to temporarily silence the alarm. The alarm will sound again after approximately 9 minutes.
6.4 Sleep Function
The sleep function allows you to fall asleep to the radio, which will automatically turn off after a set period.
- While the radio is playing, press the SLEEP button repeatedly to cycle through available sleep times (e.g., 90, 60, 30, 15 minutes, or OFF).
- The radio will play for the selected duration and then automatically turn off.
6.5 NAP Function
The NAP function sets a short alarm for a specified duration.
- Press the NAP button repeatedly to select a nap duration (e.g., 10, 20, 30, 60, 90, 120 minutes, or OFF).
- The alarm will sound after the selected duration.
6.6 Radio Operation (FM)
- Press the SOURCE button to select FM radio mode.
- Press and hold the HR or MIN button to automatically scan for the next available station. Briefly press to manually tune.
- Adjust the volume using the Volume Up/Down buttons.
Setting Radio Presets:
The unit supports up to 20 FM radio presets.
- Tune to your desired FM station.
- Press and hold the PRESET button (often combined with a number or memory button, if not explicitly labeled, refer to the full manual for specific button). If no dedicated PRESET button, the HR/MIN buttons might serve this function in radio mode.
- Use the HR or MIN buttons to select a preset number (P01-P20).
- Press the PRESET button again to save the station.
- To recall a preset, briefly press the PRESET button and then use HR or MIN to select the desired preset number.
6.7 AUX Input
Connect an external audio device (e.g., MP3 player, smartphone) to the AUX IN jack on the rear of the unit using a 3.5mm audio cable (not included).
- Connect one end of the audio cable to your external device's headphone jack.
- Connect the other end to the AUX IN jack on the clock radio.
- Press the SOURCE button to select AUX mode. The display will show "AUX".
- Play audio from your external device. Adjust volume using the clock radio's Volume Up/Down buttons and your external device's volume control.
6.8 USB Charging
The USB port on the rear of the unit can be used to charge compatible devices.

Figure 3: The Muse M-192 CR Clock Radio highlighting its jumbo white display and the USB charging port located on the rear of the unit.
- Connect your device's USB charging cable to the USB charging port on the clock radio.
- Ensure the clock radio is powered on.
- Your device should begin charging.
Note: The USB port is for charging only and does not support data transfer or audio playback.
6.9 Display Dimmer
Adjust the brightness of the display to suit your preference.
- In standby mode, press the SNOOZE/DIMMER button repeatedly.
- Cycle through the brightness levels: High, Low, and Off.
7. Maintenance
- Cleaning: Wipe the unit with a soft, dry cloth. Do not use abrasive cleaners, waxes, or solvents.
- Ventilation: Keep the ventilation openings clear of dust and debris.
- Storage: If storing the unit for an extended period, disconnect it from the power outlet and remove the backup batteries.
8. Troubleshooting
| Problem | Possible Cause | Solution |
|---|---|---|
| No power / Display off | AC adapter not connected or faulty. | Ensure AC adapter is securely plugged into the unit and a working wall outlet. |
| Alarm does not sound | Alarm not activated or set incorrectly. | Verify alarm time and source are set correctly and the alarm icon is visible on the display. |
| Poor FM radio reception | Antenna not extended or interference. | Extend the FM wire antenna fully. Reposition the unit to improve reception. |
| Display too bright/dim | Dimmer setting needs adjustment. | Press the SNOOZE/DIMMER button to cycle through brightness levels. |
9. Specifications

Figure 4: Technical drawing illustrating the dimensions of the Muse M-192 CR Clock Radio (226mm length, 86mm width, 108mm height).
- Model: M-192 CR
- Display: 1.8-inch White Digital LED
- Radio: FM PLL Radio with 20 Presets
- Alarm Functions: Dual Alarm, Snooze, Sleep, NAP
- Alarm Source: Radio or Buzzer
- Connectivity: AUX-in, USB Charging Port
- Power: AC Power (Adapter Included), Battery Backup (2 x 1.5V AAA batteries, not included)
- Output Power: 2 Watts
- Dimensions (L x W x H): 22.6 x 8.6 x 10.8 cm
- Weight: 800 g
10. Warranty and Support
For detailed warranty information and technical support, please refer to the documentation provided with your purchase or contact your retailer. Keep your proof of purchase for any warranty claims.


