
SINOCMP EC230
SINOCMP Arm Cylinder Repair Seal Kit User Manual
Model: EC230 | Brand: SINOCMP
1. Introduction and Product Overview
This manual provides essential information for the proper installation, operation, and maintenance of the SINOCMP Arm Cylinder Repair Seal Kit for Volvo EC230 and EC230LC Excavators. This kit is designed to restore the sealing integrity of the arm cylinder, ensuring optimal hydraulic performance and preventing fluid leaks.
The SINOCMP seal kit includes high-quality components engineered for durability and reliability in demanding excavator applications. Proper installation is crucial for the longevity and effectiveness of the seals.

Figure 1.1: Overview of the SINOCMP Arm Cylinder Repair Seal Kit components.
2. Product Features
- Comprehensive Kit: Includes all necessary seals for the arm cylinder repair.
- High-Quality Materials: Features piston seal PTFE with 40% bronze, buffer seal, wiper seal, and rod seal for enhanced durability.
- Exact Fit: Specifically designed for Volvo EC230 and EC230LC Excavator models, ensuring accurate installation and performance.
- Temperature Resistance: Operates effectively across a wide temperature range from -40°C to 250°C.
- Reliable Performance: Engineered for quality and construction to provide long-lasting sealing integrity.
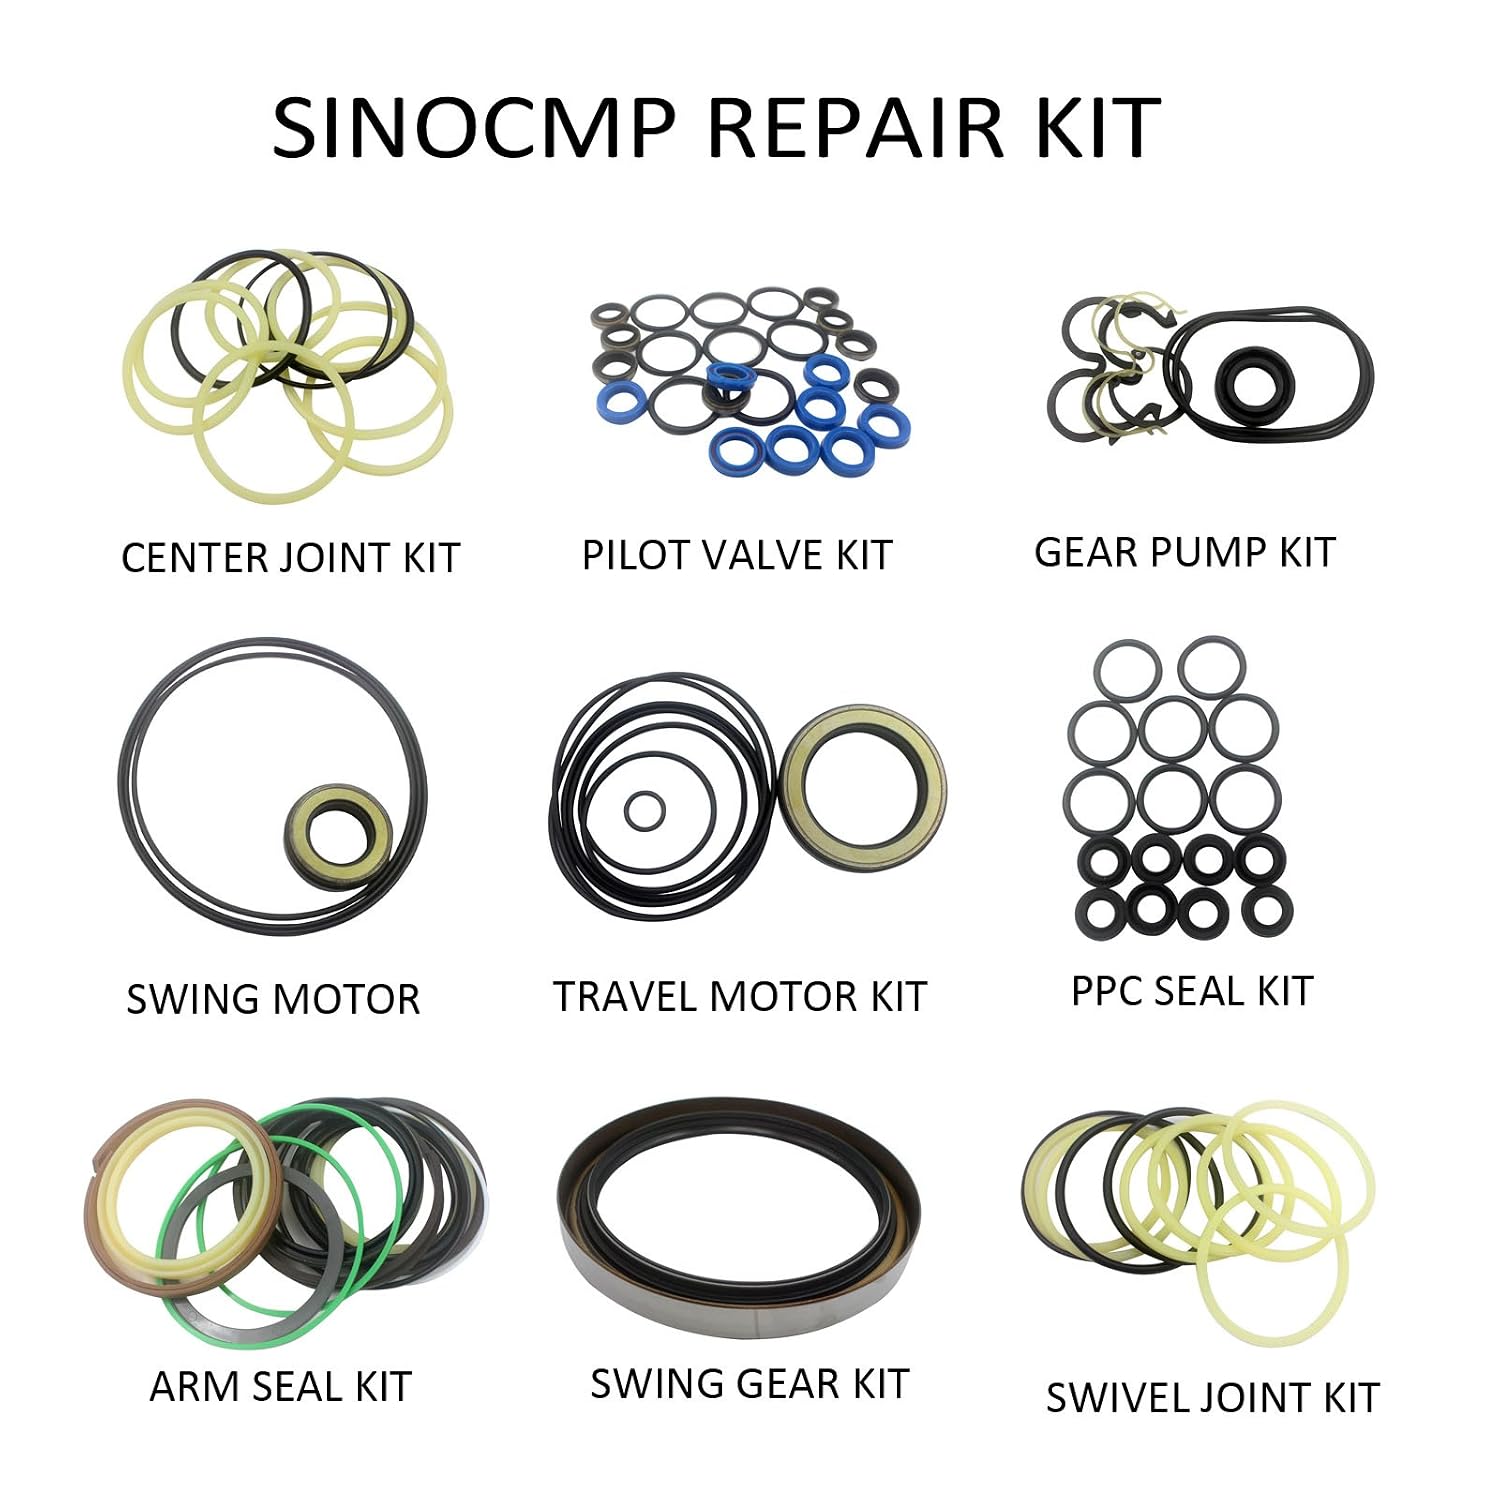
Figure 2.1: SINOCMP offers a range of repair kits, including the Arm Seal Kit.
3. Specifications
| Attribute | Detail |
|---|---|
| Part Name | Arm Cylinder Repair Seal Kit |
| Applicable Models | Volvo EC230, EC230LC Excavator |
| Material | Rubber (Piston seal PTFE with 40% bronze) |
| Temperature Range | -40°C to 250°C |
| Product Dimensions | 5.91 x 3.94 x 5.91 inches |
| Item Weight | 1.1 Pounds |
| Manufacturer | SINOCMP |
| ASIN | B01A6CJ88Q |
| UPC | 702082681213 |
4. Setup and Installation
Installation of the arm cylinder repair seal kit requires mechanical expertise and specialized tools. It is recommended that this procedure be performed by qualified personnel. Always refer to the excavator's official service manual for detailed, model-specific instructions.
4.1 Safety Precautions
- Ensure the excavator is parked on level ground, engine off, and all hydraulic pressure is relieved before beginning work.
- Use appropriate personal protective equipment (PPE), including safety glasses, gloves, and protective clothing.
- Support the arm securely using stands or blocks before disassembling the cylinder.
- Be aware of potential hydraulic fluid leaks and have containment measures in place.
4.2 Identifying Seal Kit Components
Familiarize yourself with the different types of seals included in the kit and their specific placement within the arm cylinder. The kit typically includes piston seals, rod seals, buffer seals, and wiper seals, among others.

Figure 4.1: Diagram illustrating the positions of various seal kits on an excavator, including the arm cylinder.
4.3 General Installation Steps (Consult Service Manual for Details)
- Disassembly: Carefully remove the arm cylinder from the excavator. Disassemble the cylinder, paying close attention to the order and orientation of existing components.
- Cleaning: Thoroughly clean all cylinder components, including the piston, rod, and cylinder barrel. Remove any old seal material, dirt, or debris. Inspect for wear or damage.
- Seal Replacement: Install the new SINOCMP seals. Use appropriate seal installation tools to prevent damage to the seals during installation. Lubricate seals with clean hydraulic fluid before installation.
- Reassembly: Reassemble the arm cylinder, ensuring all components are correctly aligned and torqued to specifications.
- Reinstallation: Reinstall the arm cylinder onto the excavator. Connect hydraulic lines, ensuring proper routing and secure connections.
- Bleeding Air: After installation, slowly extend and retract the arm cylinder several times to bleed air from the hydraulic system. Check fluid levels and top up as necessary.

Figure 4.2: Detailed view of excavator seal kit locations, aiding in precise installation.
5. Post-Installation Operation Considerations
After installing the seal kit, it is important to perform a functional check and monitor the hydraulic system.
- Initial Operation: Operate the arm cylinder slowly through its full range of motion immediately after installation. Listen for unusual noises and observe for smooth operation.
- Leak Check: Visually inspect all connections and the cylinder itself for any signs of hydraulic fluid leakage. Address any leaks immediately.
- Performance Monitoring: Monitor the arm cylinder's performance during regular operation. Look for any signs of sluggishness, loss of power, or continued leakage.
6. Maintenance
Regular maintenance of your excavator's hydraulic system is key to extending the life of your seal kits and preventing future failures.
- Hydraulic Fluid Quality: Ensure the hydraulic fluid is clean and at the correct level. Contaminated fluid can accelerate seal wear.
- Filter Replacement: Adhere to the manufacturer's recommended schedule for hydraulic filter replacement.
- Regular Inspections: Periodically inspect hydraulic cylinders and hoses for signs of wear, damage, or minor leaks. Early detection can prevent major failures.
- Proper Operation: Avoid overloading the excavator or operating it in a manner that puts excessive stress on hydraulic components.
7. Troubleshooting
If you encounter issues after installing the seal kit, consider the following common problems and solutions:
| Problem | Possible Cause | Solution |
|---|---|---|
| Hydraulic Fluid Leakage |
|
|
| Sluggish Cylinder Movement |
|
|
| Premature Seal Failure |
|
|
If troubleshooting steps do not resolve the issue, please contact SINOCMP customer support.
8. Warranty Information
The SINOCMP Arm Cylinder Repair Seal Kit comes with a 3-month warranty from the date of purchase. During this period, replacement parts will be provided free of charge for product-related problems.
This warranty covers defects in materials and workmanship under normal use. It does not cover damage resulting from improper installation, misuse, neglect, accident, alteration, or unauthorized repair.
For warranty claims, please retain your proof of purchase and contact SINOCMP customer support as soon as possible.
9. Support and Contact Information
For any product-related questions, technical assistance, or support, please contact SINOCMP customer service.
- Manufacturer: SINOCMP
- Seller: SINOCMP Excavator Parts
- Online Store: Visit the SINOCMP Store on Amazon
- Please provide your product model (EC230) and ASIN (B01A6CJ88Q) when contacting support for faster service.
We recommend offering correct address and contact information when dealing with product issues to ensure prompt assistance.
Ask a question about this manual
Ask about setup, troubleshooting, compatibility, parts, safety, or missing instructions. Manuals+ will review the question and use this page’s manual context to help answer it.