
1. Introduction
This manual provides essential information for the safe and efficient installation, operation, and maintenance of your Flamco Flexcon Expansion Tank, Model 26185. Please read these instructions carefully before installation and retain them for future reference. Proper adherence to these guidelines will ensure optimal performance and longevity of the product.
2. Product Overview
The Flamco Flexcon Expansion Tank is designed to maintain stable pressure within closed heating and air conditioning systems. It features a robust construction and advanced diaphragm technology to ensure reliable operation.
- Superior Performance: Flexcon expansion vessels are engineered to provide excellent performance in maintaining system pressure.
- Durable Diaphragm: The diaphragm flexes between the lower and upper shells. A unique crimping process (zinc-plated metal ring), performed after painting, enhances diaphragm longevity by reducing mechanical stress and preventing paint contact during baking.
- Factory Tested: Each unit is 100% factory tested to ensure quality and reliability.
- Nitrogen Pre-charge: The expansion tank is pre-charged with nitrogen, which significantly extends the period for which the correct pressure is maintained.
- Mounting Versatility: Can be wall-mounted using the MB3 bracket (part number 27903), offering various installation possibilities. Flexconsole and Flexconsole Plus accessories are also available.

Figure 2.1: Cross-section illustrating the diaphragm crimping mechanism, showing the zinc-plated metal ring that secures the diaphragm between the tank shells, contributing to its extended lifespan.
3. Specifications
Detailed technical specifications for the Flamco Flexcon Expansion Tank, Model 26185.
| Specification | Value |
|---|---|
| Manufacturer | Flamco |
| Item Number | 26185 |
| Product Dimensions (L x W x H) | 40.5 x 28.6 x 80 cm |
| Weight | 3.7 Kilograms |
| Size / Capacity | 18 Liter |
| Pre-charge Pressure | 0.5 Bar |
| Color | Red |
| Batteries Included | No |
| Batteries Required | No |
| ASIN | B019GTE12S |
| First Available Date | 24 December 2015 |

Figure 3.1: Front view of the Flamco Flexcon expansion tank, highlighting key dimensions A (width), B (height), and E (connection diameter) for installation planning.

Figure 3.2: Technical drawing showing various dimensions (A, B, C, D, E) of a similar cylindrical expansion tank, useful for understanding installation requirements and space considerations.
4. Safety Information
Always observe the following safety precautions to prevent injury and damage to the product or system.
- Installation should only be performed by qualified personnel in accordance with local regulations and standards.
- Ensure the system is depressurized and cooled before attempting any installation or maintenance.
- Do not exceed the maximum operating pressure of 3 bar.
- Wear appropriate personal protective equipment (PPE) during installation and maintenance.
- Never tamper with the pre-charge valve unless performing a pressure adjustment as part of maintenance.
5. Setup and Installation
Follow these steps for proper installation of your Flexcon Expansion Tank.
- System Preparation: Ensure the heating or cooling system is completely drained and depressurized.
- Mounting Location: Select a suitable location for the expansion tank, preferably near the boiler or chiller, ensuring it is easily accessible for inspection and maintenance. The tank can be wall-mounted using the optional MB3 bracket (part number 27903).
- Connection: Connect the expansion tank to the system's return line, typically at the lowest point, using appropriate fittings. Ensure all connections are sealed properly to prevent leaks.
- Pre-charge Check: Verify the pre-charge pressure of the tank using a pressure gauge. The factory pre-charge is 0.5 bar. Adjust if necessary according to system requirements, but always consult a professional for pressure adjustments.
- System Filling: Slowly refill the system, bleeding air as it fills. Monitor the system pressure to ensure it remains within safe operating limits.
- Leak Check: After filling, thoroughly inspect all connections for any signs of leaks.

Figure 5.1: Exploded view showing the internal components of the expansion tank, including the diaphragm and connection points, which aids in understanding its construction and installation.
6. Operating Instructions
Once installed, the Flamco Flexcon Expansion Tank operates automatically to manage pressure fluctuations within your closed heating or cooling system. It absorbs excess water volume as the system heats up and releases it back as the system cools, thereby maintaining a stable operating pressure.
- Ensure the system pressure gauge is always within the recommended operating range for your heating or cooling system.
- The tank's pre-charge pressure (0.5 bar) is critical for its function. Do not operate the system if the tank's pre-charge is incorrect or if the tank is damaged.
7. Maintenance
Regular maintenance ensures the continued efficient operation and extends the lifespan of your expansion tank.
- Annual Pressure Check: At least once a year, check the pre-charge pressure of the expansion tank. This should be done when the system is cold and depressurized. If the pressure is too low, recharge with nitrogen to the specified 0.5 bar.
- Visual Inspection: Periodically inspect the tank for any signs of external damage, corrosion, or leaks.
- Connection Integrity: Check all connections for tightness and signs of weeping or leaks.
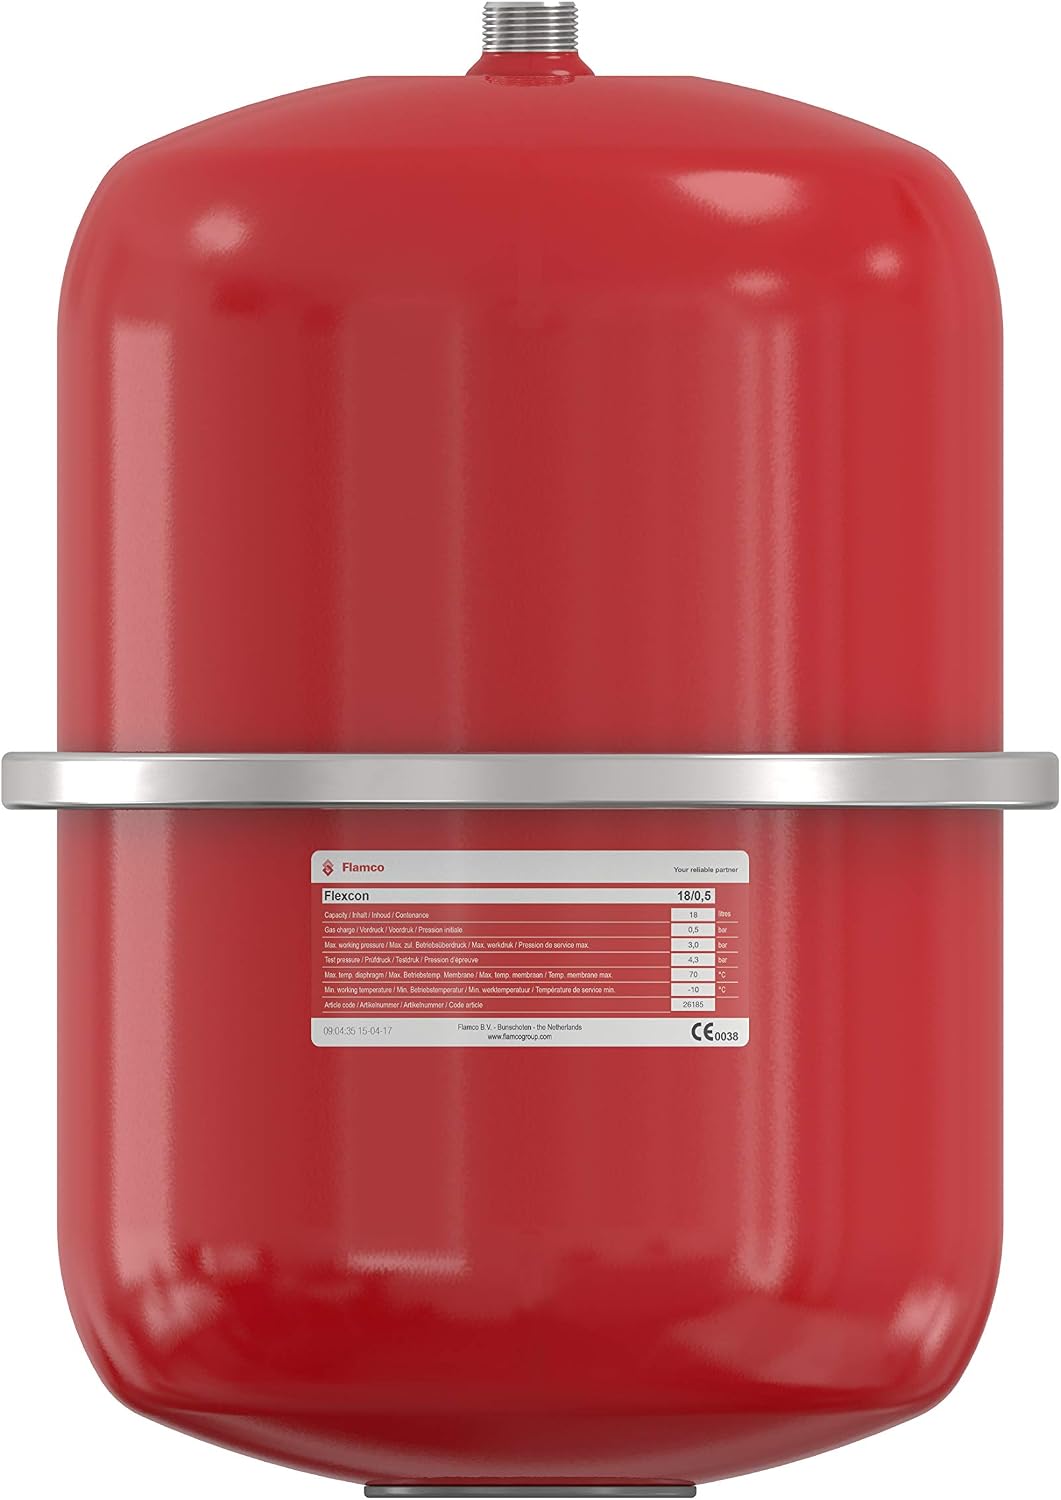
Figure 7.1: Product label on the Flamco Flexcon expansion tank, providing essential information such as capacity, pre-charge pressure, and maximum working pressure, crucial for maintenance checks.
8. Troubleshooting
This section addresses common issues you might encounter with your expansion tank.
| Problem | Possible Cause | Solution |
|---|---|---|
| System pressure fluctuates excessively | Low pre-charge pressure in expansion tank | Check and recharge the tank with nitrogen to 0.5 bar (system depressurized). |
| Water dripping from pre-charge valve | Diaphragm failure | The tank needs to be replaced. Contact a qualified technician. |
| Visible leaks around connections | Loose fittings or damaged seals | Tighten connections or replace seals. Ensure proper sealing during installation. |
| System pressure remains high/low | Incorrect system fill pressure or faulty pressure relief valve | Verify system fill pressure. Inspect and potentially replace the pressure relief valve. Consult a professional. |
9. Warranty and Support
For warranty information, technical support, or to purchase replacement parts, please contact Flamco customer service or visit their official website. Always provide the model number (26185) and purchase date when seeking support.
Flamco is committed to providing high-quality products and support. Do not attempt repairs beyond the scope of this manual, as this may void your warranty and pose safety risks.