
1. Introduction
The Santamedical SM-150BL Fingertip Pulse Oximeter is designed for non-invasive spot-checking of arterial hemoglobin oxygen saturation (SpO2) and pulse rate. This device is suitable for use at home, in sports, and during recreational activities such as mountain climbing or high-altitude activities. It is intended for adults and pediatric patients.
This manual provides essential information for the correct operation and maintenance of your pulse oximeter. Please read it thoroughly before use.
2. Safety Information
Please observe the following safety precautions to ensure proper use and to prevent damage to the device or injury to the user:
- Do not use the pulse oximeter in an MRI or CT environment.
- Do not use the device in an explosive atmosphere.
- This device is not intended for continuous monitoring.
- Do not use the device on an infant or neonate.
- Avoid placing the oximeter on the same arm as a blood pressure cuff or other monitoring device.
- Ensure the finger is clean and dry before use. Nail polish or artificial nails may affect accuracy.
- Keep the device away from dust, vibration, corrosive substances, explosive materials, high temperatures, and moisture.
- Remove batteries if the device will not be used for an extended period.
- Consult a medical professional for interpretation of results. This device is for informational purposes and not a substitute for professional medical advice.
3. Product Overview
The Santamedical SM-150BL Fingertip Pulse Oximeter features a compact design with an easy-to-read LED display. Key components are labeled below:

Figure 1: Labeled components of the Santamedical SM-150BL Pulse Oximeter. This image shows the device from the front-right, highlighting the finger opening, single operation button, battery cover, lanyard loop hole, and the digital display indicating average heart rate, blood oxygen saturation level, and a heart rate bar graph.
- Finger Opening: Where the finger is inserted for measurement.
- One-Button Operation: For turning the device on and off, and changing display modes.
- Battery Cover: Protects the battery compartment.
- Heart Rate Bar Graph: Visual representation of pulse intensity.
- Lanyard Loop Hole: For attaching the included lanyard.
- LED Display: Shows SpO2 percentage, pulse rate (BPM), and pulse bar graph.
4. Setup
4.1 Battery Installation
The device requires two AAA batteries (included). Follow these steps to install them:
- Slide the battery cover off the back of the device.
- Insert two AAA batteries into the compartment, ensuring the polarity (+/-) matches the diagrams inside the compartment.
- Slide the battery cover back into place until it clicks securely.

Figure 2: Battery compartment of the pulse oximeter with the cover removed, showing where to insert two AAA batteries.
4.2 Attaching the Lanyard
To attach the included lanyard for portability, follow these steps:

Figure 3: Instructions for attaching the lanyard to the pulse oximeter.
- Insert the thin loop end of the lanyard through the lanyard loop hole on the device.
- Thread the main strap of the lanyard through the loop you just created.
- Pull the strap firmly until the lanyard is securely attached to the device.
5. Operation
5.1 Taking a Measurement
To obtain an accurate reading, follow these steps:
- Open the clamp of the oximeter.
- Insert one of your fingers (preferably the index finger) into the rubber opening of the oximeter, ensuring your nail is facing upwards towards the display.
- Release the clamp. The device will automatically turn on and begin measuring.
- Keep your hand still during the measurement. Movement can affect accuracy.
- Read the SpO2 and pulse rate values displayed on the screen.
- The device will automatically power off after approximately 10 seconds of inactivity.

Figure 4: Proper finger placement in the pulse oximeter for measurement.
5.2 Display Information
The LED display shows the following information:
- SpO2: Blood Oxygen Saturation Level, displayed as a percentage (e.g., 98%).
- PRbpm: Pulse Rate, displayed in beats per minute (BPM).
- Pulse Bar Graph: A vertical bar graph indicating the strength of the pulse signal.
- Battery Indicator: Shows the remaining battery life.
6. Maintenance
Proper maintenance ensures the longevity and accuracy of your pulse oximeter.
- Cleaning: Clean the surface of the device with a soft cloth dampened with 70% isopropyl alcohol. Do not immerse the device in liquid.
- Disinfection: After each use, clean the finger contact area with a soft cloth dampened with 70% isopropyl alcohol.
- Storage: Store the device in a cool, dry place, away from direct sunlight, extreme temperatures, and moisture. Remove batteries if storing for extended periods.
- Battery Replacement: Replace batteries when the low battery indicator appears on the display.
7. Troubleshooting
If you encounter issues with your pulse oximeter, refer to the table below for common problems and solutions:
| Problem | Possible Cause | Solution |
|---|---|---|
| Display shows "Finger Out" or no reading. | Finger not properly positioned or too small/large. | Re-insert finger correctly, ensuring it covers the sensor. Try a different finger. |
| Display is unstable or inaccurate. | Patient movement, nail polish, or weak signal. | Remain still. Remove nail polish. Ensure finger is warm. |
| Device does not turn on. | Batteries are dead or incorrectly inserted. | Check battery polarity. Replace batteries if necessary. |
| Low battery indicator. | Batteries are low. | Replace with new AAA batteries. |
If the problem persists after trying these solutions, please contact customer support.
8. Specifications
The technical specifications for the Santamedical SM-150BL Pulse Oximeter are as follows:
| Feature | Detail |
|---|---|
| Model Name | SM-150BL |
| Measuring Range (SpO2) | 35%~100% |
| Measuring Range (Pulse Rate) | 25 BPM ~250 BPM |
| Accuracy (SpO2) | ±2% (70-100%), unspecified below 70% |
| Accuracy (Pulse Rate) | ±2 BPM or ±2% (whichever is greater) |
| Display Type | Digital LED |
| Power Requirements | 2 x 1.5V AAA alkaline batteries |
| Power Consumption | Less than 30mA |
| Automatic Power Off | After 10 seconds of inactivity |
| Product Dimensions | 3.5 x 1 x 2 inches (approximate) |
| Item Weight | 3.2 ounces (including batteries) |
| Operating Temperature | 5°C to 40°C (41°F to 104°F) |
| Storage Temperature | -10°C to 50°C (14°F to 122°F) |
| Operating Humidity | 15% to 80% non-condensing |
| Storage Humidity | 10% to 93% non-condensing |
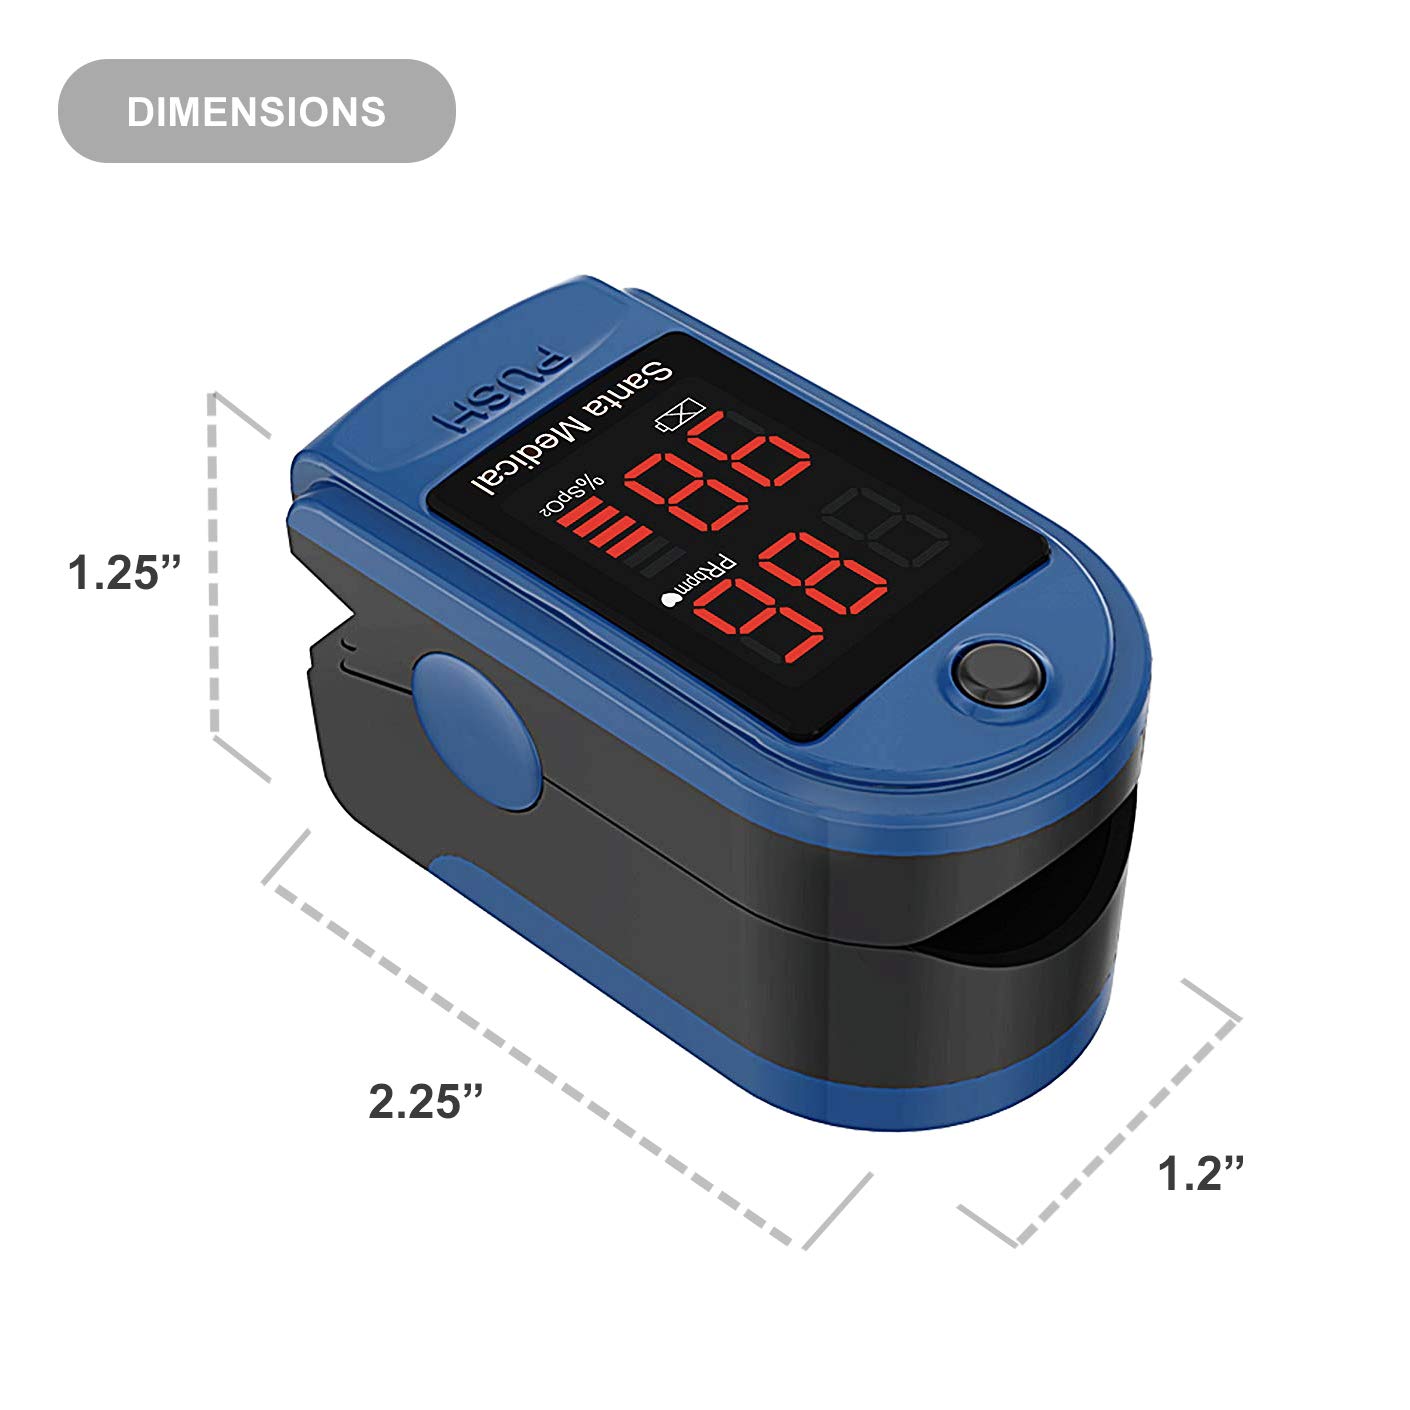
Figure 5: Dimensions of the Santamedical SM-150BL Pulse Oximeter.
9. Warranty and Support
The Santamedical SM-150BL Fingertip Pulse Oximeter comes with a 1-year warranty from the date of purchase. This warranty covers manufacturing defects and ensures the device functions as intended under normal use.
For warranty claims, technical support, or any questions regarding the product, please contact Santamedical customer service. Refer to the packaging or the official Santamedical website for contact information.


