
1. Product Overview
The Spicer 50491 Axle Shaft Seal is an essential component designed for automotive applications, specifically for axle assemblies. This genuine Spicer part is engineered and manufactured to meet or exceed original equipment (OE) requirements, ensuring a precise fit and reliable performance.
Key features include:
- Spicer genuine OE replacement for assured compatibility and quality.
- Designed for strength and durability to ensure a longer service life.
- Provides a tight seal to prevent leaks and maintain proper system function.
What's in the Box
- 1 x Spicer 50491 Axle Shaft Seal

Figure 1: Front view of the Spicer 50491 Axle Shaft Seal, showing its robust construction and sealing surface.
2. Installation Guide
Proper installation of the axle shaft seal is crucial for its performance and longevity. It is highly recommended that installation be performed by a qualified automotive technician using appropriate tools. Incorrect installation can lead to premature seal failure and fluid leaks.
2.1. Tools and Materials Required
- Appropriate vehicle service manual for specific torque specifications and procedures.
- Axle shaft seal installer tool (specific to vehicle make/model, often mentioned as crucial for correct installation).
- Socket set and wrenches.
- Pry bar or seal puller.
- Clean rags.
- Approved lubricant for seal installation.
- Safety glasses and gloves.
2.2. General Installation Steps (Consult Vehicle Service Manual for Detailed Instructions)
- Preparation: Safely lift and support the vehicle. Remove the wheel, brake caliper, rotor, and any other components obstructing access to the axle shaft and old seal.
- Remove Old Seal: Carefully pry out the old axle shaft seal using a seal puller or appropriate tool. Be cautious not to damage the axle housing or shaft.
- Clean Surface: Thoroughly clean the seal bore in the axle housing and the axle shaft. Remove any old sealant, rust, or debris. Ensure surfaces are smooth and free of nicks or burrs.
- Inspect Components: Inspect the axle shaft for any wear, grooves, or damage that could compromise the new seal's integrity. Inspect the axle housing bore for damage.
- Lubricate New Seal: Apply a thin, even coat of approved lubricant to the inner and outer lips of the new Spicer 50491 seal. This aids in installation and prevents initial dry running.
- Install New Seal: Position the new seal squarely into the axle housing bore. Use the correct axle shaft seal installer tool to press the seal evenly into place until it is fully seated. Avoid hammering directly on the seal without a proper installer, as this can deform it.
- Reassemble: Reinstall all removed components in reverse order, adhering to the vehicle manufacturer's torque specifications.
- Check for Leaks: After reassembly, check for any fluid leaks before operating the vehicle.
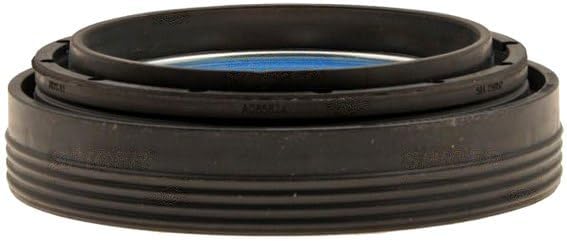
Figure 2: Side profile of the Spicer 50491 Axle Shaft Seal, highlighting its layered design.
3. Operation
The Spicer 50491 Axle Shaft Seal functions as a critical barrier within the vehicle's axle assembly. Its primary role is to prevent the leakage of axle lubricant (gear oil) from the differential housing along the axle shaft, while also preventing contaminants like dirt, water, and debris from entering the axle housing and damaging internal components.
By maintaining a tight seal, the axle shaft seal ensures that the axle bearings and gears remain properly lubricated, which is essential for smooth operation, reduced friction, and extended component life. In vehicles equipped with vacuum-actuated hubs, a properly functioning axle shaft seal is also vital for the vacuum system to operate correctly, allowing for proper engagement and disengagement of the four-wheel drive system.
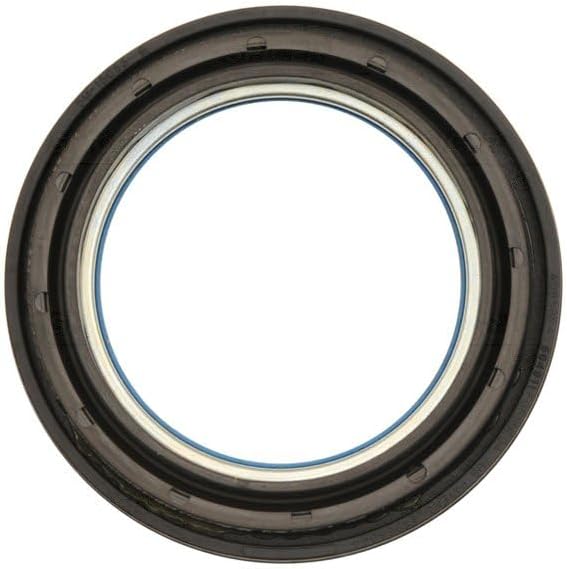
Figure 3: Top view of the Spicer 50491 Axle Shaft Seal, showing the inner diameter and sealing elements.
4. Maintenance
Axle shaft seals are wear items and do not typically require routine maintenance beyond periodic inspection. However, their condition should be checked during routine vehicle inspections or when servicing related components.
4.1. Inspection
- Visual Check: Regularly inspect the area around the axle shaft where it exits the differential housing for any signs of fluid leakage. A greasy or wet appearance indicates a potential seal failure.
- Noise: Listen for unusual noises from the axle area, which could indicate bearing issues caused by lubricant loss due to a failed seal.
- Tire Wear: Uneven tire wear can sometimes be an indirect symptom of axle issues, though less directly related to the seal itself.
4.2. Replacement
If a leak is detected or the seal shows signs of damage (cracking, hardening), it should be replaced immediately to prevent further damage to the axle assembly due to lubricant loss or contamination. Refer to Section 2 for installation guidelines.
5. Troubleshooting
Most issues related to an axle shaft seal manifest as fluid leaks. Here are common problems and their potential causes:
| Problem | Possible Cause | Solution |
|---|---|---|
| Axle fluid leak at the seal |
|
|
| Grinding or humming noise from axle |
|
|
If you encounter persistent issues after attempting troubleshooting steps, it is advisable to consult a certified automotive professional.
6. Technical Specifications
| Attribute | Detail |
|---|---|
| Brand | Spicer |
| Model Number | 50491 |
| Material | Alloy Steel |
| Color | Black |
| Product Dimensions | 1"L x 1"W |
| Recommended Uses | Sealing against air/water leaks in axle assemblies |
| Item Weight | 9.6 ounces |
| Number of Items | 1 |
| UPC | 023913145392 |
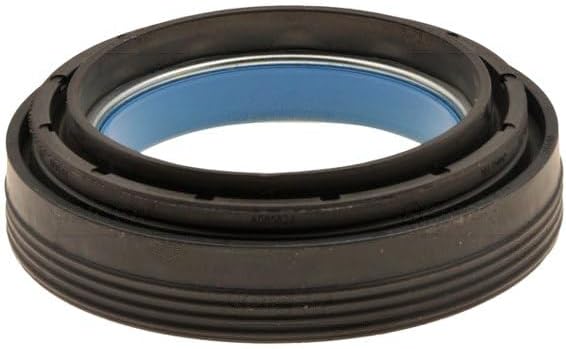
Figure 4: Angled view of the Spicer 50491 Axle Shaft Seal, showing its overall form.
7. Warranty and Support
Spicer products are manufactured to high standards of quality and performance. For specific warranty information regarding the Spicer 50491 Axle Shaft Seal, please refer to the official Spicer website or contact their customer support directly.
For further assistance or technical inquiries, please visit the official Spicer Store on Amazon or the manufacturer's official website.