
1. Introduction
Thank you for purchasing the Excelvan AOK-5019 Wireless Weather Station. This device provides accurate indoor and outdoor temperature and humidity readings, weather forecasts, moon phase displays, and a radio-controlled clock. Please read this manual carefully to ensure proper setup and operation of your weather station.
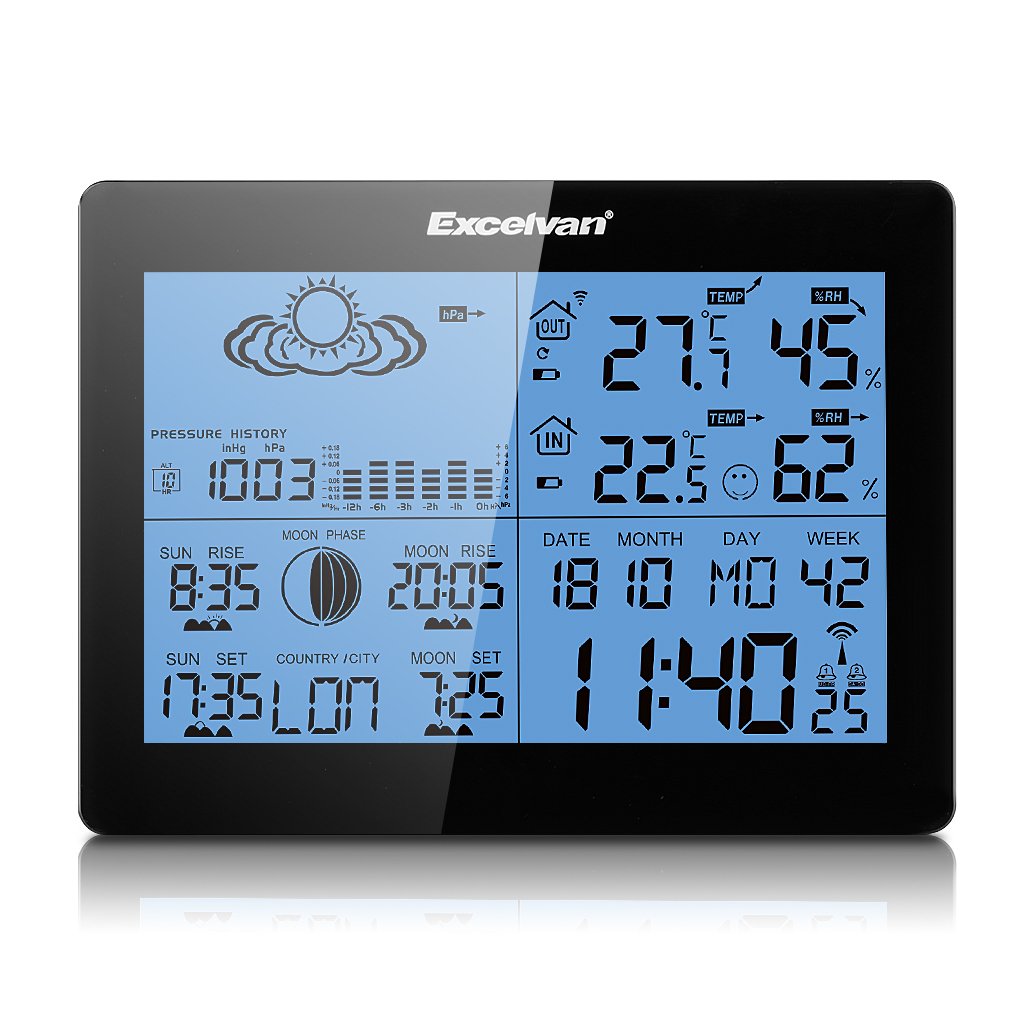
Image: The Excelvan AOK-5019 main display unit and its accompanying wireless remote sensor. The display shows various weather parameters and time, while the sensor indicates its effective range of 50 meters.
2. Safety Information
- Do not expose the main unit or sensor to extreme temperatures, direct sunlight, or moisture.
- Avoid dropping the device or subjecting it to strong impacts.
- Do not attempt to disassemble or repair the unit yourself. Refer all servicing to qualified personnel.
- Dispose of used batteries responsibly according to local regulations. Do not mix old and new batteries or different types of batteries.
- Keep the device out of reach of children.
3. Package Contents
Please check the package contents to ensure all items are present:
- Excelvan AOK-5019 Main Display Unit
- Wireless Remote Sensor (433MHz)
- User Manual

Image: The main display unit, wireless remote sensor, and a folded instruction manual, representing the typical contents of the Excelvan AOK-5019 package.
4. Product Features
- Large color LCD display with backlight
- Indoor and outdoor temperature display (℃/℉)
- Indoor and outdoor humidity display (%RH)
- Weather forecast with graphical icons
- Barometric pressure history display
- Moon phase display
- Radio-controlled clock (DCF/WWVB) with manual setting option
- Alarm clock with snooze function
- Sunrise and sunset times (for selected cities)
- Max/Min temperature and humidity records
- Low battery indicator for main unit and sensor
5. Setup
5.1 Battery Installation
Main Unit: Open the battery compartment cover on the back of the main unit. Insert 3 x AAA batteries (not included) according to the polarity markings (+/-). Close the cover.
Wireless Remote Sensor: Open the battery compartment cover on the back of the sensor. Insert 2 x AAA batteries (not included) according to the polarity markings (+/-). Close the cover. It is recommended to use alkaline batteries for better performance, especially in cold weather.

Image: Front and back view of the wireless remote sensor, showing its display and the battery compartment on the rear.
5.2 Sensor Placement
Place the wireless remote sensor in a shaded, dry location outdoors, away from direct sunlight and rain, to ensure accurate temperature and humidity readings. The maximum effective transmission distance is approximately 50 meters (164 feet) in open air. Walls and other obstructions may reduce this range.
5.3 Initial Setup and Pairing
After inserting batteries into both units, the main unit will automatically search for the outdoor sensor. The outdoor temperature and humidity should appear on the main display within a few minutes. If the outdoor readings do not appear, press and hold the "CHANNEL" button on the main unit to initiate a manual search.
5.4 Time and Date Settings
The weather station will attempt to synchronize its time with a radio signal (DCF/WWVB). This process may take several hours. If automatic synchronization is not successful or you prefer to set the time manually:
- Press and hold the "MODE" button to enter time setting mode.
- Use the "▲" (UP) or "▼" (DOWN) buttons to adjust the flashing value.
- Press "MODE" again to confirm and move to the next setting (e.g., 12/24 hour format, hour, minute, year, month, day, time zone).
- Press "MODE" one last time to exit the setting mode.
6. Operating Instructions
6.1 Display Overview
The main display unit shows various information simultaneously:
- Top Left: Weather forecast icons (sunny, cloudy, rainy, etc.) and barometric pressure trend.
- Middle Right: Outdoor temperature and humidity (OUT), Indoor temperature and humidity (IN).
- Bottom Left: Sunrise/Sunset times, Moon phase, Country/City setting.
- Bottom Right: Current time, date, and day of the week.

Image: A detailed view of the Excelvan AOK-5019 weather station's display, highlighting the "SNOOZE/LIGHT" button at the top, and showing various data points like temperature, humidity, and time.
6.2 Button Functions
- MODE: Switches display modes (e.g., time, alarm), enters setting mode (long press).
- ▲ (UP): Adjusts values in setting mode, views MAX/MIN records.
- ▼ (DOWN): Adjusts values in setting mode, switches temperature units (℃/℉).
- ALARM: Activates/deactivates alarm, enters alarm setting mode (long press).
- SNOOZE/LIGHT: Activates backlight, snoozes alarm.
- CHANNEL: Switches between multiple outdoor sensors (if applicable), initiates manual sensor search (long press).
6.3 Weather Forecast
The weather station predicts weather conditions for the next 12-24 hours based on changes in barometric pressure. The forecast icons (sunny, partly cloudy, cloudy, rainy) are for reference only and may not always reflect actual weather conditions.
6.4 MAX/MIN Records
Press the "▲" (UP) button repeatedly to view the maximum and minimum recorded indoor/outdoor temperature and humidity values. These records are reset automatically every 24 hours or can be manually cleared by holding the "▲" (UP) button.
7. Maintenance
- Clean the display and casing with a soft, damp cloth. Do not use abrasive cleaners or solvents.
- Replace batteries in both units when the low battery indicator appears on the display.
- Ensure the outdoor sensor is free from dirt, dust, and spiderwebs for optimal performance.
8. Troubleshooting
| Problem | Possible Cause | Solution |
|---|---|---|
| No display on main unit. | Batteries are dead or incorrectly inserted. | Check battery polarity, replace with new batteries. |
| No outdoor temperature/humidity reading. | Sensor out of range, low sensor battery, interference. | Move sensor closer to main unit, replace sensor batteries, press and hold "CHANNEL" button to re-sync. Avoid placing near electronic devices. |
| Inaccurate temperature/humidity readings. | Sensor exposed to direct sunlight/moisture, poor ventilation. | Relocate sensor to a shaded, well-ventilated area. Ensure main unit is not near heat sources. |
| Time synchronization failure. | Weak radio signal, interference. | Place main unit near a window, away from electronic devices. Try manual time setting. |
9. Specifications
- Brand: EXCELVAN
- Model: AOK-5019
- Power Source (Main Unit): Battery powered (e.g., 3 x AAA, not included)
- Power Source (Sensor): Battery powered (e.g., 2 x AAA, not included)
- Wireless Frequency: 433 MHz
- Wireless Range: Up to 50 meters (164 feet) in open area
- Temperature Range (Indoor): 0℃ to +50℃ (32℉ to 122℉)
- Temperature Range (Outdoor): -20℃ to +60℃ (-4℉ to 140℉)
- Humidity Range: 20% to 95% RH
- UPC: 723120366930
- ASIN: B018LXA7Z0
10. Warranty and Support
For warranty information or technical support, please refer to the documentation provided at the time of purchase or contact your retailer. Keep your purchase receipt as proof of purchase.