1. Introduction
This manual provides detailed instructions for the installation, operation, and maintenance of your Pioneer AVH-210EX Double DIN in-dash multimedia receiver. This unit offers advanced audio and video capabilities, including Bluetooth connectivity, DVD/CD playback, USB media support, and integration with a backup camera for enhanced safety. Please read this manual thoroughly before using your new receiver to ensure proper operation and to maximize your enjoyment of its features.
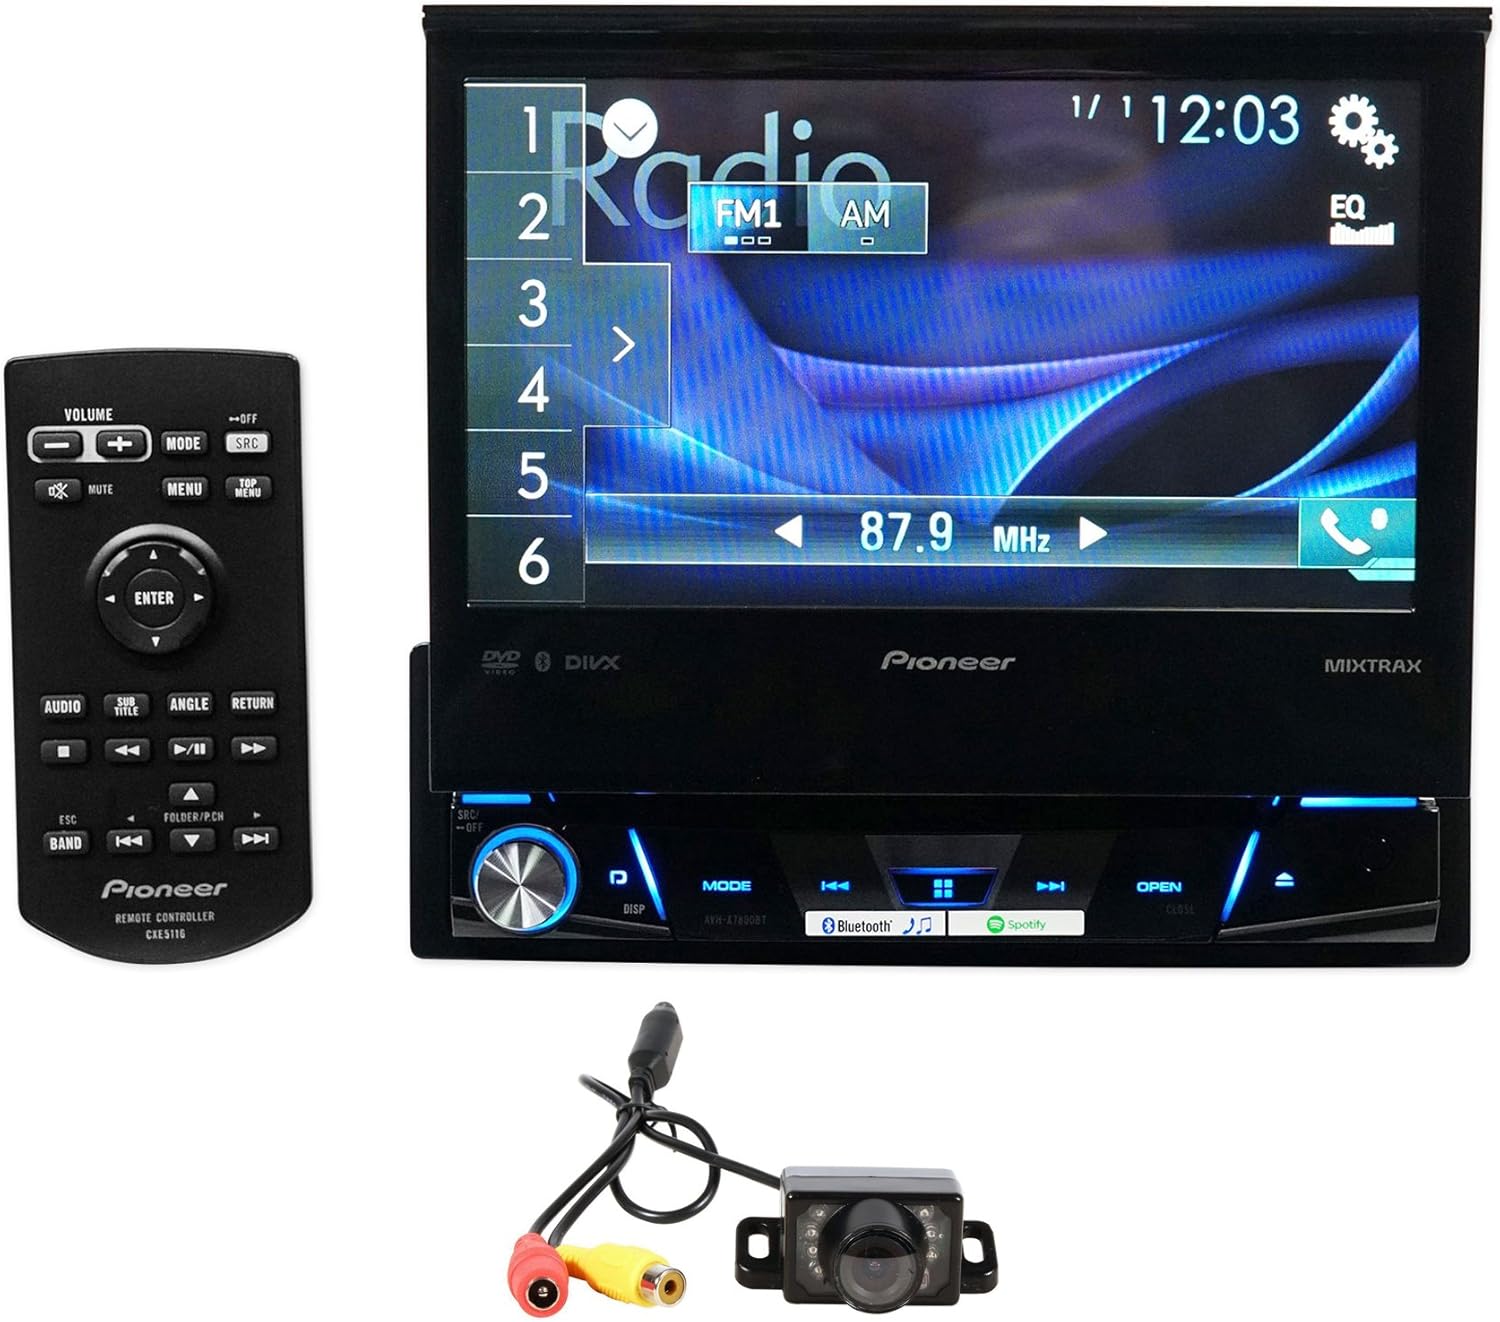
Image 1.1: Pioneer AVH-210EX receiver with included remote and backup camera.
2. Setup and Installation
Proper installation is crucial for the optimal performance of your AVH-210EX receiver. It is highly recommended that installation be performed by a qualified professional. Incorrect wiring or mounting can lead to damage to the unit, your vehicle, or personal injury.
2.1 What's in the Box
- Pioneer AVH-210EX Double DIN In-Dash Receiver
- Remote Control
- Wiring Harness
- USB Extension Cable
- Microphone for Hands-Free Calling
- Xtremevision HD Backup Camera with Cables
- Owner's Manual and Warranty Information

Image 2.1: Typical package contents for the Pioneer AVH-210EX.
2.2 Wiring Connections
Ensure all power, ground, speaker, and accessory wires are connected securely according to the wiring diagram provided in the separate installation manual. Key connections include:
- Power (Yellow): Constant 12V supply.
- Accessory (Red): Switched 12V supply.
- Ground (Black): Secure chassis ground.
- Speaker Wires: Connect to vehicle speakers (ensure correct polarity).
- Backup Camera Input (Yellow RCA): Connects to the video output of the backup camera.
- Remote Turn-On (Blue/White): For external amplifiers or power antennas.
- Parking Brake (Light Green): Connect to the vehicle's parking brake circuit for video playback safety.
- Reverse Gear Signal (Purple/White): Activates the backup camera display when the vehicle is in reverse.
- USB Input: For media playback and smartphone connection.
- AUX Input: For external audio devices.

Image 2.2: Rear panel connections of the AVH-210EX receiver.
2.3 Backup Camera Installation
The included Xtremevision HD Backup Camera connects to the dedicated camera input on the receiver. Mount the camera securely at the rear of your vehicle, typically near the license plate, ensuring a clear view. Route the video cable to the receiver and connect the camera's power wire to the vehicle's reverse light circuit so it powers on when reverse gear is engaged.

Image 2.3: The Xtremevision HD Backup Camera unit.

Image 2.4: Example of a backup camera installation on a vehicle.
3. Operating Instructions
3.1 Basic Controls and Touchscreen Interface
The AVH-210EX features a 6.2-inch touchscreen display for intuitive control. Physical buttons are located along the bottom edge of the unit for essential functions like volume, mode, and eject. The touchscreen allows for navigation through menus, media selection, and settings adjustments.

Image 3.1: Front view of the AVH-210EX receiver.
3.2 Bluetooth Connectivity
The built-in Bluetooth allows for hands-free calling and wireless audio streaming. To pair a device:
- Ensure Bluetooth is enabled on your smartphone.
- On the AVH-210EX, navigate to the Bluetooth menu.
- Select 'Search' or 'Add Device'.
- Select your Pioneer unit from your phone's Bluetooth device list.
- Confirm the pairing code on both devices.
Once paired, the unit will automatically connect to your phone when in range. You can make and receive calls, and stream music directly from your phone.
3.3 Media Playback
- DVD/CD: Insert a disc into the slot behind the retractable screen. The unit will automatically switch to DVD/CD mode.
- USB: Connect a USB device (flash drive, iPod/iPhone) to the USB input. The unit supports MP3, WMA, AAC, WAV audio files, and MPEG-1/MPEG-2/MPEG-4/AVI/DIVX/WMV/JPEG video files.
- AUX: Connect an external audio player to the 3.5mm AUX input.
- Radio: Select the AM or FM source. Use the touchscreen controls to tune to stations, save presets, and scan.
3.4 Display and Illumination Settings
Customize the display colors and background images to match your vehicle's interior or personal preference. Access these settings through the 'System' or 'Display' menu on the touchscreen. You can choose from five display colors and 112 key illumination colors.
3.5 Backup Camera Operation
When the vehicle is shifted into reverse gear, the AVH-210EX will automatically display the feed from the connected backup camera on its screen, providing a clear view of the area behind your vehicle. This feature enhances safety during parking and maneuvering.
4. Maintenance
To ensure the longevity and optimal performance of your Pioneer AVH-210EX, follow these maintenance guidelines:
- Screen Cleaning: Use a soft, dry cloth to gently wipe the touchscreen. For stubborn smudges, slightly dampen the cloth with water or a screen-safe cleaner. Avoid harsh chemicals or abrasive materials.
- General Care: Keep the unit free from dust and debris. Avoid exposing it to extreme temperatures or direct sunlight for extended periods.
- Disc Handling: Handle DVDs and CDs by their edges to prevent scratches. Keep discs clean and store them in their cases when not in use.
5. Troubleshooting
If you encounter issues with your AVH-210EX, refer to the following common troubleshooting steps:
- No Power: Check all power and ground connections. Verify the vehicle's fuse and the unit's inline fuse.
- No Sound: Ensure speaker wires are correctly connected and not shorted. Check the volume level and mute settings. Verify the audio source is active.
- Bluetooth Connection Issues: Ensure Bluetooth is enabled on both the receiver and your phone. Try unpairing and re-pairing the device. Clear previous Bluetooth connections if necessary.
- Backup Camera Not Displaying: Check the camera's power and video connections. Ensure the reverse gear signal wire is correctly connected and receiving power when in reverse.
- Disc Playback Errors: Ensure the disc is clean and free of scratches. Try a different disc.
- Unit Not Responding: Perform a soft reset by pressing the reset button (usually a small pinhole) with a thin object.
For persistent issues, consult a professional installer or contact Pioneer customer support.
6. Specifications
| Feature | Specification |
|---|---|
| Model Number | AVH-210EX |
| Display Size | 6.2 inches |
| Bluetooth | Built-in (HFP, A2DP, AVRCP 1.6, SSP) |
| Media Playback | DVD, CD, USB (MP3/WMA/AAC/WAV, MPEG-1/MPEG-2/MPEG-4/AVI/DIVX/WMV/JPEG) |
| Tuner | AM/FM |
| Inputs | Rear USB, Rear AUX, Backup Camera Input, Wired Remote Input |
| Outputs | Composite Video Output |
| Display Colors | 5 (with 112 key colors) |
| Compatible Devices | Smartphone (Android, iPhone) |
| Item Weight | 6.14 pounds |
| Product Dimensions | 13.4 x 10 x 5 inches |
7. Warranty and Support
Your Pioneer AVH-210EX receiver is covered by a manufacturer's warranty. Please refer to the warranty card included in your product packaging for specific terms, conditions, and duration. For technical assistance, troubleshooting beyond this manual, or warranty claims, please contact Pioneer customer support directly or visit their official website.
For additional information and support, you may visit the Pioneer Store on Amazon.


