
1. Introduction
Thank you for choosing the Hoover WDXA 5117 AH-S Washer Dryer. This appliance is designed to provide efficient and convenient laundry care. To ensure optimal performance and safety, please read this instruction manual carefully before using the appliance and keep it for future reference. This manual contains important information on installation, operation, maintenance, and troubleshooting.
2. Safety Information
General Safety:
- Always disconnect the appliance from the power supply before cleaning or performing any maintenance.
- This appliance is intended for household use only. Do not use it for commercial or industrial purposes.
- Do not allow children or persons with reduced physical, sensory, or mental capabilities to operate the appliance without supervision.
- Keep packaging materials (plastic bags, polystyrene, etc.) out of reach of children, as they can be dangerous.
- Ensure the appliance is properly earthed and connected to a suitable power outlet.
- Do not touch the appliance with wet hands or feet.
- Do not pull the power cord to unplug the appliance; always grasp the plug.
Installation Safety:
- Ensure the appliance is installed on a firm, level surface.
- Do not install the appliance in areas exposed to extreme temperatures or high humidity.
- Check that the water inlet and drain hoses are correctly connected and secured to prevent leaks.
- Remove all transit bolts and packing materials before use. Failure to do so can cause severe damage to the appliance.
Operation Safety:
- Do not overload the appliance. Refer to the maximum load capacity specified in the program table.
- Do not wash or dry items that have been soiled with flammable substances (e.g., cooking oil, petrol).
- Always check pockets for foreign objects (coins, keys, lighters) before loading laundry.
- The door can become very hot during drying cycles. Keep children and pets away from the appliance.
3. Setup and Installation
3.1 Unpacking
Carefully remove the appliance from its packaging. Remove all internal packing materials, including the polystyrene block and any plastic bags. Retain the packaging for future transport if needed.
Important: Remove the transit bolts located at the rear of the appliance. These bolts secure the drum during transport and must be removed before operation. Keep the transit bolts for future transport of the machine.
3.2 Positioning
Place the appliance on a firm, level floor. Ensure there is adequate space around the machine for ventilation and maintenance. Adjust the feet at the bottom of the appliance to ensure it is perfectly level. A spirit level can be used for accuracy. Proper leveling prevents excessive vibration and noise during operation.
3.3 Water Connection
Water Inlet: Connect the supplied water inlet hose to the cold water tap. Ensure the connection is tight to prevent leaks. Do not use old hoses.
Water Drain: Position the drain hose into a standpipe or over the edge of a sink. Ensure the drain hose is securely fixed to prevent it from dislodging during the cycle. The height of the drain point should be between 60 cm and 100 cm from the floor.
3.4 Electrical Connection
Plug the power cord into a grounded electrical outlet. Ensure the voltage and frequency of your electrical supply match the specifications on the appliance's rating plate. Do not use extension cords or multiple adapters.
3.5 First Use
Before washing any laundry, run an empty wash cycle at 60°C with a small amount of detergent to clean the drum and remove any manufacturing residues.
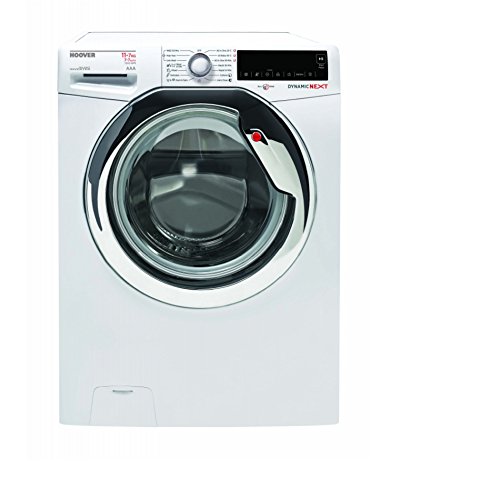
Image 1: Front view of the Hoover WDXA 5117 AH-S Washer Dryer. This image shows the appliance's control panel, detergent drawer, and loading door, illustrating its compact design and front-load configuration.
4. Operating Instructions
4.1 Control Panel Overview
The control panel typically includes a program selector knob, a digital display, and various option buttons (e.g., Start/Pause, Temperature, Spin Speed, Delay Start, Drying Level).
- Program Selector Knob: Used to select the desired wash or dry program.
- Display: Shows program duration, remaining time, error codes, and selected options.
- Start/Pause Button: Initiates or pauses a cycle.
- Option Buttons: Allow customization of programs (e.g., pre-wash, extra rinse, steam).
4.2 Loading Laundry
Open the door and load items one by one, ensuring they are not tangled. Do not overload the drum. Leave enough space for the laundry to tumble freely. Close the door firmly.
4.3 Adding Detergent and Additives
Pull out the detergent drawer. Add detergent to the main wash compartment (II) and fabric softener to the softener compartment (flower symbol). If using pre-wash, add detergent to compartment (I). Do not exceed the MAX level indicated in the compartments.
4.4 Selecting a Program
Turn the program selector knob to choose the desired wash or dry program. The display will show the default duration and temperature for the selected program. You can then adjust options like temperature, spin speed, or drying level using the respective buttons.
Common Programs:
- Cotton: For durable cotton items.
- Synthetics: For synthetic or mixed fabrics.
- Delicates: For delicate items requiring gentle care.
- Wool: Specific program for woolens.
- Rapid Wash: Quick cycles for lightly soiled items.
- Wash & Dry: Combines washing and drying in one continuous cycle.
- Drying Programs: Various levels of drying (e.g., Extra Dry, Cupboard Dry, Iron Dry).
4.5 Starting a Cycle
Once the program and options are selected, press the Start/Pause button to begin the cycle. The door will lock, and the program will start.
4.6 End of Cycle
At the end of the cycle, the display will show "End" or a similar indication. The door will unlock after a short delay. Open the door and remove your laundry. Turn the program selector knob to the "Off" position and unplug the appliance from the power supply.
5. Maintenance
Regular maintenance ensures the longevity and efficient operation of your appliance. Always disconnect the power supply before performing any maintenance.
5.1 Cleaning the Detergent Drawer
Pull out the detergent drawer completely. Rinse it under running water to remove any detergent residue. Use a brush if necessary. Reinsert the drawer.
5.2 Cleaning the Filter
The filter collects lint and small objects. It should be cleaned regularly, especially after drying cycles. Locate the filter cover at the bottom front of the appliance. Open the cover, place a shallow container underneath to catch any water, and slowly unscrew the filter. Remove any debris and rinse the filter under running water. Screw it back in firmly and close the cover.
5.3 Cleaning the Drum
Periodically run a maintenance wash cycle (e.g., a hot wash at 90°C without laundry) using a descaling agent or a specialized washing machine cleaner to prevent limescale buildup and odors.
5.4 Cleaning the Exterior
Wipe the exterior surfaces of the appliance with a soft, damp cloth. Do not use abrasive cleaners or solvents.
5.5 Winter Precautions
If the appliance is to be left in an unheated room during winter, drain all water from the hoses and pump to prevent freezing damage. Consult a qualified technician if unsure.
6. Troubleshooting
Before contacting customer service, please check the following common issues and solutions:
| Problem | Possible Cause | Solution |
|---|---|---|
| Appliance does not start. | No power supply; door not closed; Start/Pause button not pressed. | Check power plug and fuse; ensure door is firmly closed; press Start/Pause button. |
| Water not filling. | Water tap closed; inlet hose kinked; water pressure too low. | Open water tap; straighten hose; check water supply. |
| Water not draining. | Drain hose kinked or blocked; filter blocked. | Straighten drain hose; clean the filter (see Maintenance section). |
| Excessive vibration/noise. | Transit bolts not removed; appliance not level; uneven load. | Remove transit bolts; adjust feet to level appliance; redistribute laundry. |
| Poor washing results. | Overloading; insufficient detergent; incorrect program. | Reduce load; use correct amount of detergent; select appropriate program. |
| Poor drying results. | Overloading; filter blocked; incorrect drying level selected. | Reduce load; clean the filter; select a higher drying level. |
7. Specifications
The following are key specifications for the Hoover WDXA 5117 AH-S Washer Dryer:
- Brand: Hoover
- Model: WDXA 5117 AH-S
- Model Number: 31006434
- ASIN: B017IT4DWQ
- EAN (International Article Number): 08016361897618
- Type: Front-load Washer Dryer
- Maximum Spin Speed: 1500 rpm
- Color: White
- Control Type: LED
Note: Full technical specifications, including energy consumption and capacity, can be found on the appliance's rating plate or the official Hoover website.
8. Warranty and Support
Your Hoover WDXA 5117 AH-S Washer Dryer comes with a manufacturer's warranty. The terms and conditions of the warranty are detailed in the separate warranty card provided with your appliance. Please retain your proof of purchase for warranty claims.
For technical assistance, spare parts, or to schedule a service appointment, please contact Hoover customer support. Contact details can typically be found on the warranty card, the official Hoover website, or by referring to the "Support Client Spécialisé" information provided at the point of purchase.
When contacting support, please have your appliance's model number (WDXA 5117 AH-S) and serial number ready. The serial number is usually located on a sticker inside the door frame or on the back of the appliance.


