
1. Introduction
The Elinchrom Skyport Transmitter Pro for Nikon (Model EL19367) is an advanced wireless flash trigger designed to provide photographers with precise control over their Elinchrom lighting systems. This transmitter allows for seamless integration with Nikon cameras, enabling high-speed synchronization (Hi-Sync) up to 1/8000s and two-way visual feedback for power settings. This manual provides essential information for setting up, operating, and maintaining your Skyport Transmitter Pro to achieve optimal performance.
2. Key Features
- Two-Way Visual Feedback Interface: The large LCD display provides real-time control and visualization of power settings for each light in your setup. Adjust power levels and modeling lamp settings directly from the transmitter, with instant updates displayed.
- Hi-Sync Technology: Achieve sync speeds up to 1/8000s, allowing you to freeze fast motion, overpower ambient sunlight, darken backgrounds, or use wider apertures for creative depth of field.
- TTL and Manual Lock: When paired with compatible Elinchrom units like the ELB 500 TTL, benefit from accurate TTL exposures. Easily switch to manual mode for full control without losing exposure settings.
- Impressive Wireless Range: Operates on 20 channels and 4 groups, offering a reliable wireless range of up to 656 feet (200 meters) outdoors and 196 feet (60 meters) indoors.
- Broad Compatibility: Works with three previous generations of Elinchrom flash units, including EL-Skyport Transceiver RX modules for Style RX, Digital RX, and Ranger RX systems, as well as integrated EL-Skyport modules for BRX, D-Lite RX, ELC Pro HD, and ELB series.
3. Setup
3.1. Battery Installation
The Skyport Transmitter Pro requires 2 AA batteries for operation. To install:
- Locate the battery compartment on the underside of the transmitter.
- Open the compartment cover.
- Insert 2 AA batteries, ensuring correct polarity (+/-).
- Close the battery compartment cover securely.
3.2. Mounting on Camera
Attach the Skyport Transmitter Pro to your Nikon camera's hot shoe.

Image: Top-down view of the Elinchrom Skyport Transmitter Pro securely mounted on a Nikon camera's hot shoe.
Ensure it is firmly seated and locked into place to maintain a stable connection.
3.3. Connecting to Elinchrom Lights
The transmitter communicates wirelessly with compatible Elinchrom flash units. Ensure your Elinchrom lights have integrated Skyport modules or are equipped with an EL-Skyport Transceiver RX module. Refer to your specific flash unit's manual for details on enabling Skyport reception.
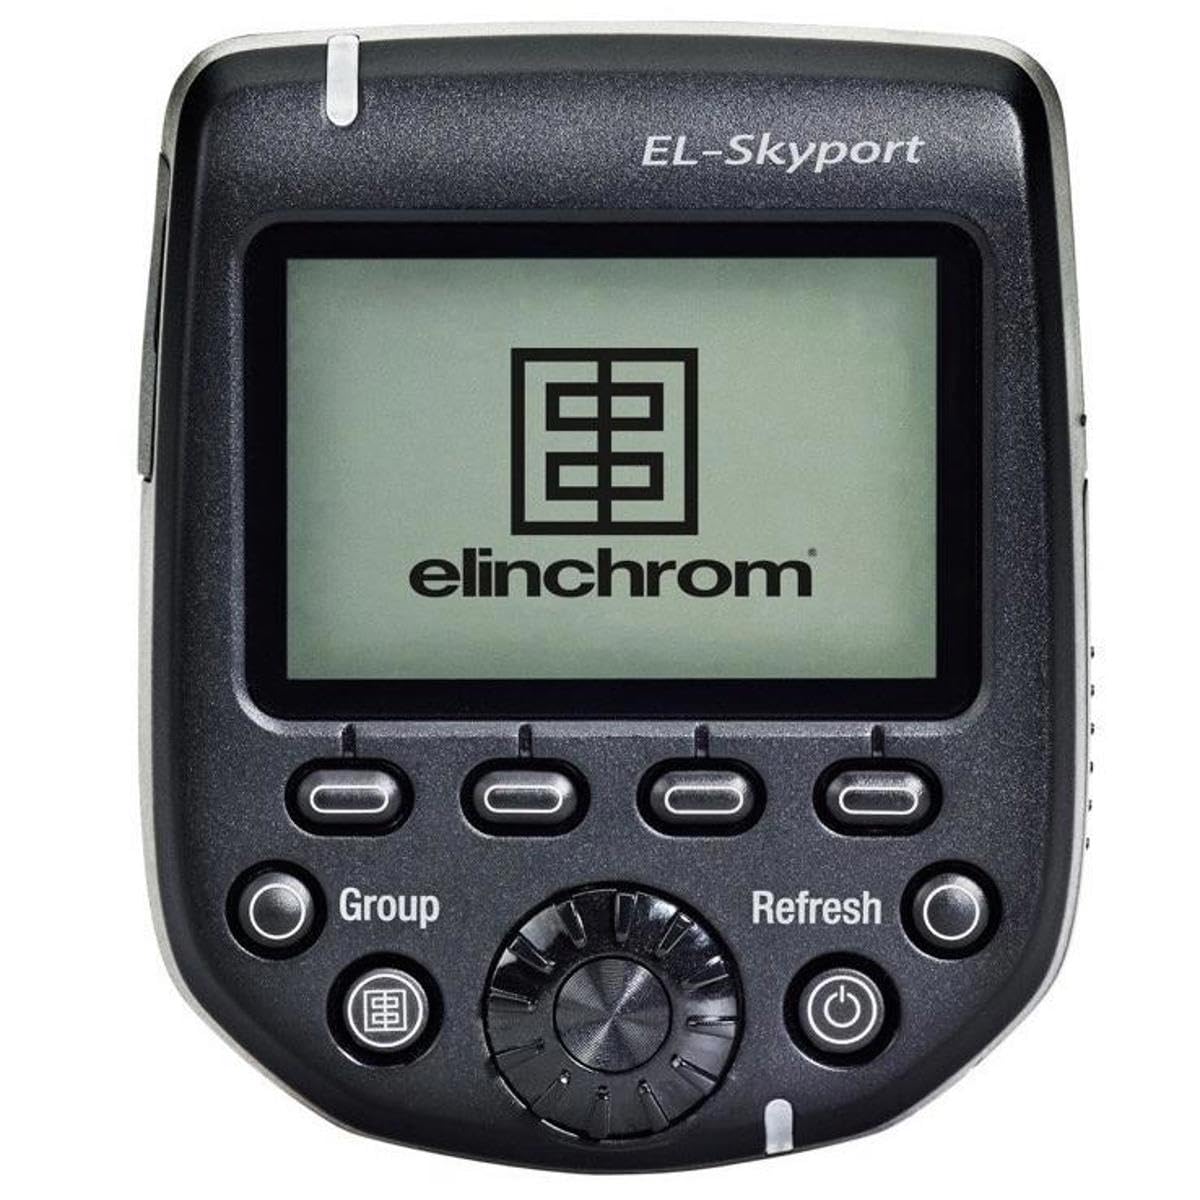
Image: Front view of the Elinchrom Skyport Transmitter Pro, highlighting the LCD screen and various control buttons.
4. Operating Instructions
4.1. Power On/Off
Press and hold the power button (usually marked with a circle and vertical line) to turn the transmitter on or off. The LCD screen will illuminate upon power-on.
4.2. LCD Display and Navigation
The large LCD display shows the status of connected lights, including power settings, groups, and channels. Use the navigation dial and buttons to scroll through options and make selections.

Image: Side view of the Elinchrom Skyport Transmitter Pro mounted on a camera, displaying the LCD screen and control layout.
4.3. Controlling Power Settings (Two-Way Visual Feedback)
The Skyport Transmitter Pro allows you to adjust the power output and modeling lamp settings of individual Elinchrom lights directly from the transmitter. The LCD screen will display the current settings of all connected lights, providing immediate visual confirmation of changes.
- Use the Group button to select the desired flash group.
- Rotate the main dial to adjust the power level.
- Press the Refresh button to update the display and ensure all lights are synchronized.
4.4. Hi-Sync Mode
To activate Hi-Sync mode and achieve shutter speeds up to 1/8000s, navigate to the mode settings on the transmitter and select Hi-Sync. This feature is ideal for freezing fast action or working with wide apertures in bright ambient light conditions.
4.5. TTL and Manual Lock
For compatible TTL-enabled Elinchrom units, the transmitter supports TTL metering for automatic exposure. You can lock the TTL exposure and switch to manual mode to fine-tune settings without losing your initial exposure values.
4.6. Wireless Range and Channels/Groups
The Skyport Transmitter Pro offers 20 channels and 4 groups for organizing your lighting setup. Ensure the transmitter and all connected flash units are set to the same channel and group for proper communication. The extended range allows for flexible placement of lights in various shooting environments.
4.7. Video Demonstration: Elinchrom Skyport Pro in Action
Video: An official Elinchrom video demonstrating the features and use of the Skyport Transmitter Pro and ELB 400 units in an outdoor action sports photography setting. This video highlights Hi-Sync capabilities and multi-light setups.
5. Maintenance
- Cleaning: Use a soft, dry cloth to clean the exterior of the transmitter. Avoid using harsh chemicals or abrasive materials. For the LCD screen, use a microfiber cloth specifically designed for electronics.
- Battery Care: Remove batteries if the transmitter will not be used for an extended period to prevent leakage. Use high-quality AA batteries for optimal performance.
- Storage: Store the transmitter in a cool, dry place, away from direct sunlight and extreme temperatures. Protect it from dust and moisture.
- Durability: Elinchrom products are known for their robust construction. The ELB 400 units, for example, are designed to withstand outdoor conditions, including dust, as demonstrated in the provided video. While durable, proper care extends the lifespan of your equipment.
6. Troubleshooting
- Lights Not Firing:
- Ensure the transmitter and all flash units are powered on.
- Verify that the transmitter and flash units are set to the same channel and group.
- Check battery levels in both the transmitter and flash units.
- Confirm the transmitter is securely mounted on the camera's hot shoe.
- Difficulty Scanning/Connecting to Lights: Some users have reported that the unit may take multiple attempts to scan and find flash units. If this occurs, try rescanning several times. Ensure no obstructions are blocking the signal between the transmitter and lights.
- Inconsistent Hi-Sync Performance: If experiencing banding or inconsistent results in Hi-Sync mode, ensure your camera's firmware and the transmitter's firmware are up to date. Adjusting the ODS (Optimal Delay Setting) on some Elinchrom units (e.g., from 3 seconds to 1 second for Canon, or similar adjustments for Nikon) can improve performance. Refer to Elinchrom's official support for specific camera/flash combinations.
- Display Issues: If the LCD display is not clear or responsive, check battery levels. If the issue persists, contact Elinchrom support.
7. Specifications
| Feature | Detail |
|---|---|
| Product Dimensions | 3.5 x 2.75 x 2.5 inches (8.9 x 7 x 6.4 cm) |
| Item Weight | 3.52 ounces (100 grams) |
| Model Number | EL19367 |
| Batteries Required | 2 AA batteries |
| Compatible Mountings | Nikon hot shoe |
| Flash Sync Speed | Up to 1/8000s (Hi-Sync) |
| Wireless Range (Outdoor) | Up to 656 feet (200 meters) |
| Wireless Range (Indoor) | Up to 196 feet (60 meters) |
| Channels/Groups | 20 Channels / 4 Groups |
| Included Components | Elinchrom Flash Trigger, Transmitter Skyport Pro for Nikon Camera |
8. Warranty & Support
Elinchrom products are manufactured to high-quality standards. For specific warranty information, please refer to the warranty card included with your product or visit the official Elinchrom website. For technical support, firmware updates, or service inquiries, please contact Elinchrom customer service or an authorized service center.
Online Resources:
- Visit the Elinchrom Store on Amazon for product information.
- Check for the latest firmware updates on the official Elinchrom website to ensure optimal performance and compatibility.


